

How to use LanderLab, step by step
Most campaigns follow the same path. Each step links to the section of this guide that covers it.1
Create a page
Generate a landing page with AI, start from a template, or import one you already have. See create a landing page.
2
Edit the design and copy
Change content in the visual editor by hand, or ask the AI Assistant to do it. See edit in the visual editor.
3
Add a way to capture leads
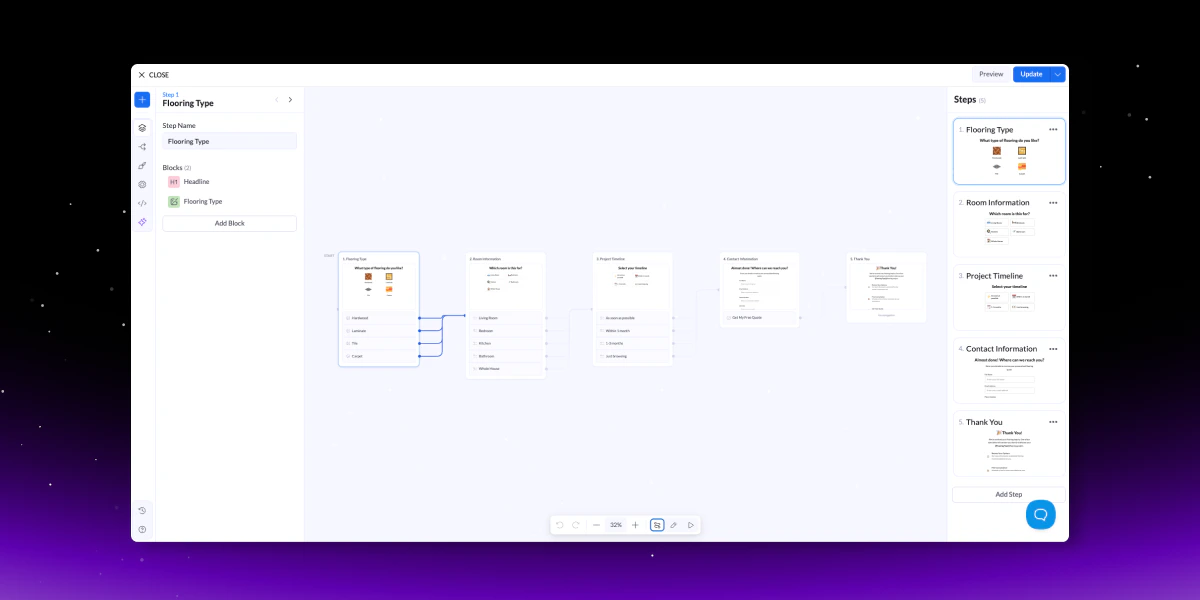
Add a form or a multi-step quiz funnel. See build a quiz funnel.
4
Connect your tools
Send leads to your CRM or buyer and add your ad pixels. See connect integrations and pixels.
5
Publish on your domain
Connect a domain and put the page live. See publish on your own domain.
6
Measure and improve
Read analytics, review leads, and A/B test new versions. See measure and improve results.
How to find your way around
Everything starts from the left sidebar. Use the workspace selector at the top to switch workspaces, then open the area you need.How to create a landing page
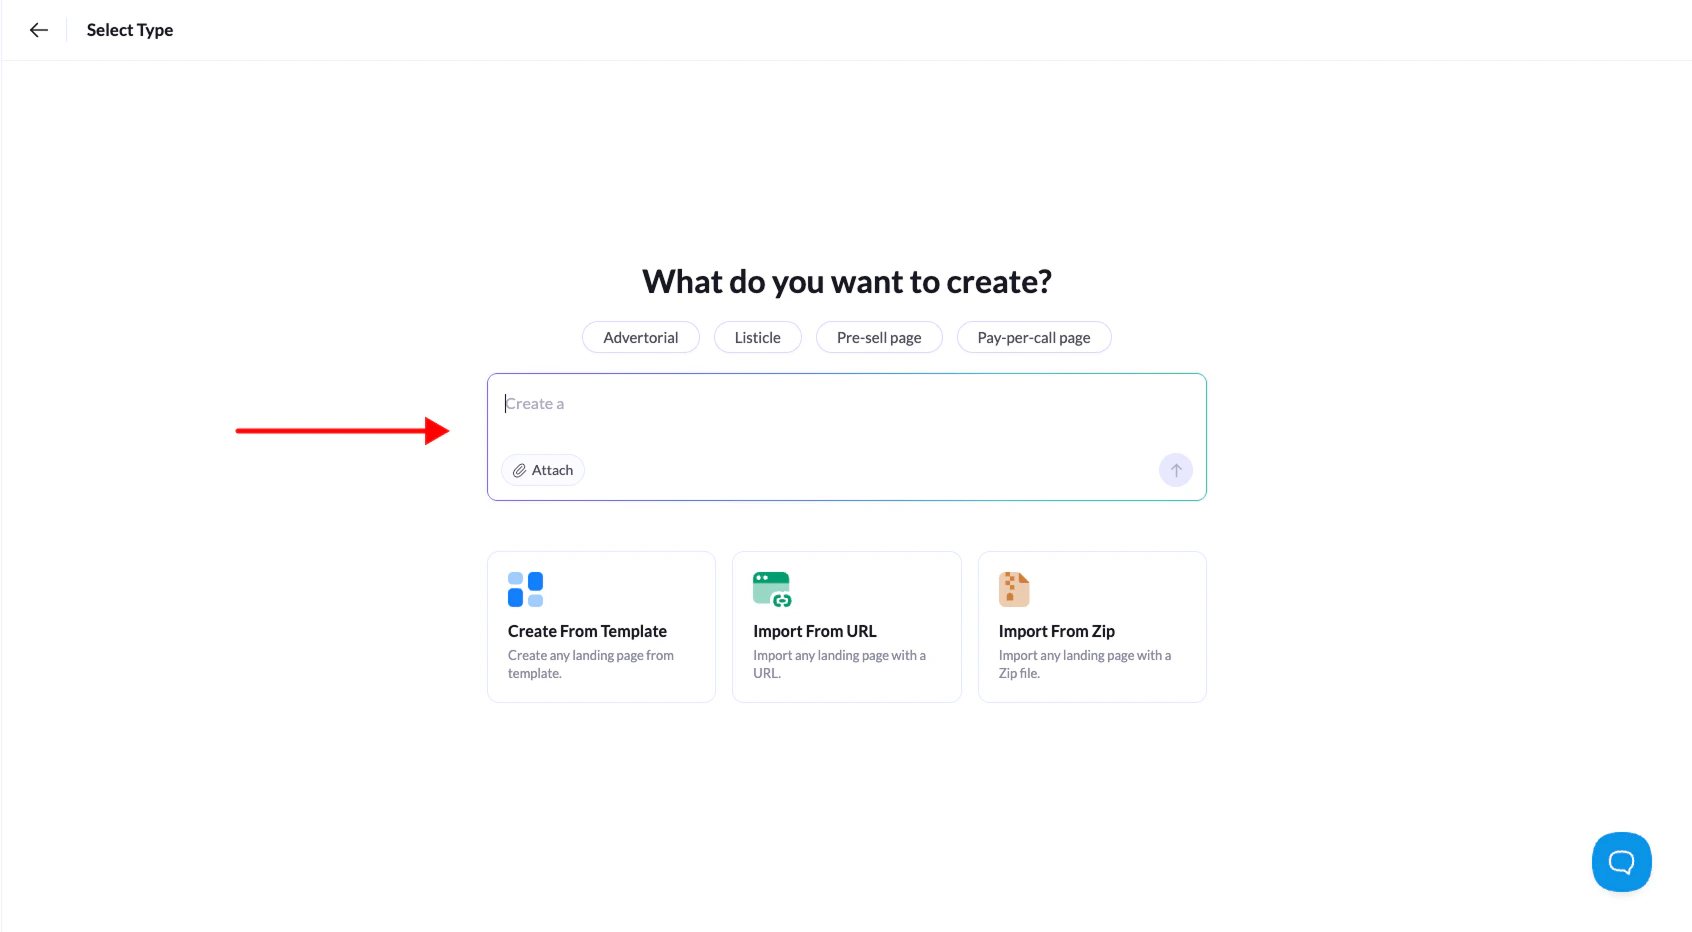
Keep pages organized with folders. To reuse a layout that works, duplicate the page.
How to edit a page in the visual editor
The visual editor is a drag and drop canvas. Pages are built from sections, and every element lives inside a section. Select any element to change its content and style in the side panel.- Elements: text, images, lists, video, countdowns, accordions, forms, custom code, and Stripe Checkout. Connect your Stripe account in Integrations first.
- Style Manager: layout, spacing, typography, animation, and device visibility.
- Theme: set brand colors and fonts once, and every element follows them.
- Pop-ups: build pop-ups that open on page load, after a delay, on scroll, or on exit intent.
- Quick actions: replace text or links across the page, compress images, and pass URL parameters to every link.
- Structure: use Layers to select nested elements, and save sections as reusable components.
- Safety nets: Version History restores earlier versions. Live Mode previews JavaScript effects before you publish.
How to build and edit with the AI Assistant
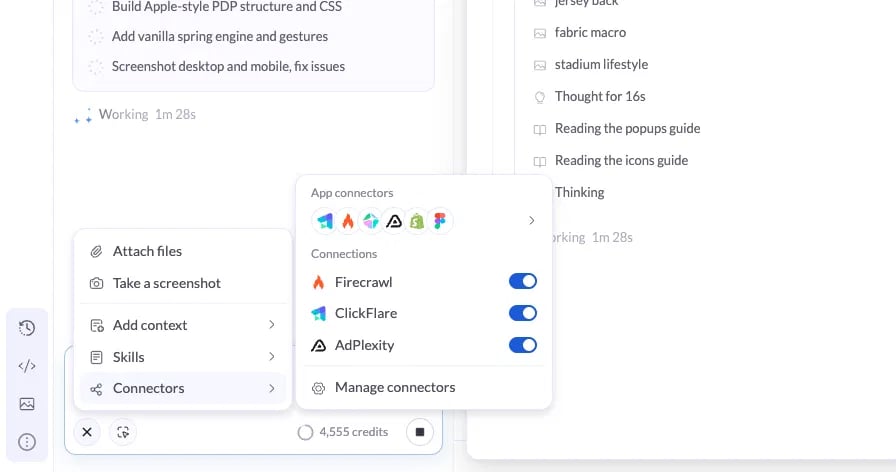
- Attach files, take a screenshot, or add context from another landing page. See add context.
- Skills are reusable instructions for tasks like CRO audits or offer copy. Manage them from + > Skills > Manage skills or Settings > Skills. See skills.
- Connectors let the AI use data from other apps and MCP servers. Add one from Settings > Connectors > Add connector. See connectors.
How to build a quiz funnel
How to reuse sections with Global Blocks

How to publish on your own domain
1
Add a domain
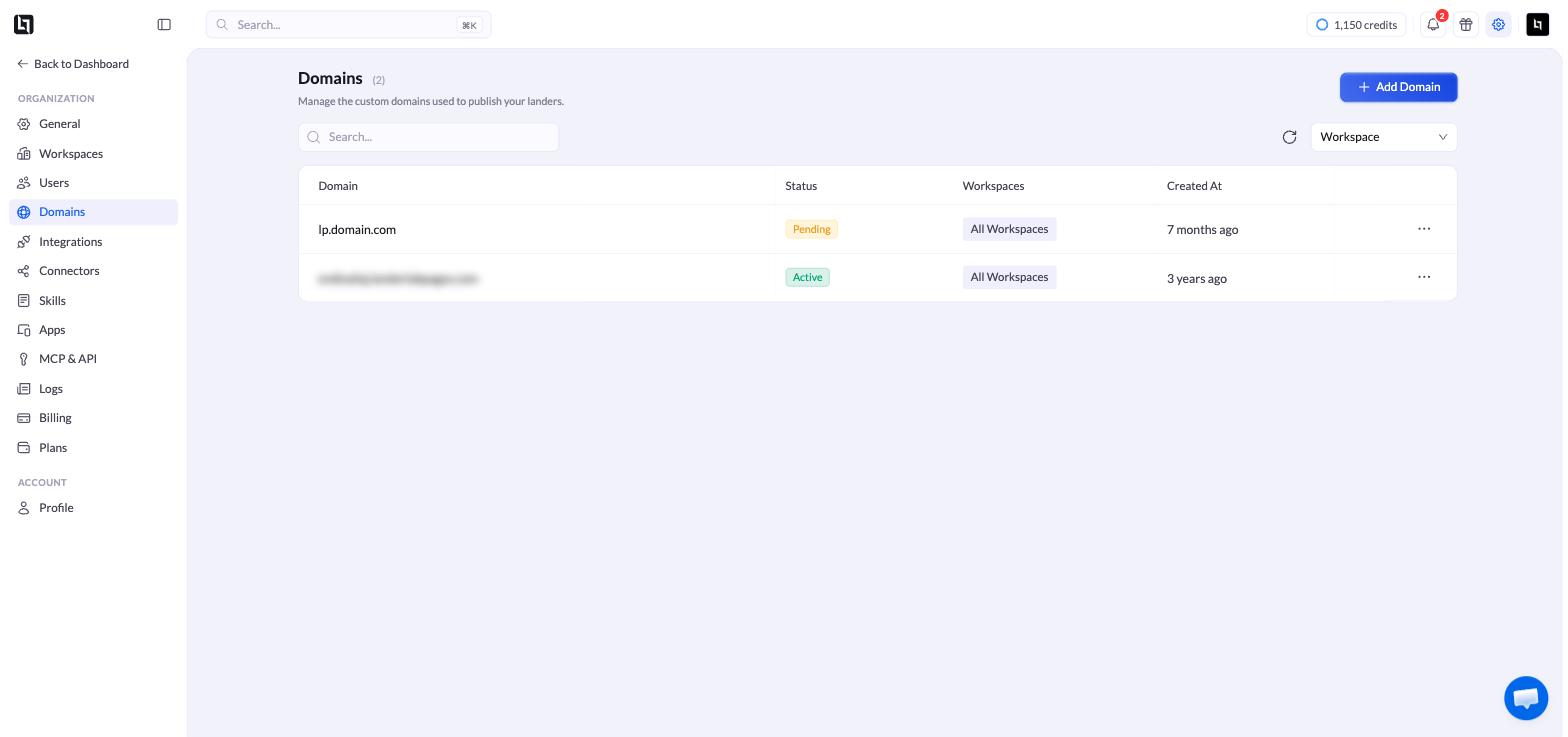
Go to Settings > Domains and click Add Domain. LanderLab checks your DNS and recommends Cloudflare or Manual DNS. Only admins can add domains.
2
Wait for Active
The domain shows as Pending until your DNS changes propagate, then switches to Active.
3
Publish the page
Open the page, click Publish, and choose the domain and URL path. See publish a landing page.
How to connect integrations and pixels
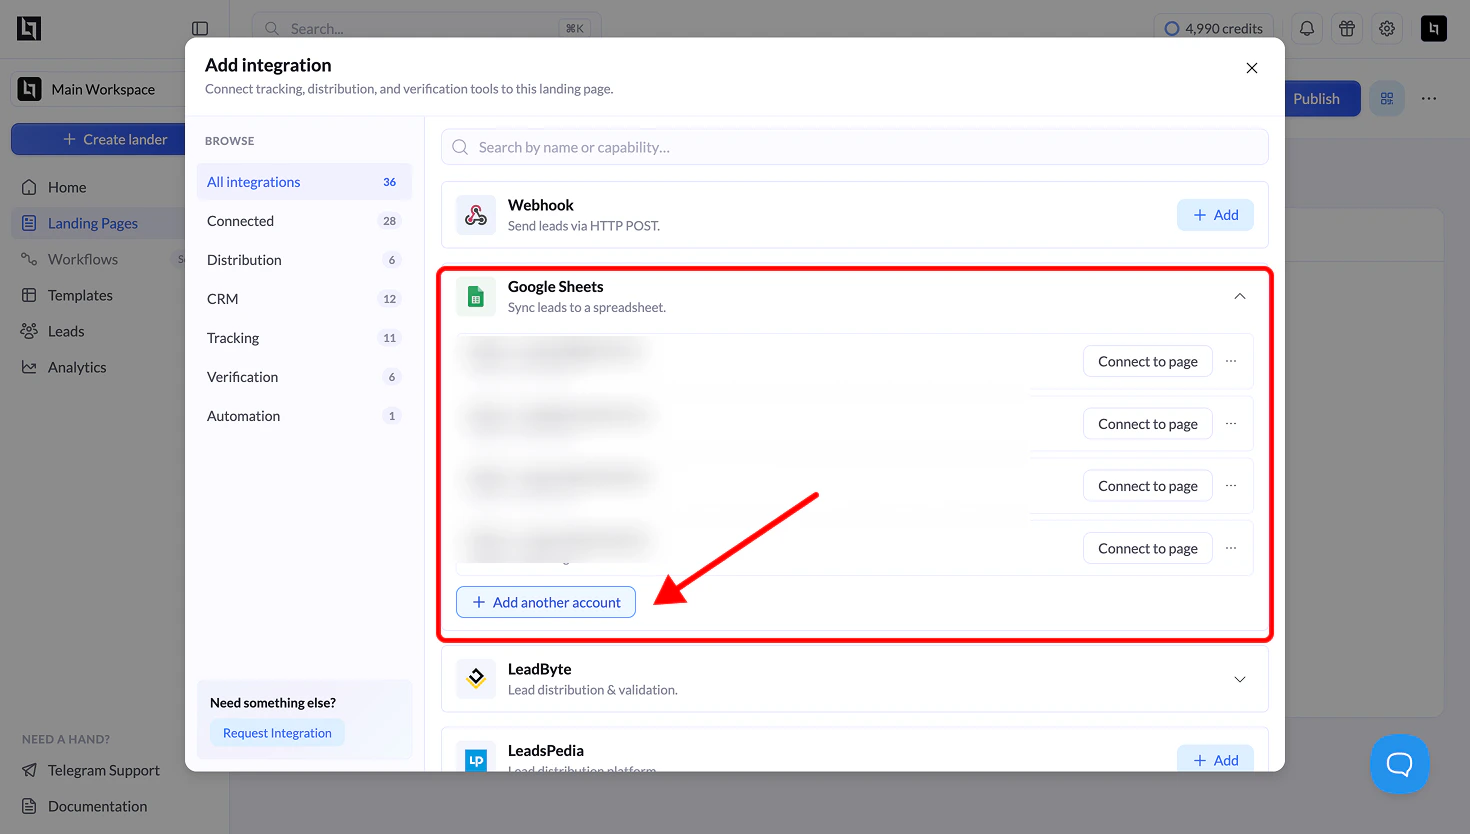
Most integrations, including CRMs, pixels, and LeadByte, are saved globally and reused across pages. Webhook, LeadsPedia, LeadProsper, and Phonexa are set up on each page instead. CRM integrations also require you to map the email field before you can continue.
How to manage your leads
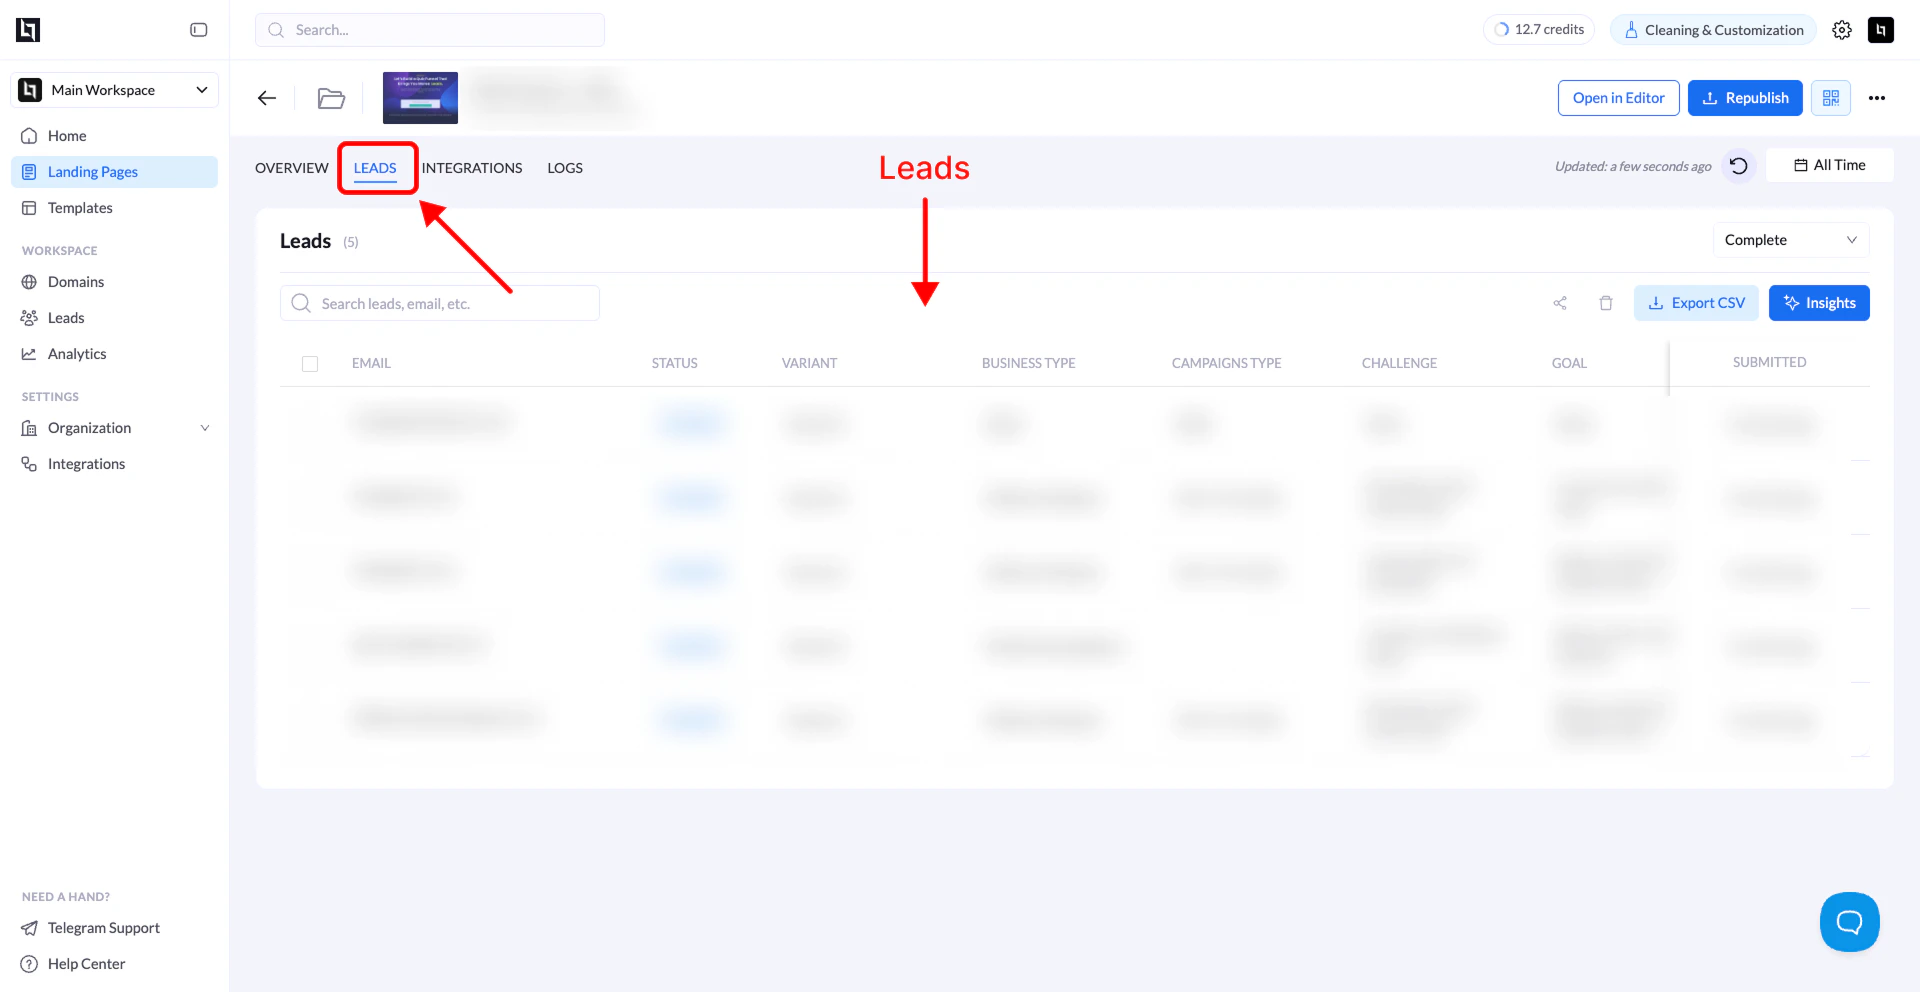
- Partial leads capture visitors who started a multi-step flow but left before finishing.
- AI Lead Insights summarizes trends, anomalies, and data quality issues in your leads.
- Bypass saving leads sends regulated data straight to your CRM without storing it in LanderLab.
How to automate lead handling with Workflows
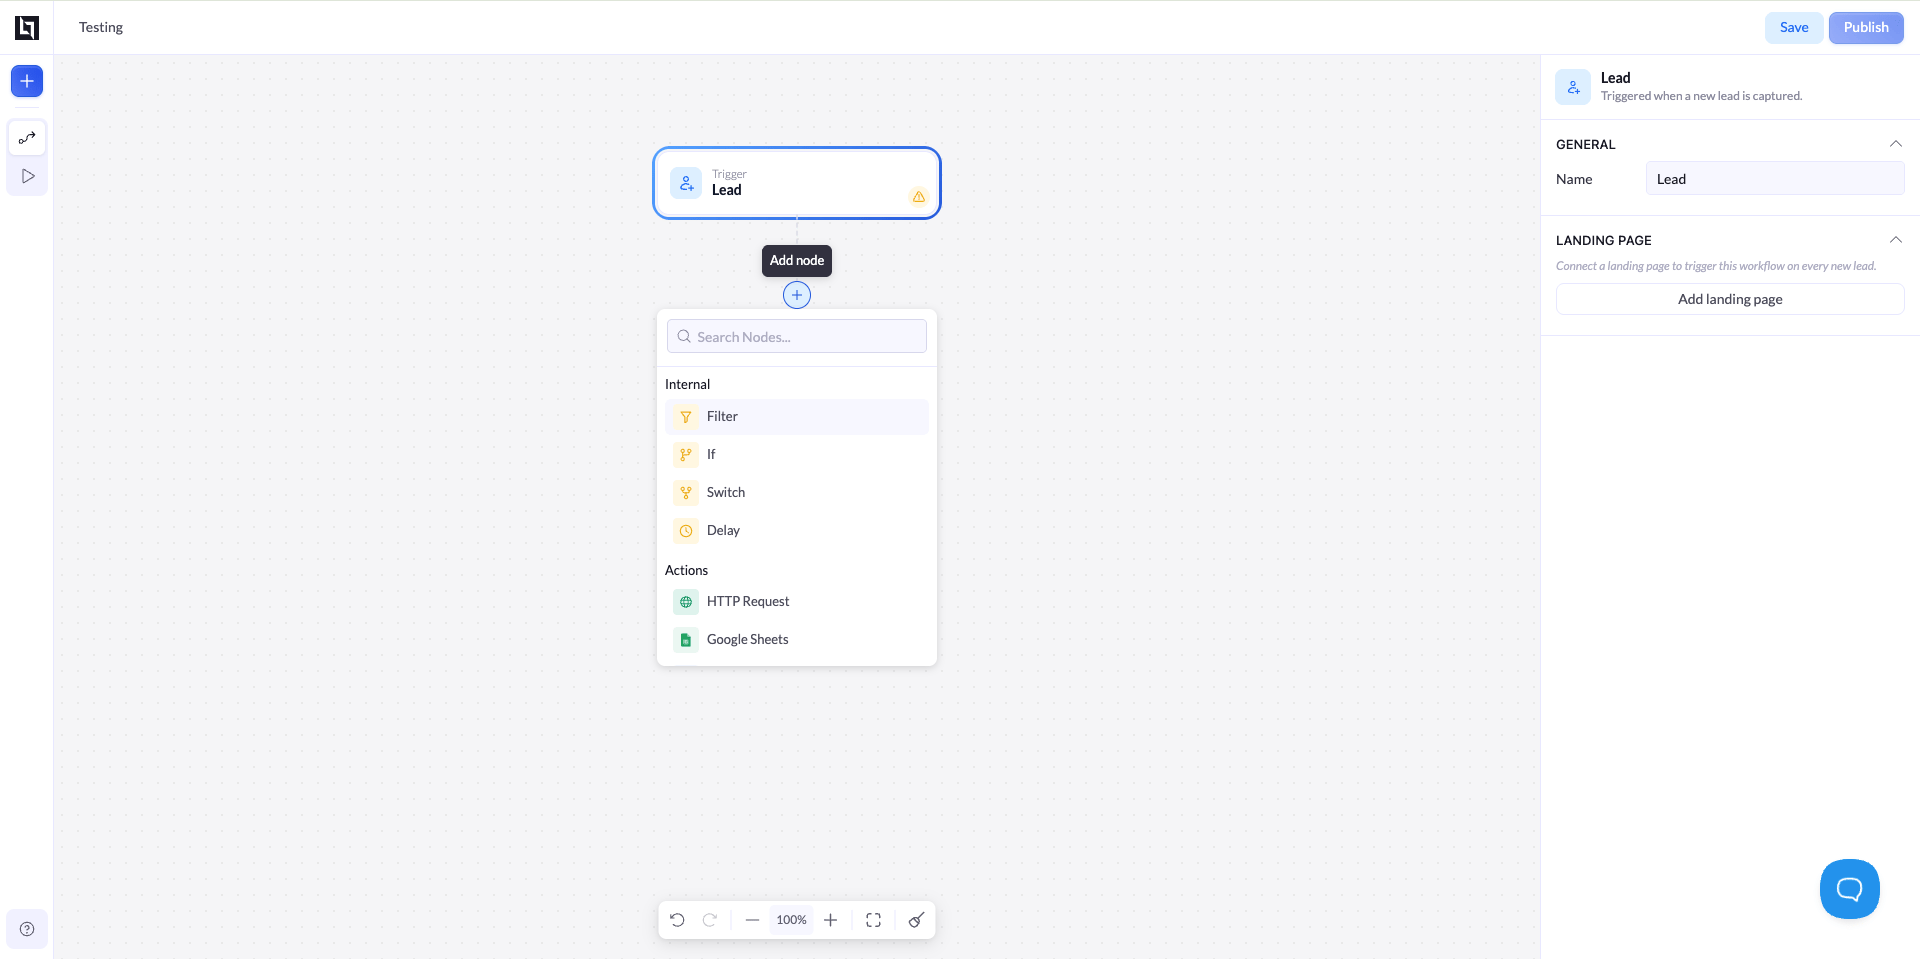
- Conditions: Filter, If, Switch, and Delay nodes.
- Actions: HTTP requests, Google Sheets, CRMs, lead distribution platforms, Meta CAPI, and ClickFlare.
- Runs: see each lead’s path through the workflow, including any failed step.
Workflows is in BETA. Available nodes may change.
How to measure and improve results
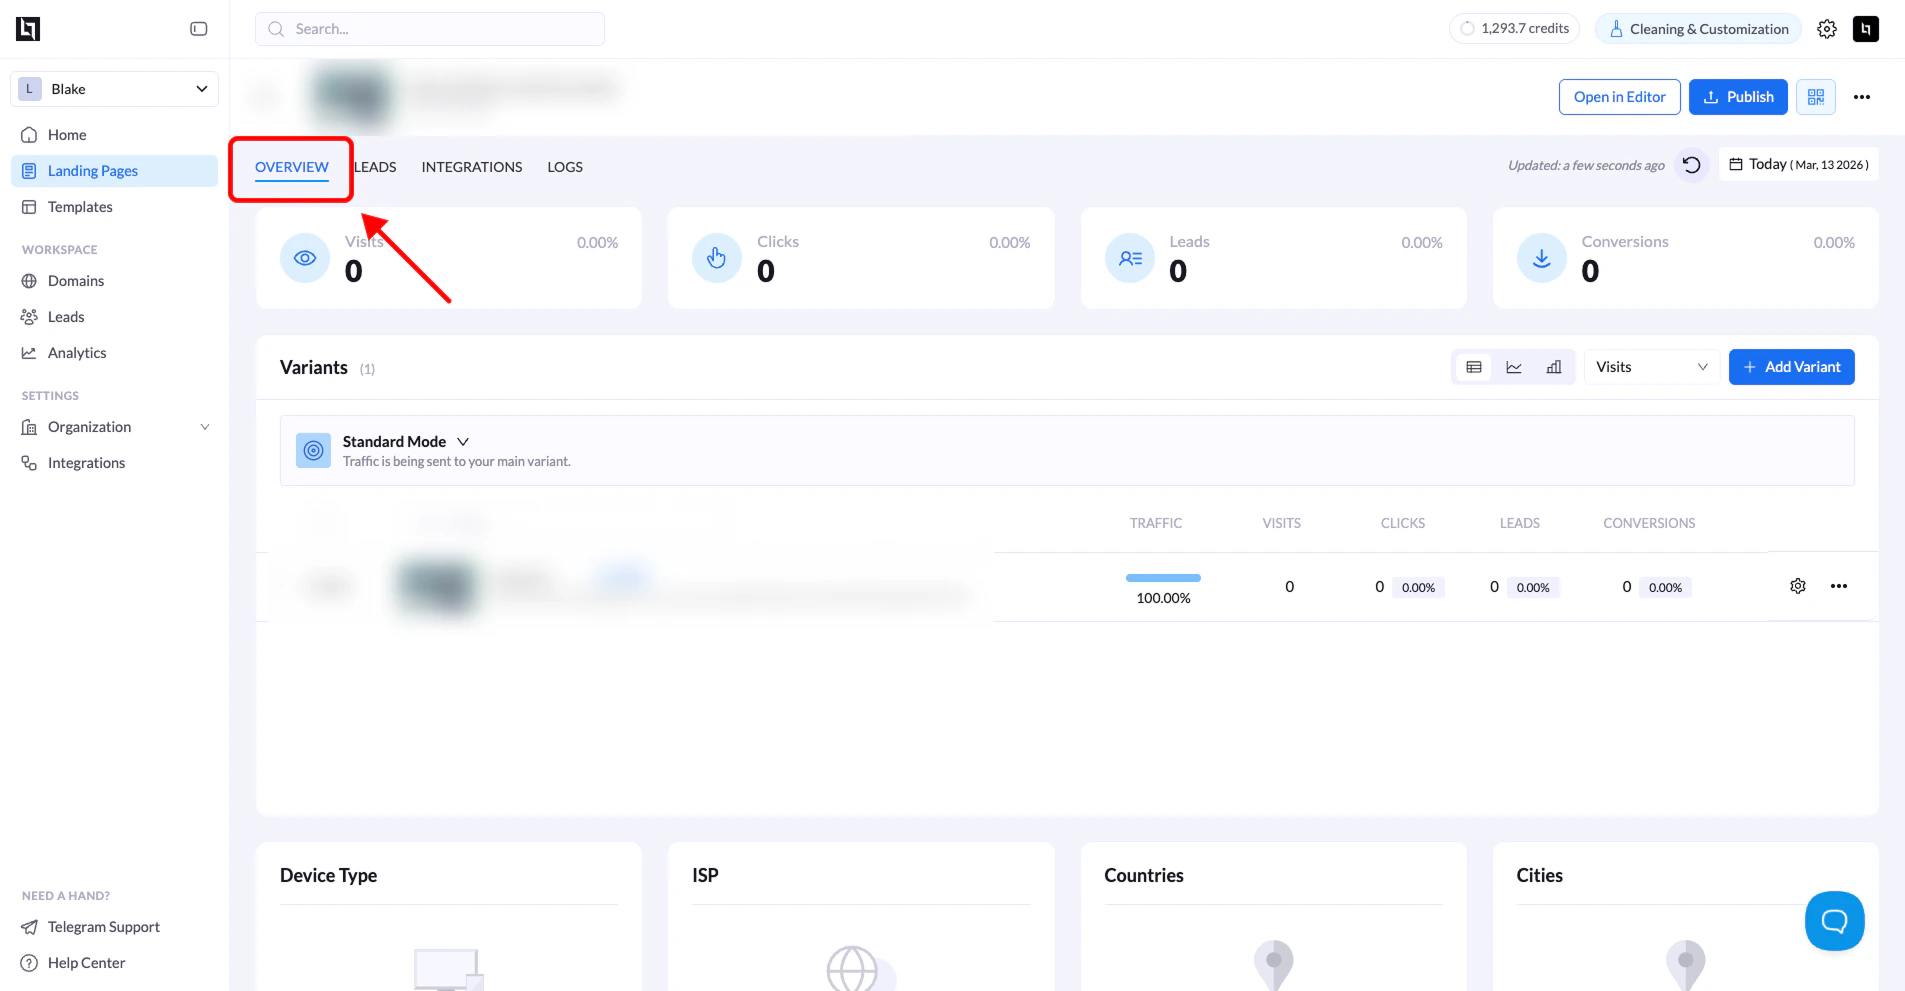
- Landing page analytics shows page views, clicks, leads, and conversions per page and per variant, with device and country breakdowns. You find it on the page’s Overview tab.
- Reporting compares every published page side by side. Sort by conversion rate to find your best pages.
- Conversion tracking defines which clicks and submissions count as conversions.
- A/B testing splits traffic between variants and lets you adjust the weights. When a test ends, set the winner as the main variant.
How to manage your team
How to connect AI assistants and the API
You can also manage LanderLab from outside the dashboard. MCP connections sign in with your LanderLab account. The REST API uses an API key.MCP server
Connect Claude, ChatGPT, Cursor, and other AI assistants to manage pages, analytics, and leads in plain English.
REST API
Manage landing pages, leads, A/B tests, and analytics programmatically.
Related
Quick Start
Build and publish your first landing page step by step.
Key Concepts
Landers, variants, workspaces, global blocks, and the rest of the vocabulary.
Webinars
Watch full builds end to end.
FAQs
Answers to the questions new users ask most.