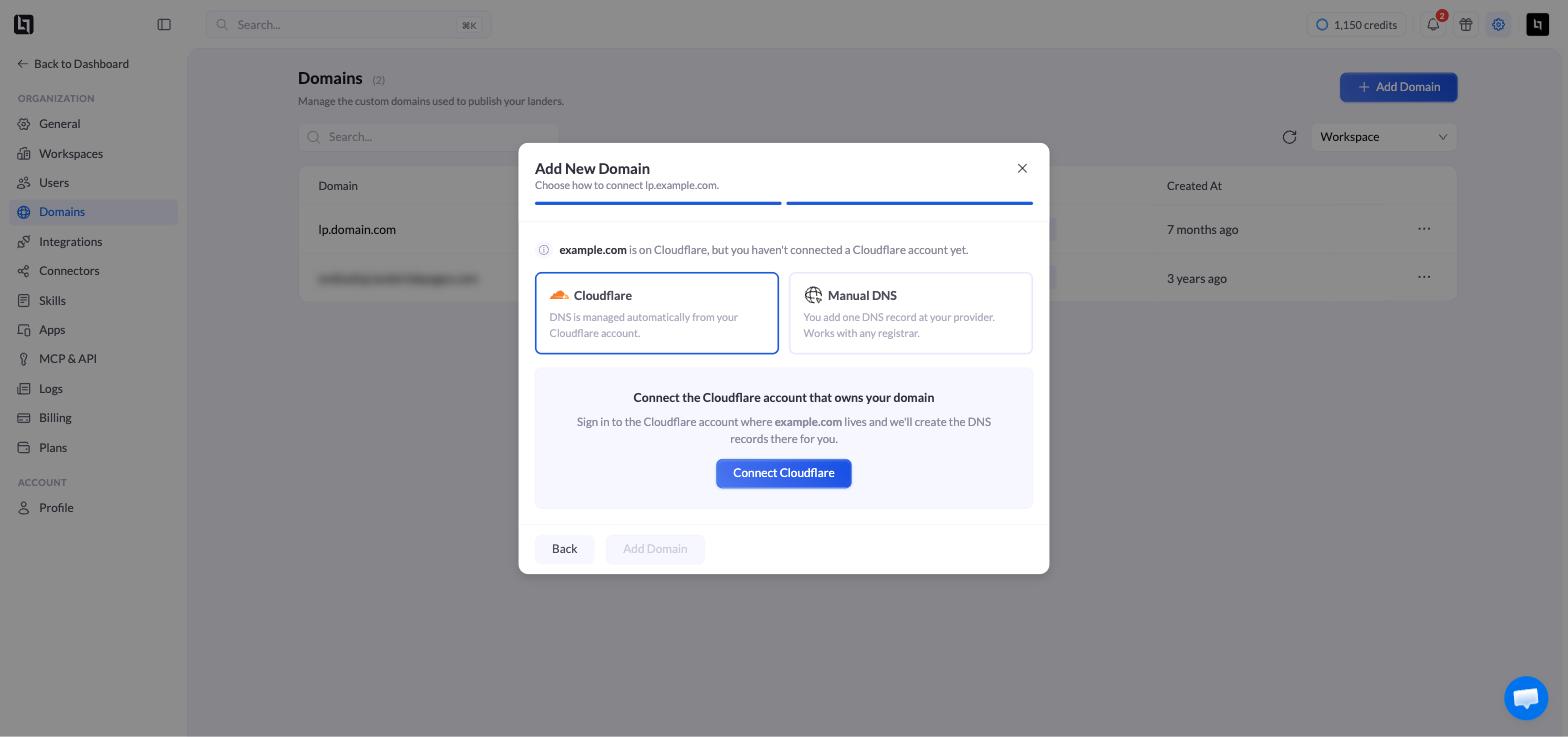
Connecting through Cloudflare is the fastest and recommended way to add a domain. LanderLab manages the required DNS records for you, so there is no manual configuration to maintain. You can use Cloudflare in two situations:
  • Your domain is already in a Cloudflare account you connect to LanderLab.
  • Your domain is managed somewhere else and you choose to send it to Cloudflare.

Before you start

Make sure the following are true:
  • You are an admin in LanderLab.
  • You have a Cloudflare account, or you are ready to create a free one.
  • You own the domain and can update its settings at your registrar.

Connect your Cloudflare account

LanderLab connects to Cloudflare with a single sign-in. You no longer need a Global API Key.
1

Start adding a domain

Open Settings, then Domains, and click Add Domain. Enter your domain, then choose Cloudflare as the connection method.
2

Choose or connect an account

If you have already connected a Cloudflare account, pick it from the Cloudflare Account dropdown.If you have not connected one yet, choose to connect and authorize LanderLab in Cloudflare. Once you approve access, the account appears in the dropdown and stays available for future domains.

Domain already in your Cloudflare account

When LanderLab detects that your domain lives in a connected Cloudflare account, setup is nearly instant.
1

Confirm the account

LanderLab confirms the domain is in your Cloudflare account and shows which account it belongs to. Select that account under Cloudflare Account.
2

Add the domain

Click Add Domain. LanderLab configures the required DNS records automatically through Cloudflare.
3

Confirm it is active

Because the domain already points to Cloudflare, no registrar changes are needed. The domain moves to Active and is ready for publishing.

Send a domain to Cloudflare

If your domain is managed somewhere else, you can move its DNS to Cloudflare so LanderLab can manage it automatically.
1

Choose Cloudflare

After entering your domain, choose Cloudflare and select the account you want to use.
2

Add the domain

Click Add Domain. LanderLab creates the zone in Cloudflare and shows a Domain Nameservers window with the two nameservers your domain needs to point to.
3

Update your nameservers

Update the nameservers at the registrar where you bought the domain (for example Namecheap or GoDaddy):
  1. Copy the two nameservers shown in LanderLab using the Copy button next to each one.
  2. Log in to your registrar and open the DNS or Nameserver settings for your domain.
  3. Replace the existing nameservers with the two you copied.
  4. Save your changes.
The nameservers shown are unique to your Cloudflare account. Always use the exact values displayed in LanderLab.
4

Wait for activation

The domain shows a Pending status until the nameserver change propagates, then switches to Active. This usually takes a few minutes, but can take up to 48 hours depending on your registrar.

Find your nameservers again

If you closed the nameserver window, you can reopen it at any time:
  1. Go to Settings, then Domains.
  2. Find the domain in your list. It will show a Pending status.
  3. Click the Pending label to reopen the Domain Nameservers window.

Choosing between multiple accounts

If you connect more than one Cloudflare account, all of them appear in the Cloudflare Account dropdown. Pick the account that holds the domain, or the one you want to manage it going forward.
Cloudflare is the recommended method because it removes manual DNS work and supports both root domains and subdomains.