

Overview
This guide walks you through connecting ClickFlare and LanderLab so that every lead captured on your landing page is automatically sent back to ClickFlare via server-to-server (S2S) postback. Once connected, you can see lead data (name, email, phone) directly in ClickFlare reporting and pass it downstream to ad platforms like Meta for improved signal quality and better ad optimization.How It Works
When a visitor clicks your ad, ClickFlare assigns a unique click ID and redirects them to your LanderLab landing page. That click ID travels with the visitor in the URL. When the visitor submits a form on your landing page, LanderLab fires an S2S postback to ClickFlare containing the click ID, the conversion type, and any form data you choose to map (name, email, phone, etc.). This gives you full-funnel attribution: you know exactly which campaign, ad, and keyword generated each lead.LanderLab fires the postback on form submission only. You cannot trigger it on other events like page load or button click.
Prerequisites
- An active ClickFlare account
- An active LanderLab account
- A published landing page in LanderLab with a lead capture form
Part 1: Set Up the Offer in ClickFlare
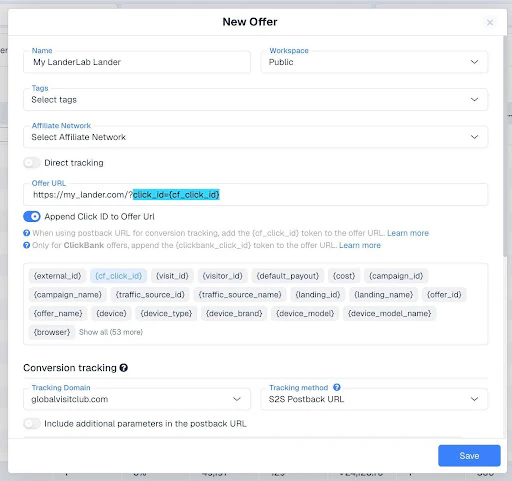
The LanderLab landing page acts as your “offer” in ClickFlare. Create it as an offer so you can assign it to a campaign and append the click ID.- In ClickFlare, go to Offers and click New Offer.
- Enter a name for the offer (e.g., “Bath Remodeling Lead Gen”).
- In the Offer URL field, enter your LanderLab landing page URL and append the click ID parameter:
- Under Conversion tracking, select your tracking domain and set the tracking method to S2S Postback URL.
- Click Save.
The
click_id parameter name is important. You will use this same parameter name when configuring the integration on the LanderLab side.Part 2: Create the Campaign in ClickFlare
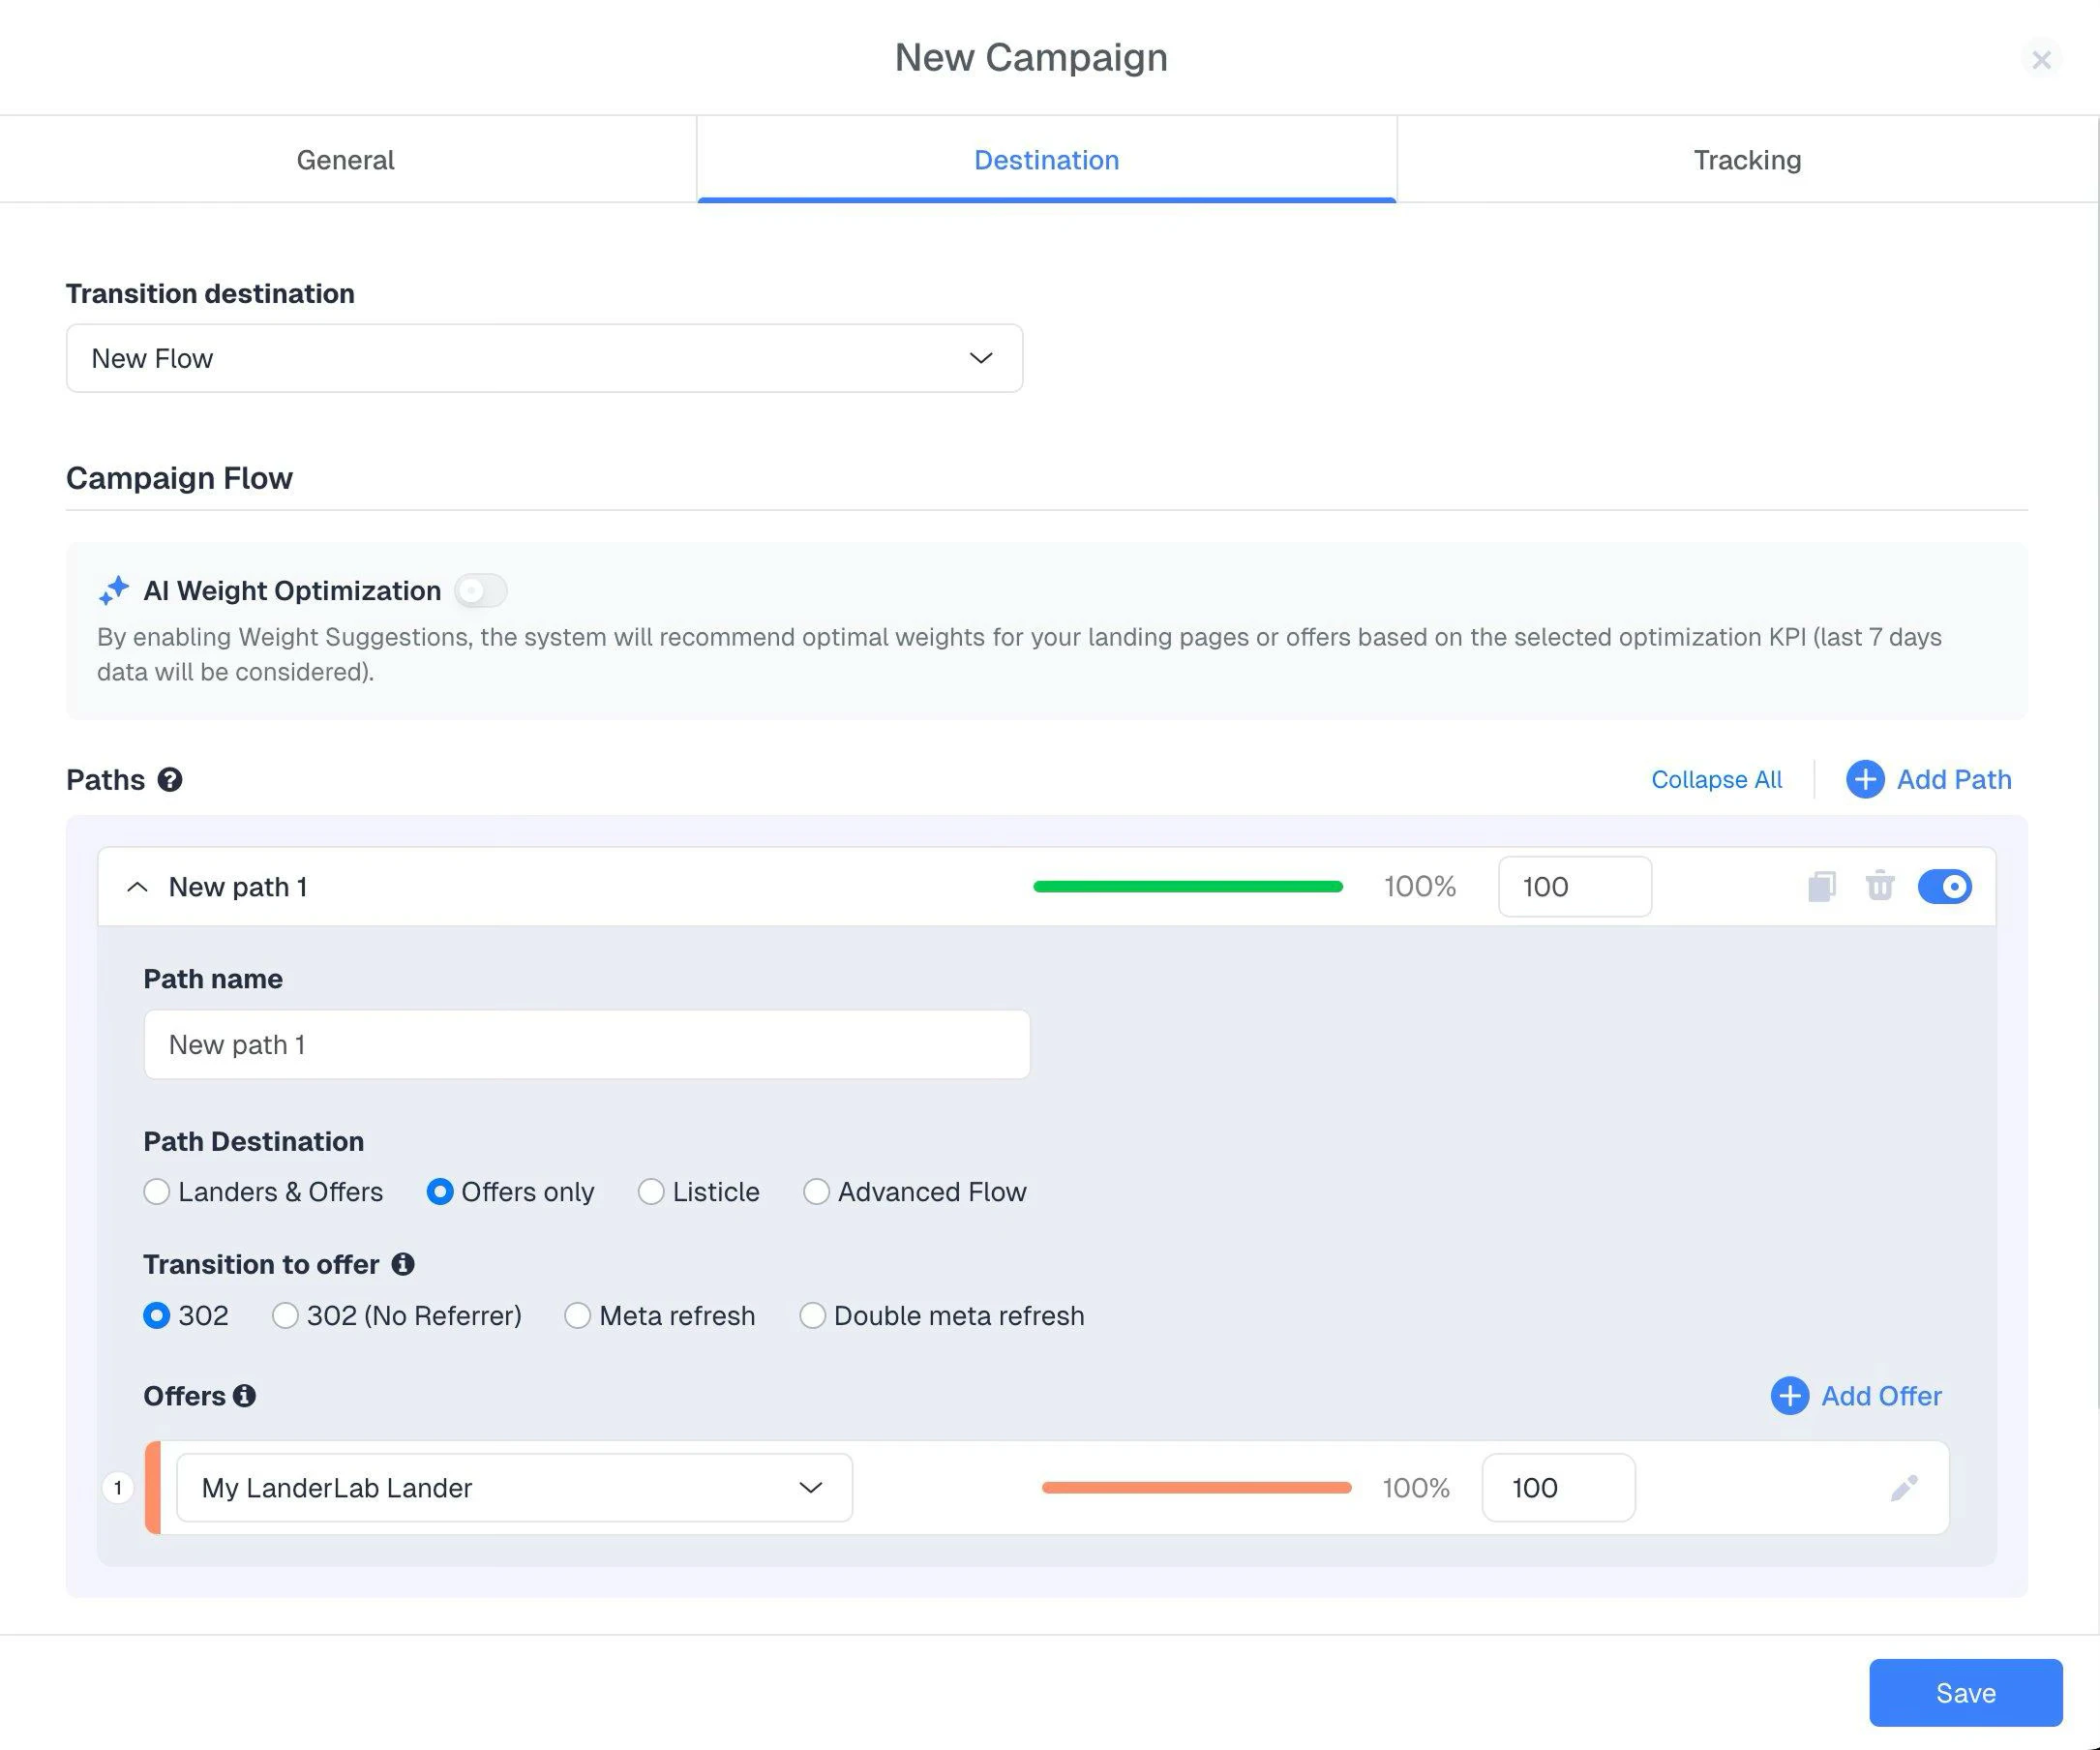
- Go to Campaigns and click New Campaign.
- On the General tab, fill in your campaign details (name, traffic source, etc.).
- On the Destination tab:
- Under Path Destination, select Offers only (since LanderLab serves as both the lander and the offer in this setup).
- Select the offer you created in Part 1.
- Click Save.
- Go to the Tracking tab and copy your Campaign URL. This is the URL you will use in your ads.
Part 3: Configure the ClickFlare Integration in LanderLab
This is where you connect the two platforms so LanderLab knows where to send lead data when a form is submitted.Step 1: Open Integration Settings
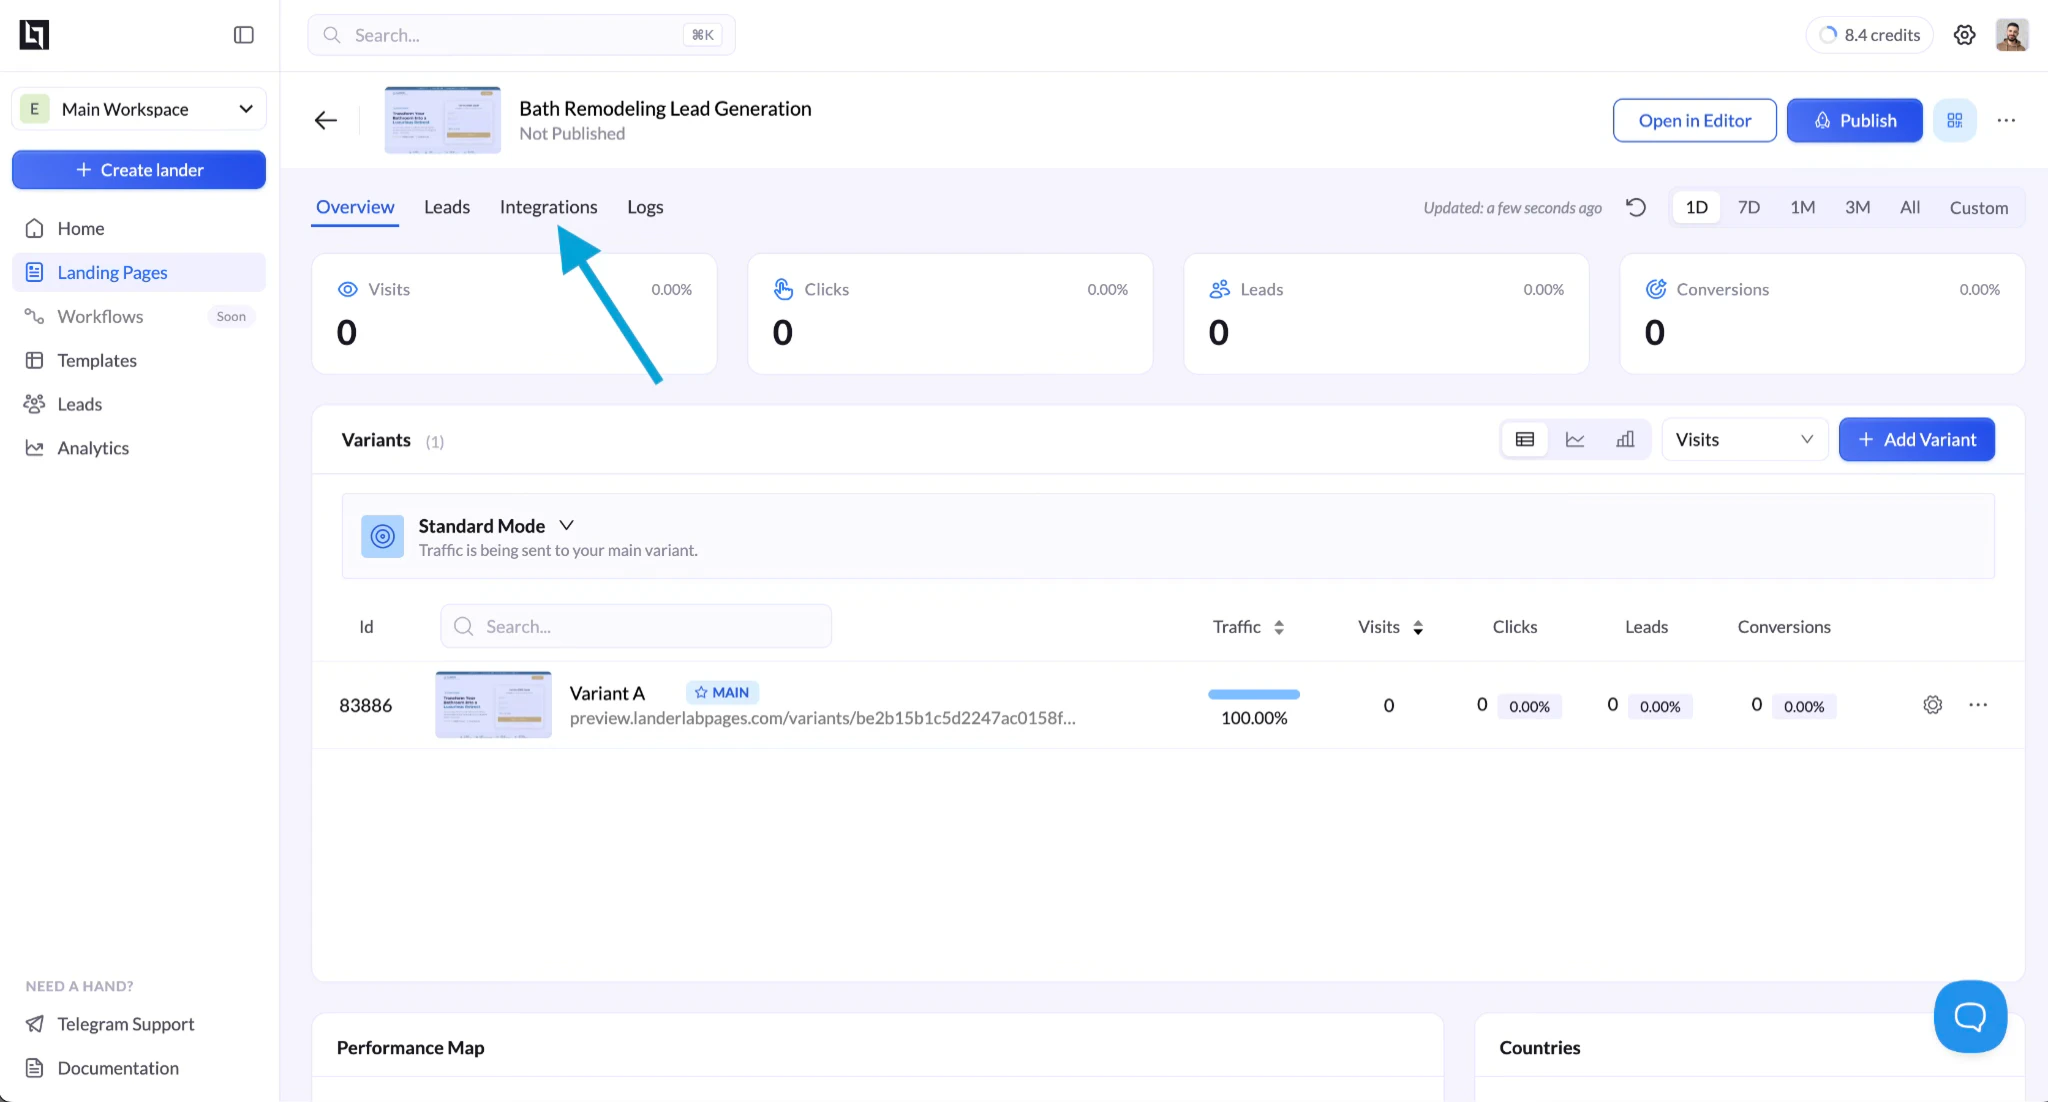
- In LanderLab, navigate to Landing Pages and click on the lander you are using for this campaign.
- Click the Integrations tab.
- Click Add Integration.
- Find ClickFlare in the list and click + Add.
Step 2: Enter Postback Details
- Name: Enter a name for this integration (e.g., “ClickFlare”).
- Postback URL: Enter the base postback URL from your ClickFlare tracking domain, up to but not including the ”?”. For example:
flarevisits.com with your actual ClickFlare tracking domain.
- Click ID URL parameter: Enter
click_id. This must match the parameter name you used when appending the click ID to the offer URL in Part 1. - Click Continue.

Step 3: Map Form Fields to Postback Parameters
On this screen, you map form fields from your landing page to ClickFlare postback parameters. ClickFlare supports 20 custom parameters (param1 through param20) where you can send any data collected from the form. For example:| Form Field | Postback Parameter |
|---|---|
| full_name | param1 |
| param2 | |
| phone | param3 |
click_id parameter automatically.
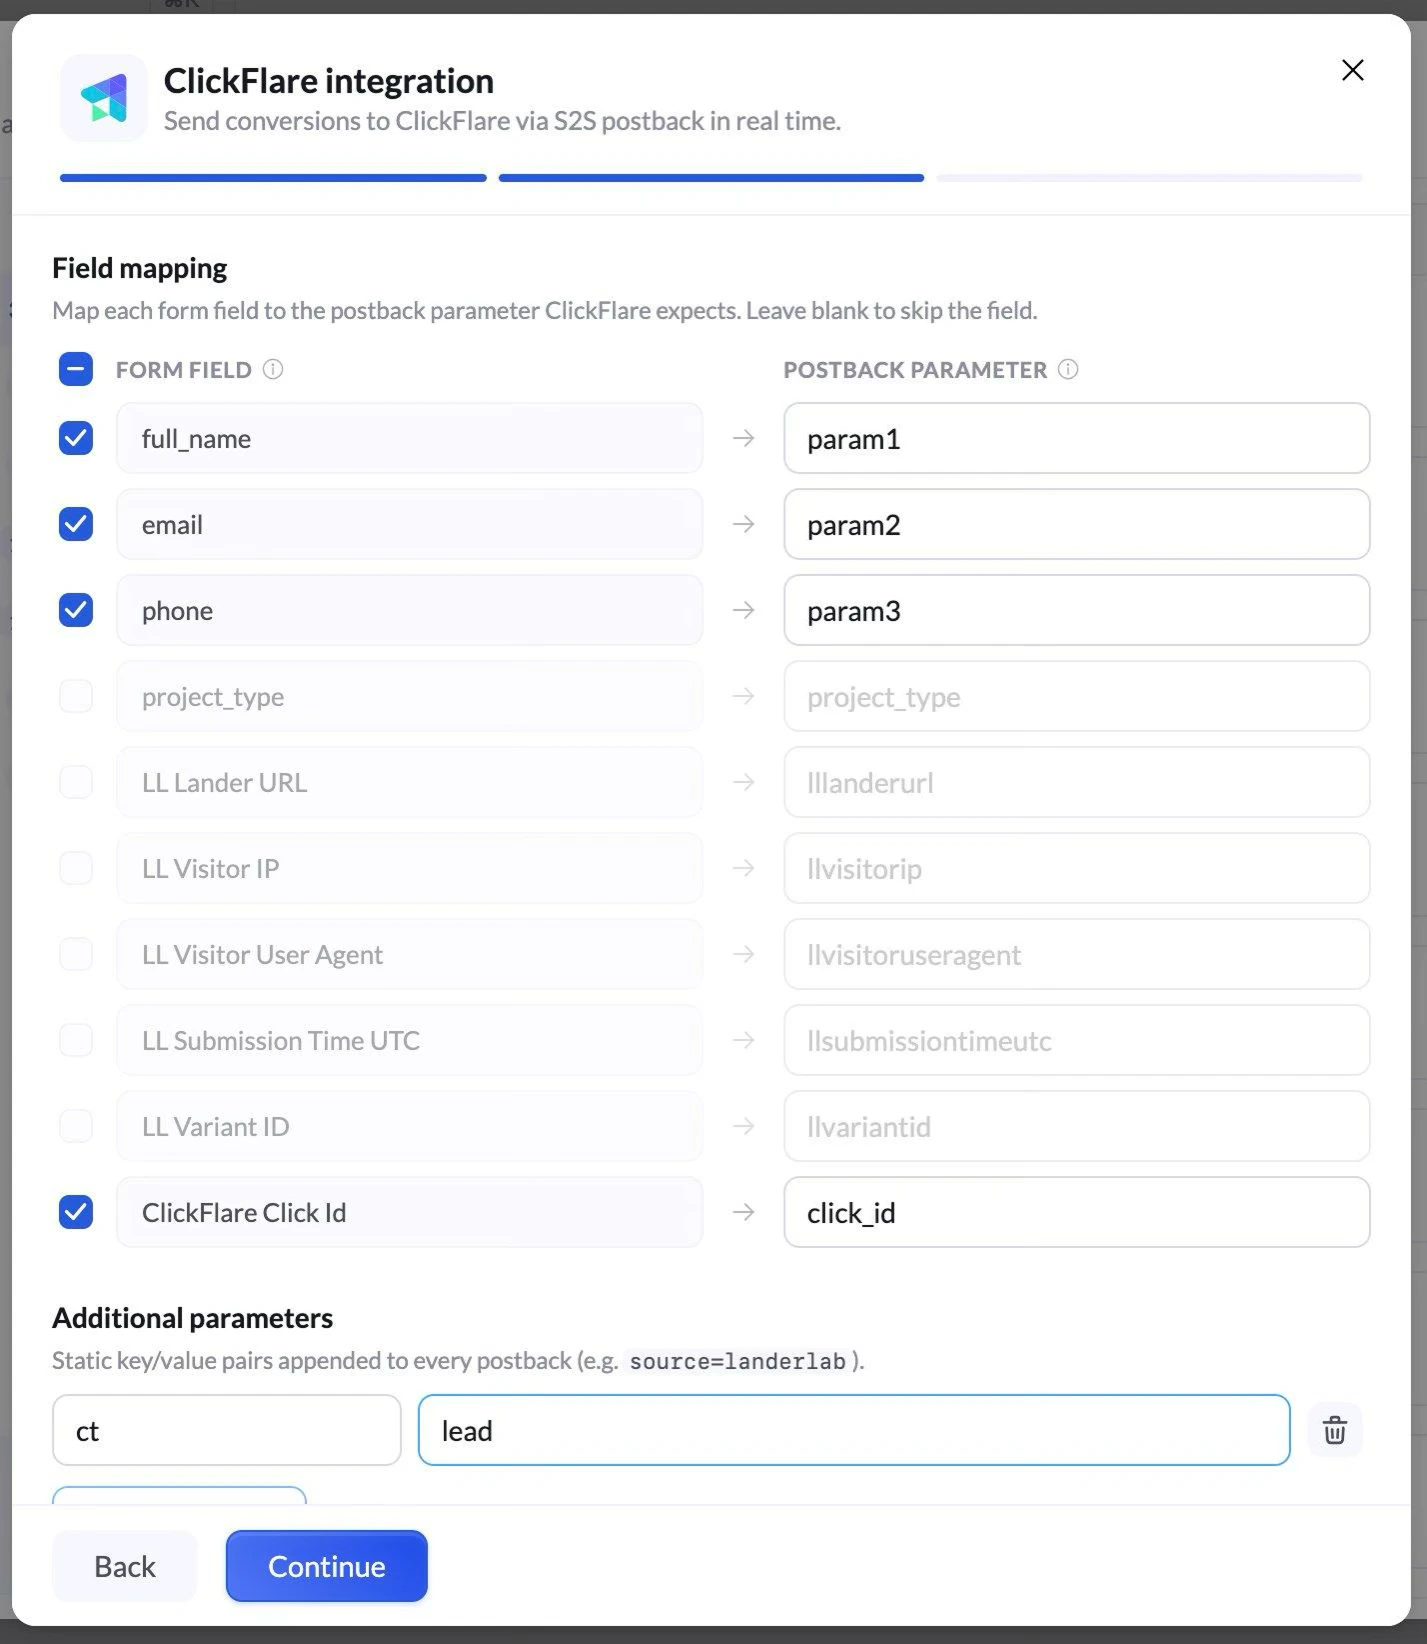
Why map form fields?
Sending lead data (email, phone, name) back to ClickFlare serves two purposes. First, you can see this data in ClickFlare reporting for each conversion. Second, ClickFlare can forward this data to ad platforms like Meta via Conversions API (CAPI), which improves match rates and helps the ad platform optimize your campaigns more effectively.Step 4: Add Custom Conversion Type (Optional)
Under Additional parameters, you can add a static key-value pair that gets appended to every postback. A common use case is defining the conversion type:| Key | Value |
|---|---|
| ct | lead |
Step 5: Review and Connect
Click Continue to review your integration settings. You will see a summary of the postback URL, field mappings, and additional parameters. If everything looks correct, click Connect ClickFlare.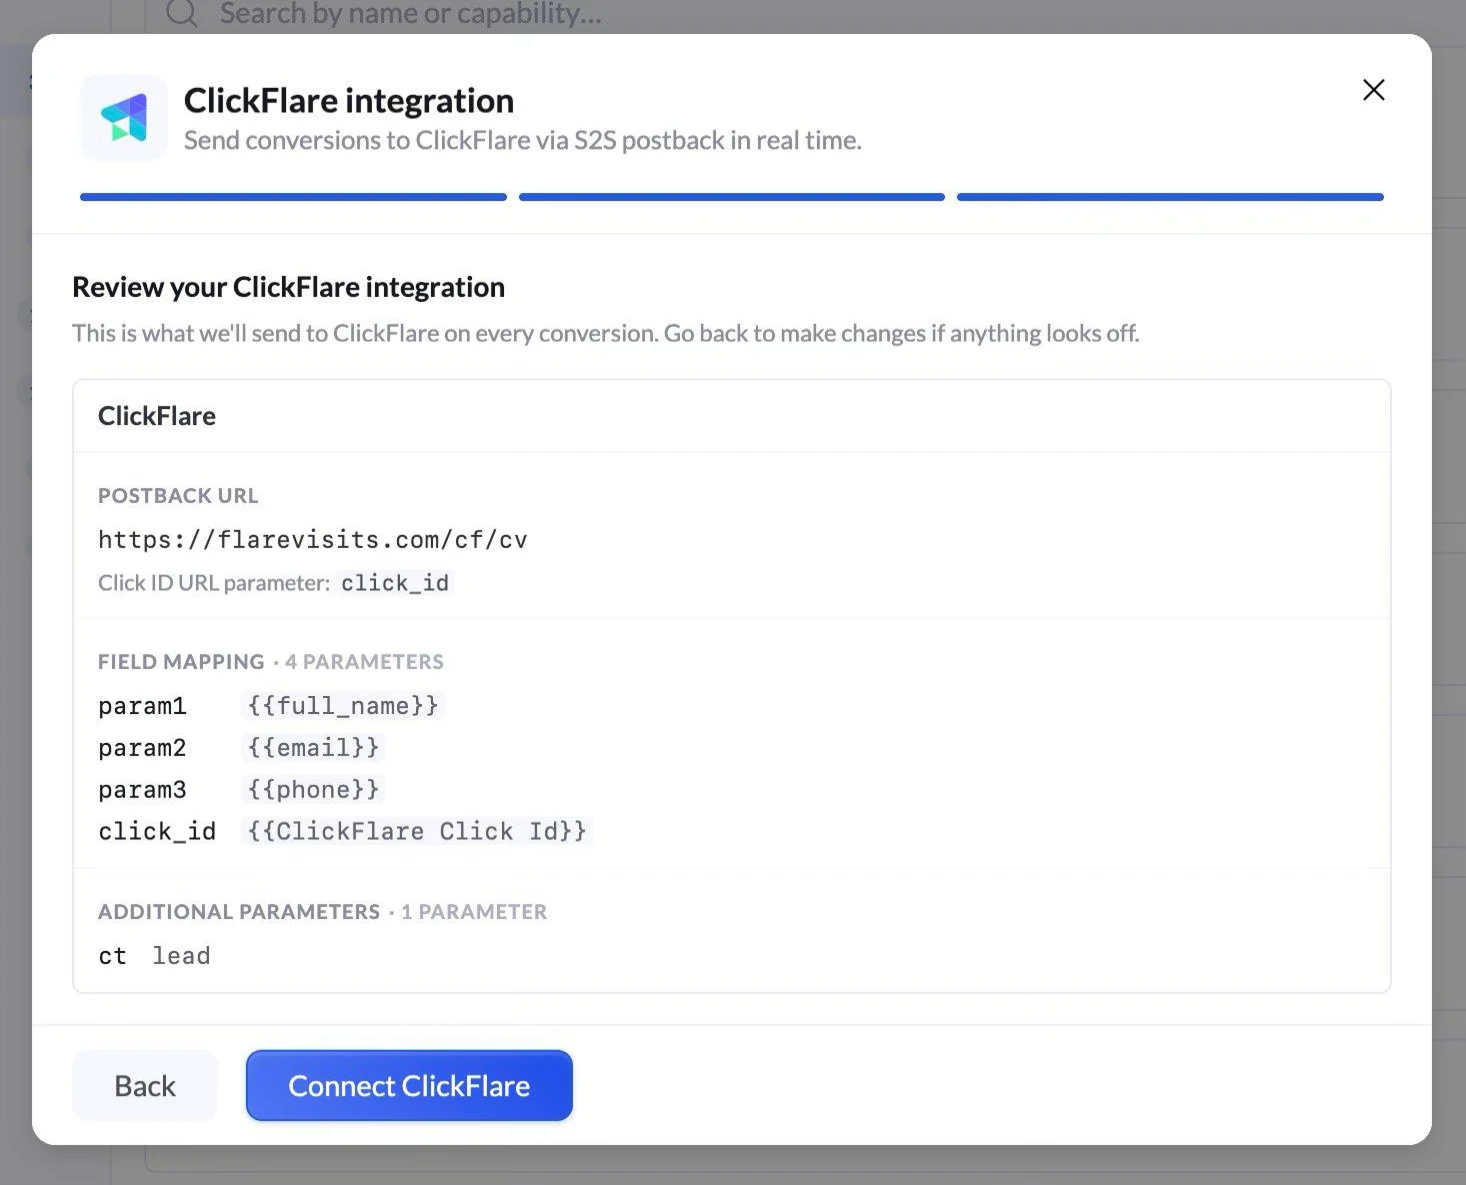
Part 4: Use the Campaign URL in Your Ads
Take the Campaign URL from ClickFlare (from Part 2, step 5) and use it as the destination URL in your ad platform. When a user clicks the ad, ClickFlare will redirect them to the LanderLab page with the click ID appended.Testing the Integration
- Click your campaign URL to visit the landing page.
- Submit the form with test data.
- In ClickFlare, check the campaign report for a new conversion. Verify the conversion type and any mapped parameters (name, email, phone) appear correctly.
Google Ads / Direct Tracking Setup
The setup described above uses a redirect campaign, which is the standard approach for traffic sources that allow redirect URLs (Meta, native, push, etc.). If you are running traffic from Google Ads and using a direct tracking setup (no redirect), the click ID cannot be appended to the URL via redirect. Instead:- Install the ClickFlare tracking script on your LanderLab landing page.
- LanderLab will automatically capture the ClickFlare click ID from the cookie set by the tracking script.
- The rest of the integration (field mapping, postback, conversion type) works the same way.
Quick Reference
| Step | Where | What |
|---|---|---|
| Create Offer | ClickFlare | Add LanderLab URL with ?click_id={cf_click_id} |
| Create Campaign | ClickFlare | Assign the offer, copy the campaign URL |
| Add Integration | LanderLab | Connect ClickFlare with postback URL and click ID parameter |
| Map Fields | LanderLab | Send form data (name, email, phone) via param1-20 |
| Set Conversion Type | LanderLab | Add ct=lead as an additional parameter |
| Launch | Ad Platform | Use the ClickFlare campaign URL in your ads |
FAQ
Can I trigger the postback on events other than form submission?
Can I trigger the postback on events other than form submission?
No. The LanderLab-ClickFlare integration fires the postback on form submission only. Other page events (page view, button click, scroll) are not supported as postback triggers.
How many parameters can I send back to ClickFlare?
How many parameters can I send back to ClickFlare?
ClickFlare supports 20 custom parameters (param1 through param20). You can map any form field to any of these parameters.
What if I am using Google Ads with direct tracking?
What if I am using Google Ads with direct tracking?
Install the ClickFlare tracking script on the page. LanderLab will pick up the click ID from the cookie automatically, so you do not need the redirect-based click ID passthrough.
Does the click ID parameter name matter?
Does the click ID parameter name matter?
Yes. The parameter name you use in the ClickFlare offer URL (e.g.,
click_id) must match the Click ID URL parameter you enter in the LanderLab integration settings.