

Where to manage connectors
You can manage connectors from two places. Both show the same connectors.- From the AI Assistant: click + in the prompt box, hover over Connectors, and click Manage connectors.
- From Settings: open Settings and select Connectors under Organization. Here you can see every connector your organization has added and click Add connector to add a new one.
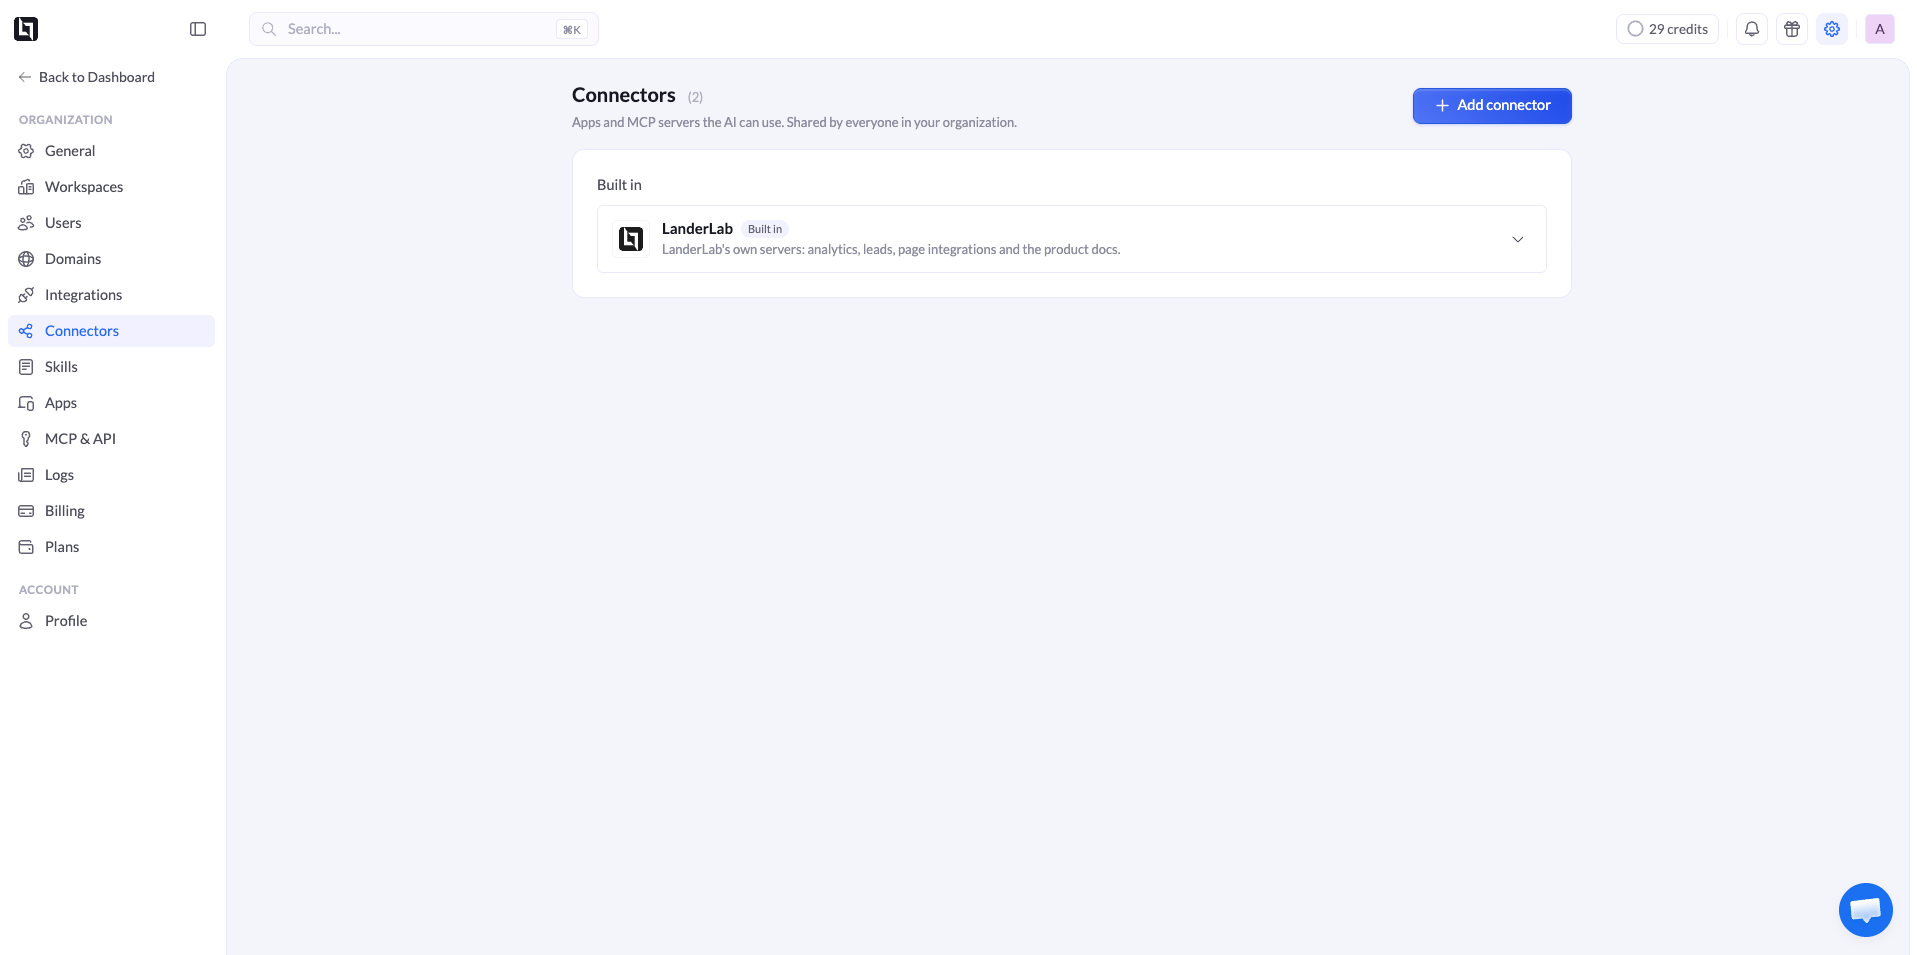
Connectors are shared by everyone in your organization. When you add one, all team members can use it with the AI Assistant.
Built-in LanderLab connector
Every organization has the LanderLab connector built in. It gives the AI access to your analytics, leads, page integrations, and the LanderLab product docs, so you do not need to set anything up.Find available connectors
All available connectors are listed in the Add connector window. Open it from Manage connectors in the AI Assistant, or click Add connector in Settings > Connectors. Connectors are grouped by category, like Tracking, Research, Design, and Commerce, so you can quickly find the right one. Each connector shows a short description of what the AI can use from it. We add new connectors regularly, so check back often.Connectors that appear greyed out are not available for your account yet.
How to add a connector
1
Open the Add connector window
In the AI Assistant prompt box, click +, hover over Connectors, and click Manage connectors. Or go to Settings > Connectors and click Add connector.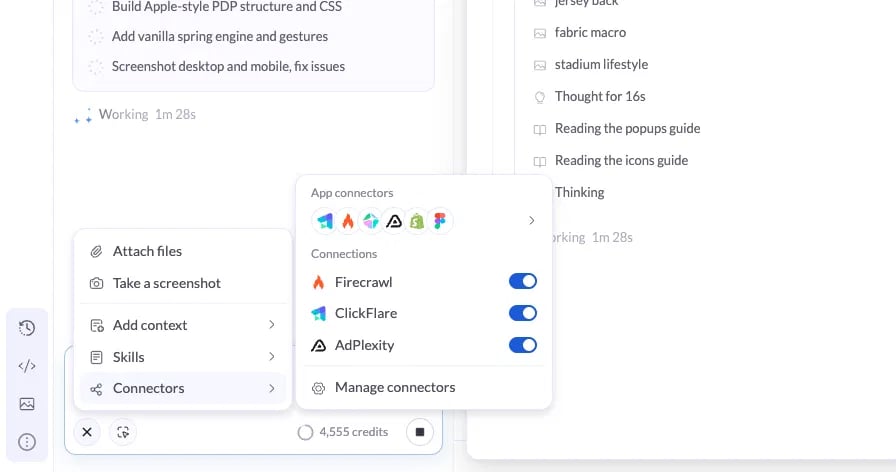
2
Find the connector
Browse by category on the left, or search by name or capability.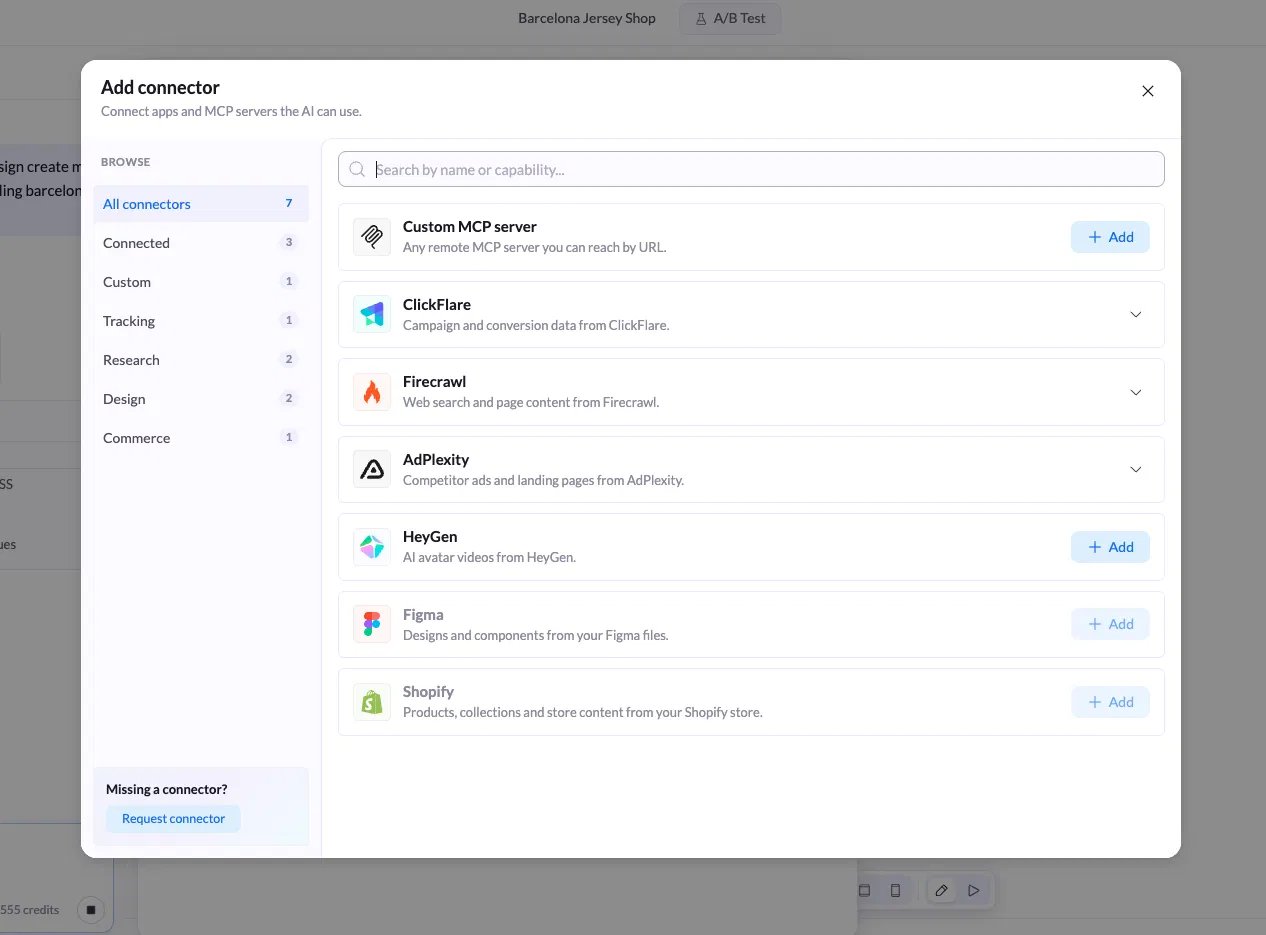
3
Click Add
Click Add next to the connector and follow the steps to sign in or enter your credentials.
4
Confirm it is connected
The connector now appears under Connected and in the Connectors menu of the prompt box.
How to add a custom MCP server
Use a custom MCP server to connect any tool that is not in the list.1
Open the Add connector window
Click + in the prompt box, hover over Connectors, and click Manage connectors. Or go to Settings > Connectors and click Add connector.
2
Add a Custom MCP server
Click Add next to Custom MCP server.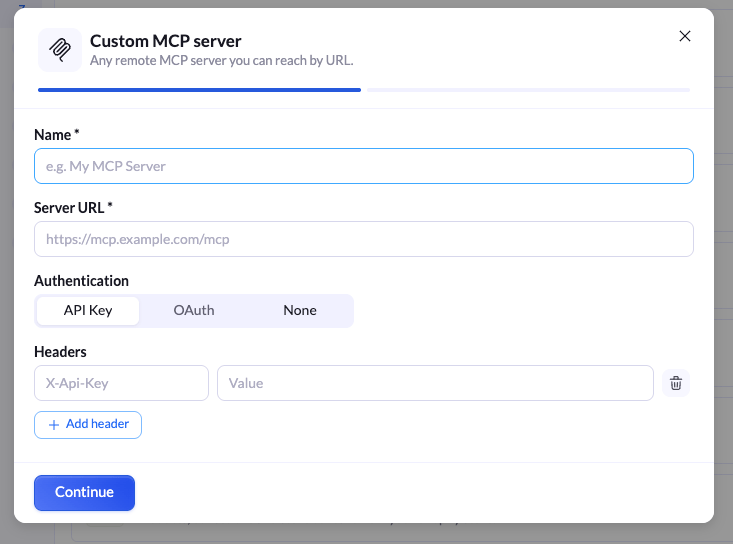
3
Enter the server URL
Paste the URL of the remote MCP server and complete any sign-in it asks for.
Turn connectors on or off
Click + in the prompt box and hover over Connectors. Under Connections, use the toggle next to each connector to turn it on or off.Example prompts
Once a connector is on, just ask for what you need in plain English. You can name the connector in your prompt to make sure the AI uses it.Missing a connector?
Open Manage connectors and click Request connector at the bottom left to tell us which app you want to connect.Related
Skills
Save reusable instructions for recurring tasks.
Connect AI assistants via MCP
Use LanderLab from Claude, ChatGPT, and other AI assistants.