

A filter is pass-or-stop. There’s no second path for leads that fail. If you need different actions for different leads instead of stopping them, use an If or Switch node instead.
Add the Filter node
Filter lives under the Internal group in the node menu.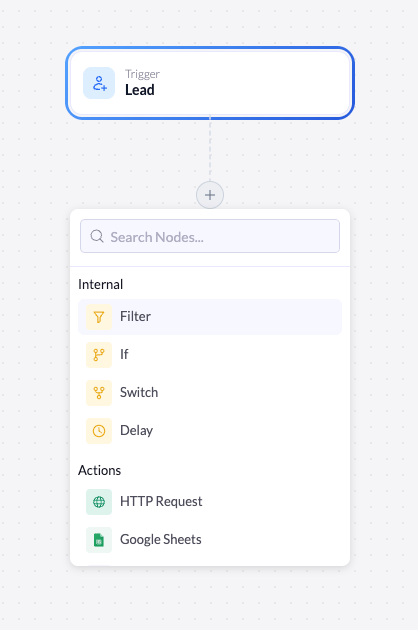
The node menu with Filter under the Internal group.
1
Open the node menu
Click the + below the node where you want the filter to run (usually right after the trigger).
2
Select Filter
Under Internal, click Filter. The node is added to the canvas and its settings open on the right.
Configure the filter
Selecting the node opens its settings. The header confirms what it does: Continue only if conditions match.General
Conditions
The Conditions section is empty until you add a condition group. Click Add Condition Group to create your first group and your first condition.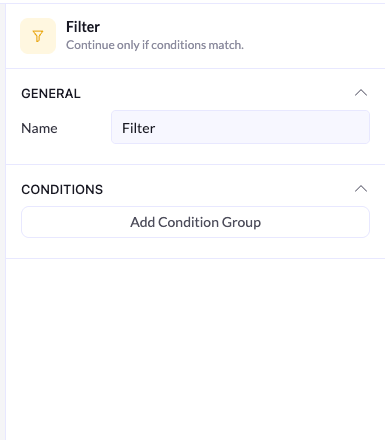
An empty Conditions section with the Add Condition Group button.
Build a condition
Each condition has three parts, read left to right: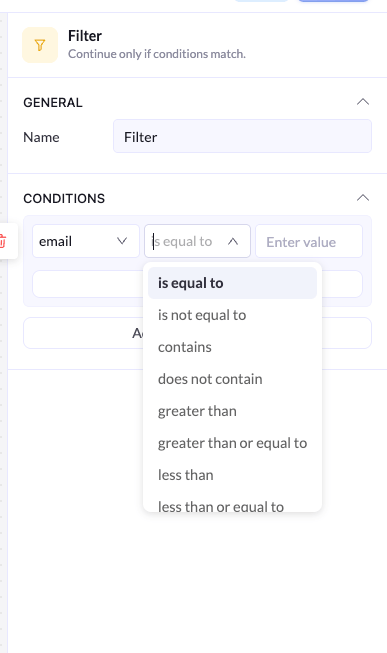
A single condition: field, operator, and value.
Field
The first dropdown lists the fields captured on your connected landing page - for example, email. Pick the field you want to check.
Operator
The second dropdown sets how the field is compared to your value. Options include:
Value
The third field is what you compare against. Type the value to check for - for example, an email domain, a country name, or a number.
Combine conditions with AND / OR
You can add more than one condition to a group. An AND / OR toggle appears between conditions to set how they combine.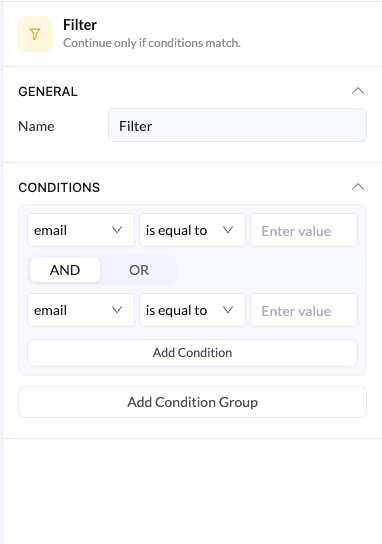
Two conditions in one group joined by an AND/OR toggle.
- AND - The lead must match every condition in the group.
- OR - The lead must match at least one condition in the group.
Add condition groups
For more complex logic, click Add Condition Group to create a second group. An AND / OR toggle then appears between the groups as well.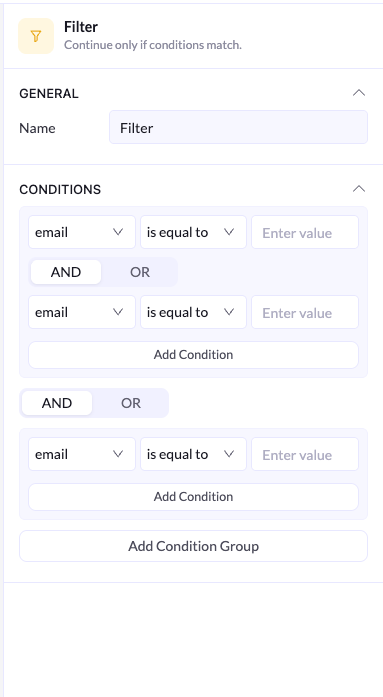
Two condition groups, joined by their own AND/OR toggle.
- Within a group - conditions combine with the group’s AND / OR toggle.
- Between groups - each group is evaluated as a whole, then groups combine with the AND / OR toggle between them.
Pass if the lead is from the US (group 1) AND they signed up for either the newsletter OR the webinar (group 2).Group 1 holds the country condition. Group 2 holds the two signup conditions joined by OR. The two groups are joined by AND.
Think of groups like parentheses in math: conditions inside a group are evaluated first, then the groups are combined. Reach for a new group whenever your logic mixes AND and OR.