

Before you start
Connect your Stripe account in Integrations. The checkout uses this connection to process payments and to load your Stripe products and coupons.Add the Stripe Checkout element
- Open your page in the editor.
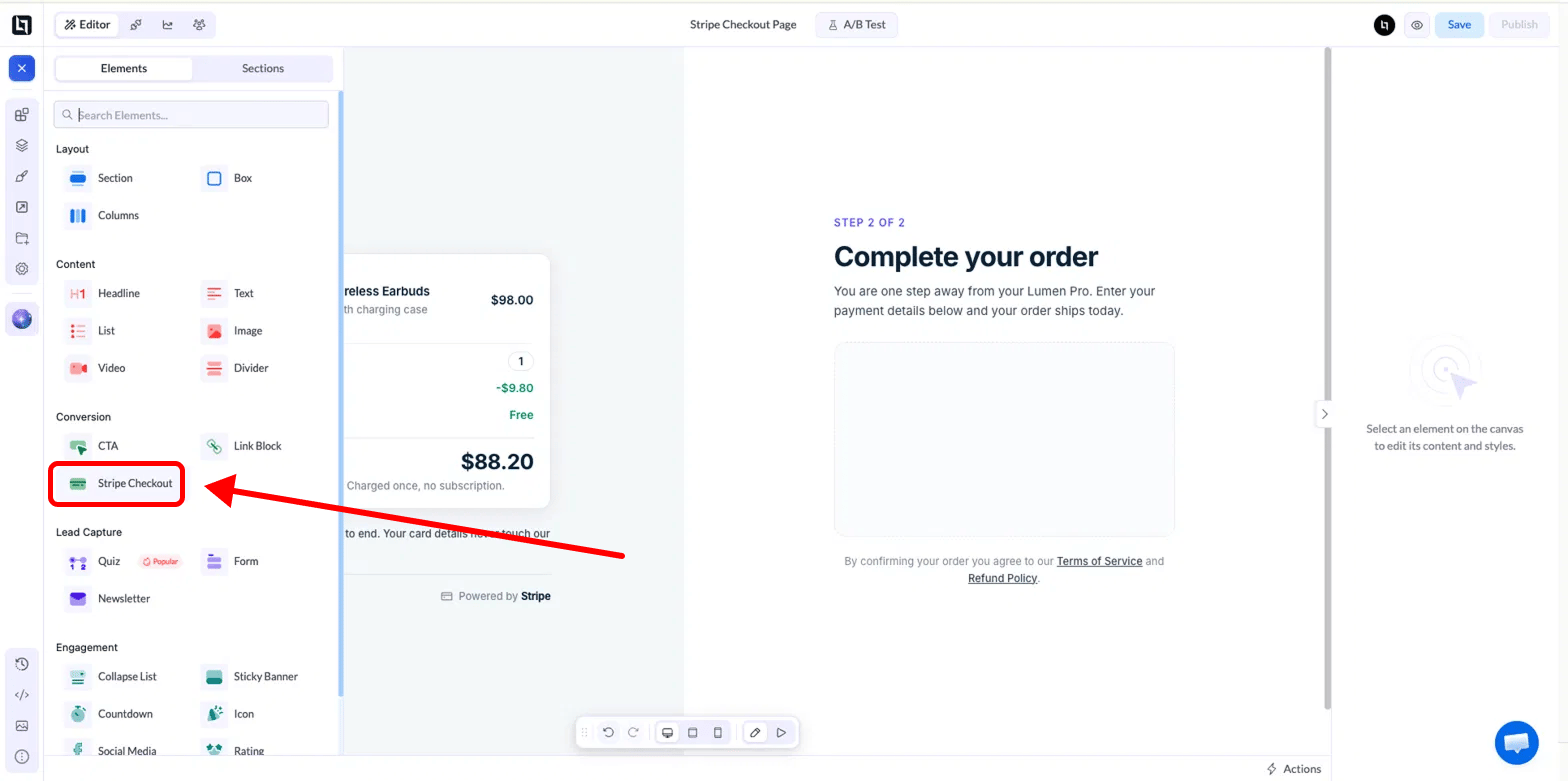
- In the left sidebar, open Elements and find the Conversion category.
- Drag Stripe Checkout onto the canvas.
- Click the element to open its settings in the right panel.
Product
Choose where the product details come from with the Source setting.
Manual gives you these fields:
- Name: The product name shown at the top of the checkout
- Description: A short line under the name, for example
Free shipping - Image: An optional product thumbnail
Billing
For manual products, choose One-time for a single payment or Recurring for a subscription, then set the Price and pick the currency. For Stripe products, these settings are hidden because the price and billing type come from Stripe.Adaptive Pricing
Turn on Adaptive Pricing to show the price in the visitor’s local currency. Stripe handles the conversion, and the checkout shows a currency switch so buyers can choose between your currency and theirs. Final charges can vary slightly based on exchange rates.Quantity
Set the default Quantity for the order. Turn on Let customers change quantity to show a quantity picker, then set the Min and Max a buyer can choose. The checkout shows a subtotal and total that update as the quantity changes.Discount
Coupons and promo codes come from your Stripe account. Create them in Stripe first, then click Refresh coupons if they do not appear in the list.
Shipping
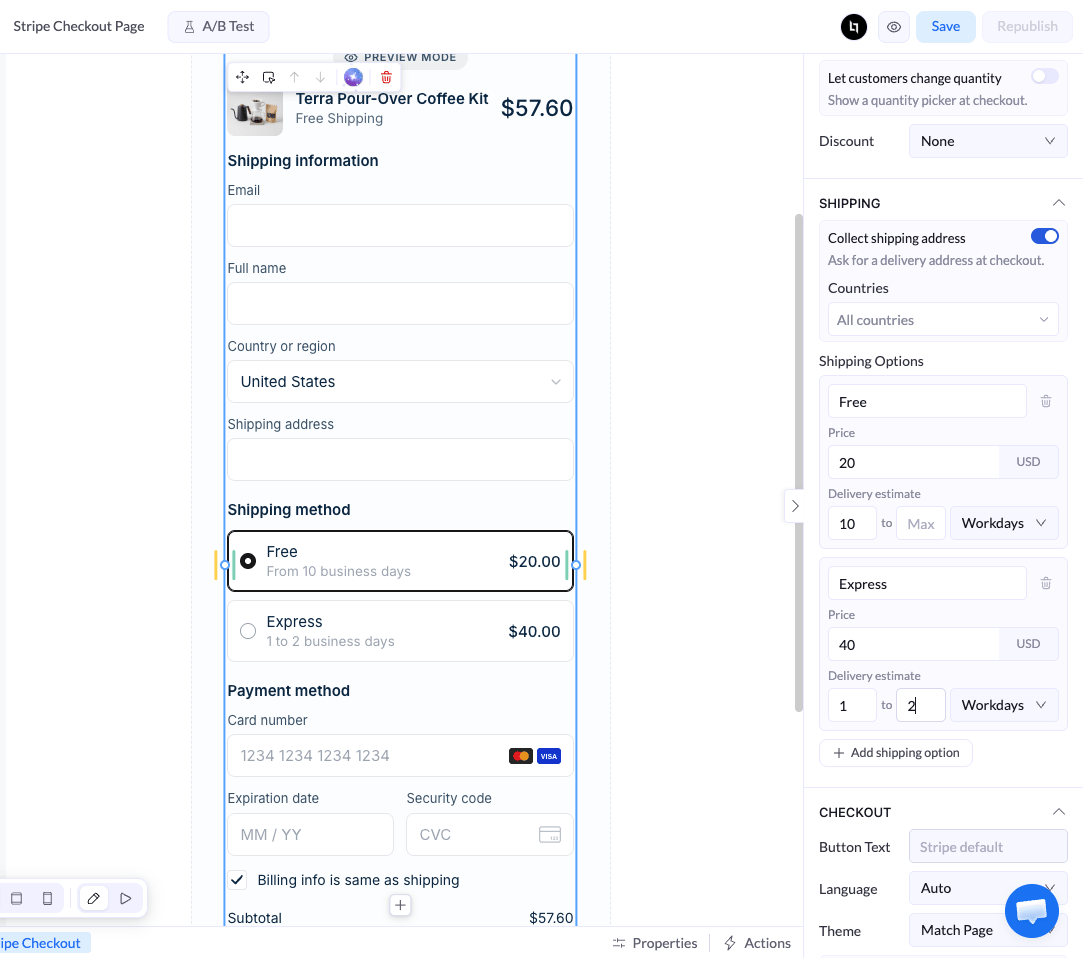
Turn on Collect shipping address to ask for a delivery address at checkout. The form adds a Shipping information section with full name, country, and address fields. A Billing info is same as shipping checkbox saves buyers from typing their address twice.- Countries: Keep All countries or select only the countries you ship to
- Shipping Options: Click Add shipping option to create a delivery rate
- Name, for example
Standard shippingorExpress - Price, set to
0for free shipping - Delivery estimate, a min and max range of delivery days
Checkout
- Button Text: Custom text for the pay button. Leave it empty to use Stripe’s default, which shows the amount, like
Pay $88.20 - Language: The language of the checkout form. Auto matches the visitor’s browser language
- Theme: The visual style of the form. Match Page blends it with your page design
- Billing Address: Collect the buyer’s full billing address
- Stripe Link: Let buyers save their payment details with Stripe Link for faster checkout next time
- One purchase per visitor: Stop the same visitor from paying twice, useful for one-time offers
Payment success
Choose what happens after a successful payment with the Action setting.
With Stay on page, write your own Confirmation Message. If you leave it empty, buyers see
Payment received, thank you!
Layout
Like other elements, you can adjust the Position (left, center, or right alignment), Dimensions (the default width is360px), and Spacing (margin and padding).
Before you publish
- Click Preview and review the checkout the way a visitor would see it.
- Check the price, currency, discount, and shipping totals.
- Make sure no warning appears under the checkout on the canvas. A warning means a required product or coupon is missing.
- Publish the page.
FAQ
Do I need a Stripe product to use the checkout?
Do I need a Stripe product to use the checkout?
No. Set Source to Manual and enter the name, price, and currency in LanderLab. Use Stripe product only if you want the price and billing managed in Stripe. Either way, your Stripe account must be connected in Integrations.
Can I sell subscriptions?
Can I sell subscriptions?
Yes. Choose Recurring under Billing, or pick a recurring product from your Stripe catalog.
What is the difference between a coupon and a promo code?
What is the difference between a coupon and a promo code?
A coupon is applied automatically for every buyer. A promo code shows a field where buyers type the code themselves.
Why is my new Stripe product or coupon missing?
Why is my new Stripe product or coupon missing?
Click Refresh products or Refresh coupons in the dropdown to load the latest data from Stripe.
Where do I see my payments?
Where do I see my payments?
All payments, refunds, and customer details are in your Stripe dashboard.