

Before you start
- You are an admin in LanderLab.
- You can access your domain’s DNS settings.
- You are using a subdomain, such as
lp.yourdomain.com. Manual DNS usually requires a subdomain rather than the root domain.
Choose Manual DNS
After you enter your domain and click Continue, select Manual DNS, then pick your Domain Provider.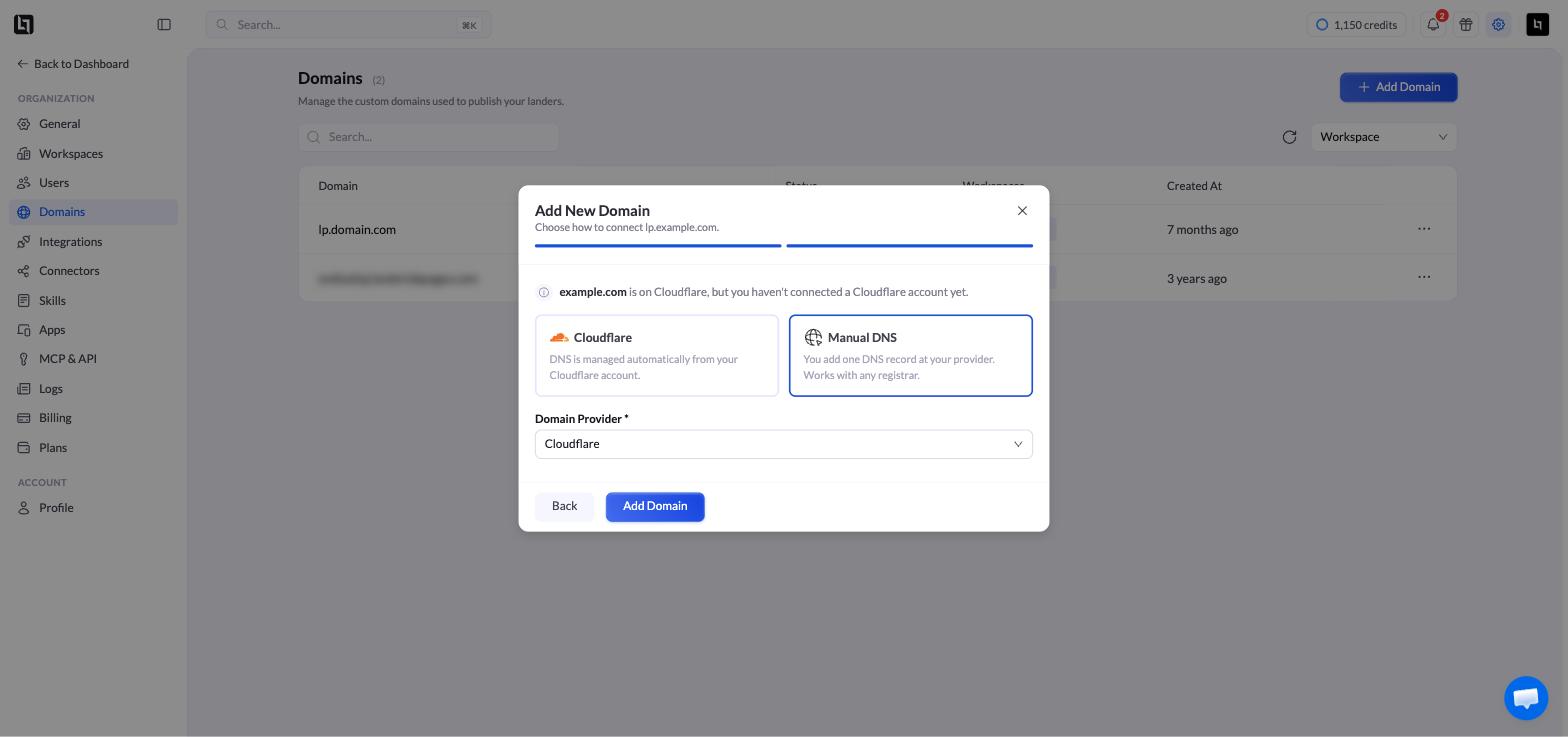
Add the record at your provider
LanderLab opens Domain Verification with the exact record to create.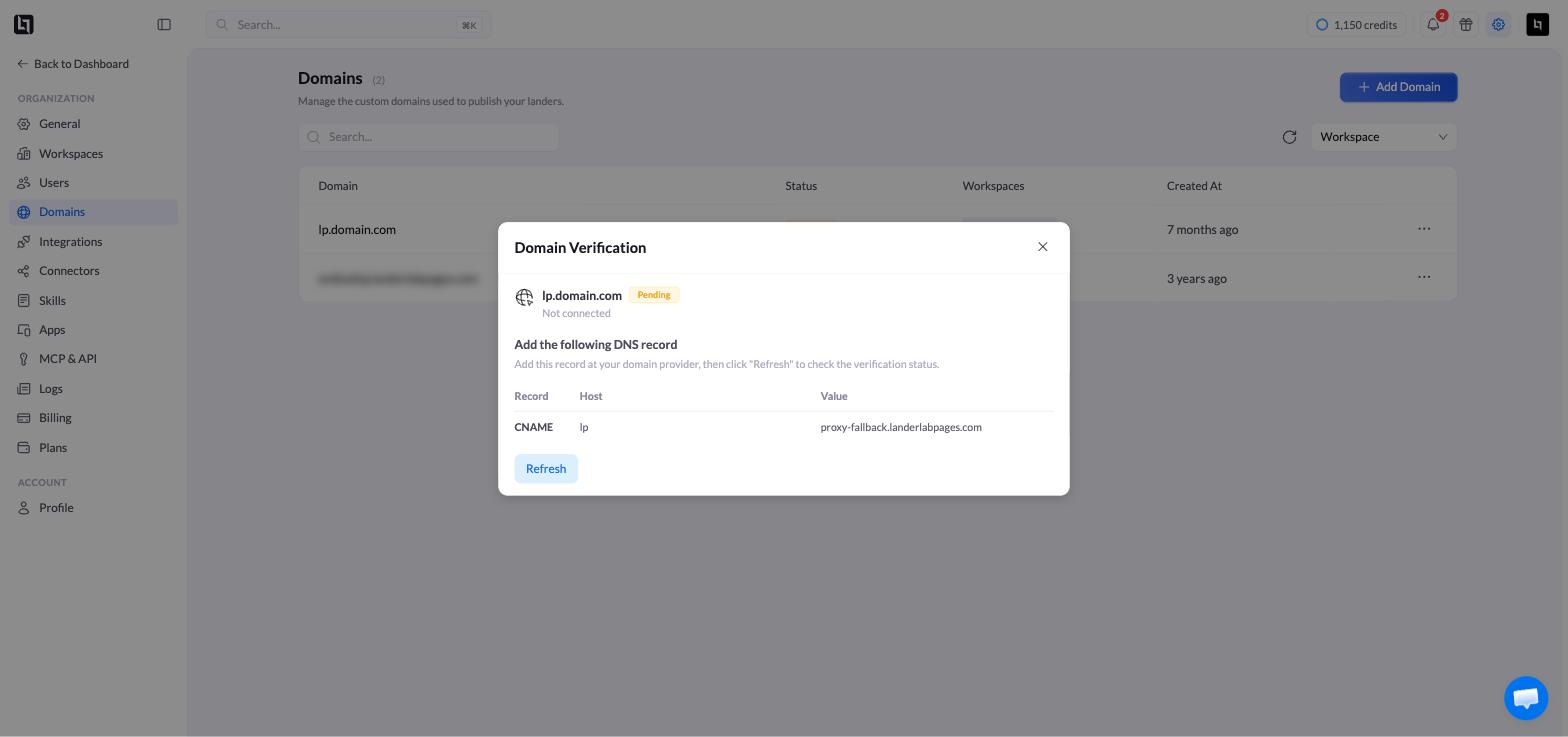
1
Open your DNS settings
Sign in to your domain provider and open DNS Management or the Zone Editor.
2
Create the record
Match the type, host and value exactly as shown in LanderLab.
- Do not include
https://in the value. - If a record already exists with the same host, edit or remove it to avoid a conflict.
- Some providers expect just
lp, others the fulllp.yourdomain.com. Follow your provider’s format.
3
Verify
Back in LanderLab, click Refresh. If LanderLab asks for another record, such as one to enable HTTPS, add it the same way and refresh again.
Root domains
Some providers do not allow a CNAME on the root domain, so Manual DNS works best with a subdomain:Common issues
The domain still shows Pending
The domain still shows Pending
DNS propagation takes a few minutes, and up to 24 to 48 hours with some providers. Reopen the record with DNS Records in the domain’s three-dot menu and click Refresh.
My provider does not allow the record on the root domain
My provider does not allow the record on the root domain
Use a subdomain, or connect through Cloudflare, which supports root domains.