


What is Campaign Monitor and Why Use This Integration?
Campaign Monitor is an email marketing platform used to manage subscribers, send campaigns, and run automations. When you connect Campaign Monitor to a LanderLab landing page, every lead that submits your form is sent straight to Campaign Monitor in real time, with the form fields you choose mapped to the matching subscriber fields. Campaign Monitor connects with an API Key. You copy the key from your Campaign Monitor account and paste it into LanderLab once.Campaign Monitor integrations are saved globally in your account. Once you add your API key, you can reuse the same account across multiple landing pages without entering it again.
Prerequisites
Before you start, make sure you have:- A LanderLab account with at least one landing page that has an email field
- A Campaign Monitor account
- Your Campaign Monitor API Key
Step 1: Get Your Campaign Monitor API Key
Open Account settings
Log in to Campaign Monitor, click your account name in the top right, then select Account settings.
Reveal your API key
Find the API Key section. Click Generate API Key, then copy the key. Keep it somewhere safe for the next step.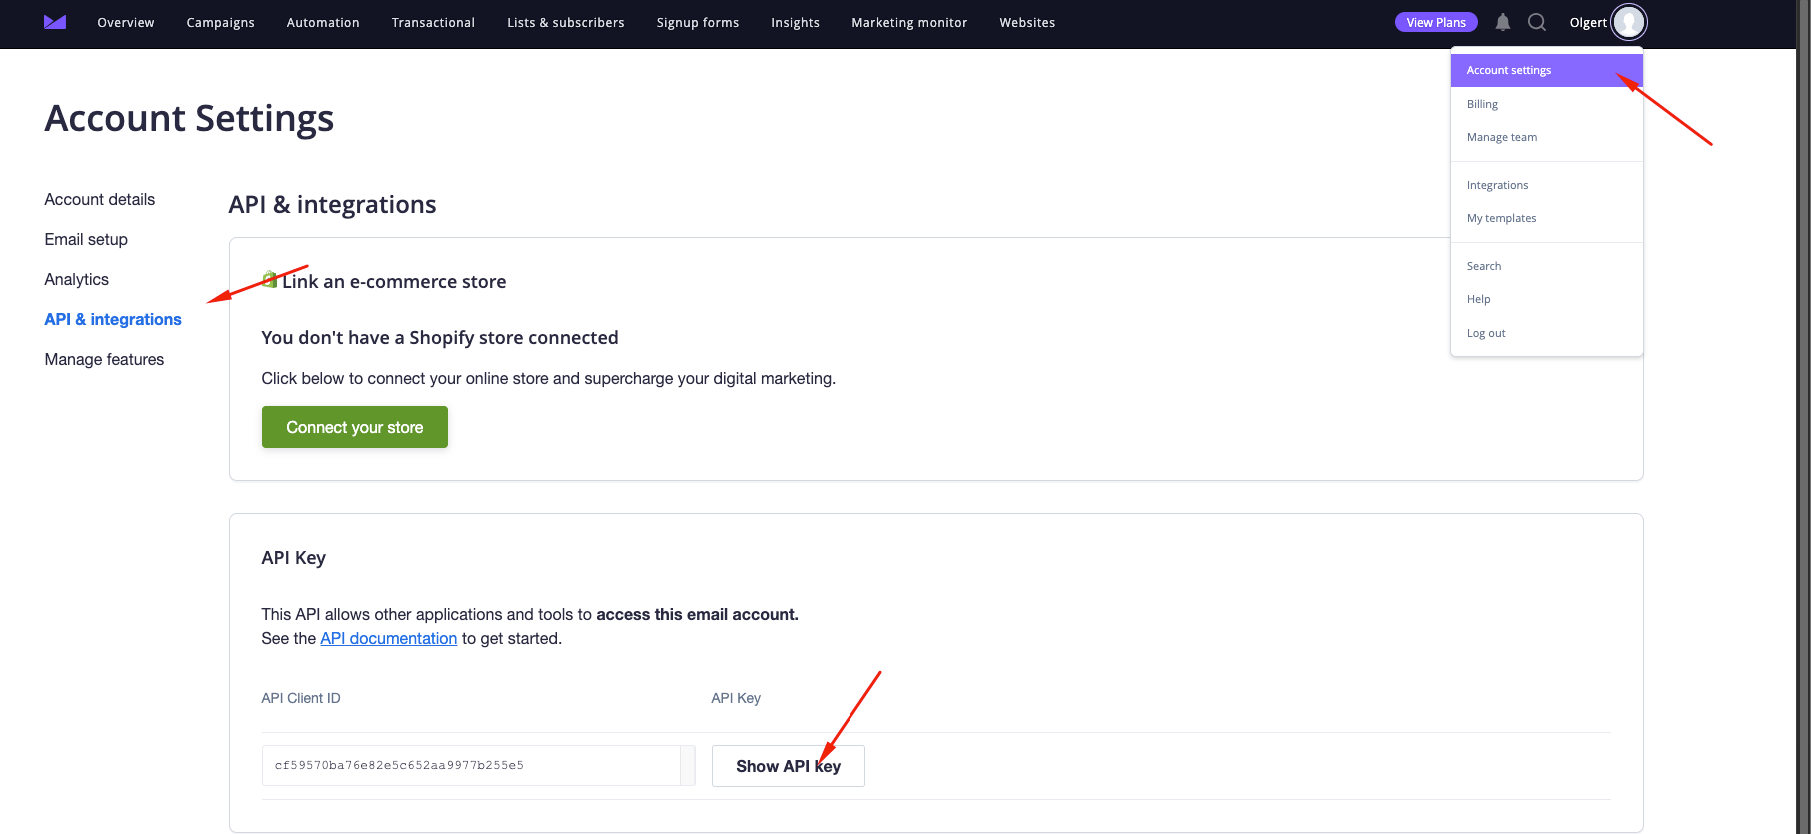
The Generate API Key option only appears after your Campaign Monitor account has been verified. If you do not see it, confirm your account from the verification email Campaign Monitor sent you.
Step 2: Add Campaign Monitor to LanderLab
Go to your landing page
In LanderLab, go to Landing Pages and open the landing page where you want to add Campaign Monitor.
Find Campaign Monitor
Search for Campaign Monitor or open the CRM category, then click Campaign Monitor.
Enter your credentials
Fill in the following fields:
- Name - A label for this account (e.g. “Campaign Monitor”). This is only used to identify the account inside LanderLab.
- API Key - Paste the API key you copied from Campaign Monitor.
Step 3: Map Your Fields
LanderLab shows your form fields on the left and a dropdown to pick the matching Campaign Monitor field on the right.Map Email
Map your form’s email field to the Campaign Monitor email field. Campaign Monitor uses email to add or update a subscriber, so this mapping is required.
Map any extra fields
Map any other fields you want to send. LanderLab also includes tracking fields you can pass along:
- LL Lander URL
- LL Visitor IP
- LL Visitor User Agent
- LL Submission Time UTC
- LL Session Time
- LL Variant ID
Step 4: Review and Connect
Review your mapping
The final step shows everything that will be sent to Campaign Monitor for every lead, including each mapped field. Review it carefully. If anything looks off, click Back to make changes.
Tips for Campaign Monitor Integration
- Always map Email - Email is what Campaign Monitor uses to identify each subscriber, so this field must be mapped.
- Reuse your account - Because Campaign Monitor is saved globally, you only enter the API key once, then connect it to other landing pages in a few clicks.
- Pass tracking data - Map fields like LL Lander URL and LL Variant ID to see which page and variant each lead came from.
- Test with a real submission - After connecting, submit a test lead and confirm the subscriber appears in Campaign Monitor within a few seconds.
Troubleshooting
My API key is not accepted
My API key is not accepted
Make sure you copied the full key after clicking Show API key in Account settings > API & integrations. If you regenerated the key in Campaign Monitor, update it in LanderLab to match.
I cannot see the Show API key option
I cannot see the Show API key option
The API key only appears after your Campaign Monitor account is verified. Open the verification email from Campaign Monitor and confirm your account, then try again.
Leads are not appearing in Campaign Monitor
Leads are not appearing in Campaign Monitor
Confirm the integration is active on your landing page and that the email field is mapped. Then submit a test lead and check your subscriber list in Campaign Monitor.