

How it works
- The user reaches the step containing the Signature block.
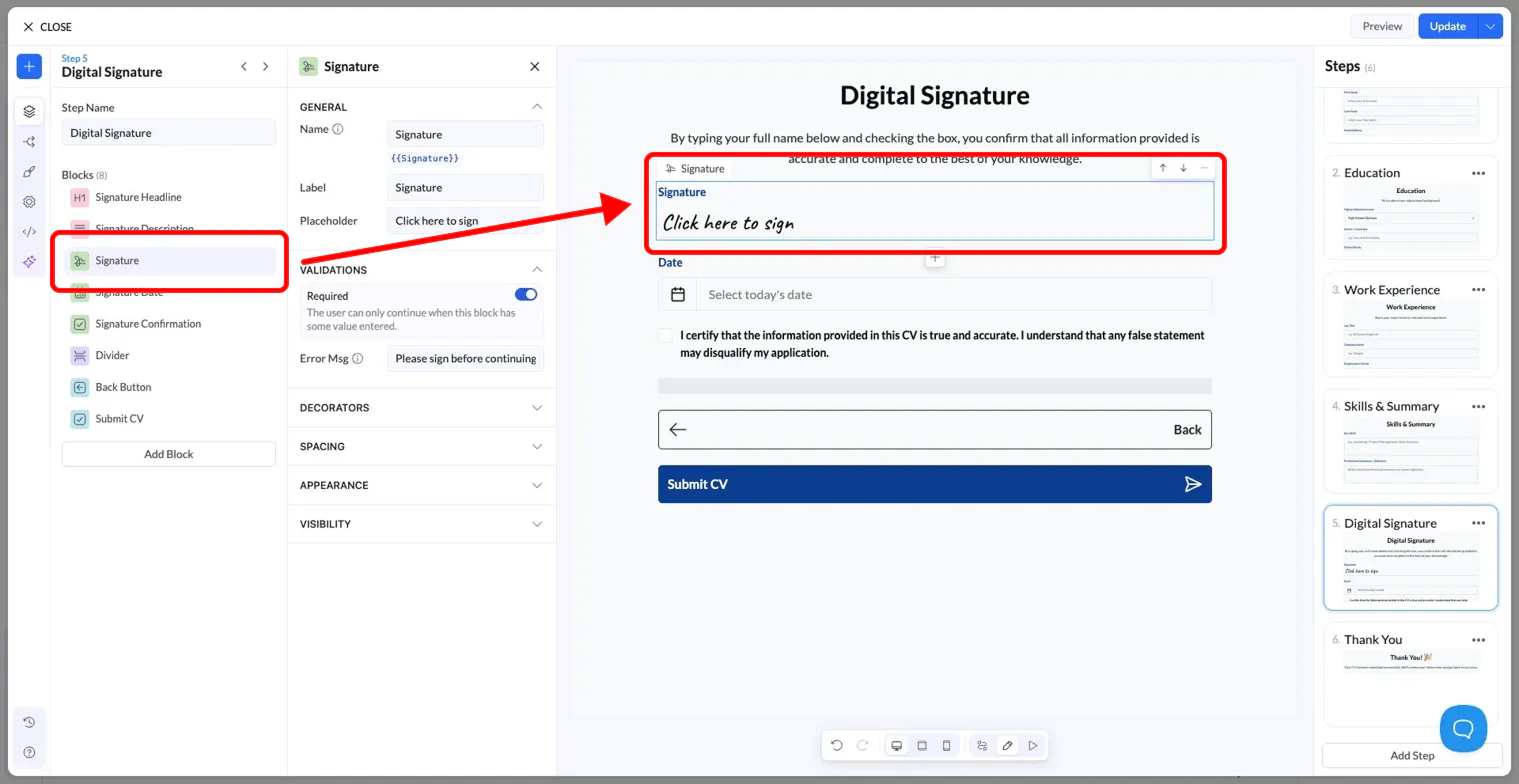
- They click the signature field, which shows a “Click here to sign” placeholder by default.
- They type or write their signature inside the field.
- On submission, LanderLab saves the signature as an image and stores a link to that image in the CRM under the lead’s record.
Settings
The Signature block shares the same settings panel as other blocks in LanderLab. Here is what each section covers: General| Setting | Description |
|---|---|
| Name | The internal field name used to reference this block, for example in the CRM or quiz API. The default value is Signature and the variable shown is {{Signature}}. |
| Label | The visible label displayed above the field on the page. |
| Placeholder | The text shown inside the field before the user interacts with it. Defaults to “Click here to sign”. |
| Setting | Description |
|---|---|
| Required | When enabled, the user cannot proceed to the next step without entering a signature. |
| Error Msg | The message shown to the user if they try to continue without signing. Defaults to “Please sign before continuing”. |
Where the signature is stored
Once the form is submitted, the signature is converted to an image and saved. You will find it in the LanderLab CRM as a URL link inside the lead’s record, under the field mapped to theSignature variable.
Tips
- Place the Signature block on the last step of your funnel, just before the submit button, so users sign as a final confirmation.
- Always enable the Required toggle to make sure no lead is submitted without a signature.
- Use a clear Signature Headline and Signature Description block above it to explain what the user is agreeing to. This improves trust and reduces drop-off.
- Keep the confirmation checkbox text specific. For example: “I certify that the information provided is true and accurate.”