

Before You Begin
Make sure you have:- An active Cloudflare account
- Your domain already added to Cloudflare (or ready to be transferred)
- Your Cloudflare Global API Key (see how to find your API key)
- Admin permissions in LanderLab
LanderLab uses Cloudflare to handle DNS queries and configure settings for landing pages. We strongly recommend transferring your domain to a free Cloudflare account and then linking it to LanderLab for the best performance.
Step 1: Open the Domains Settings
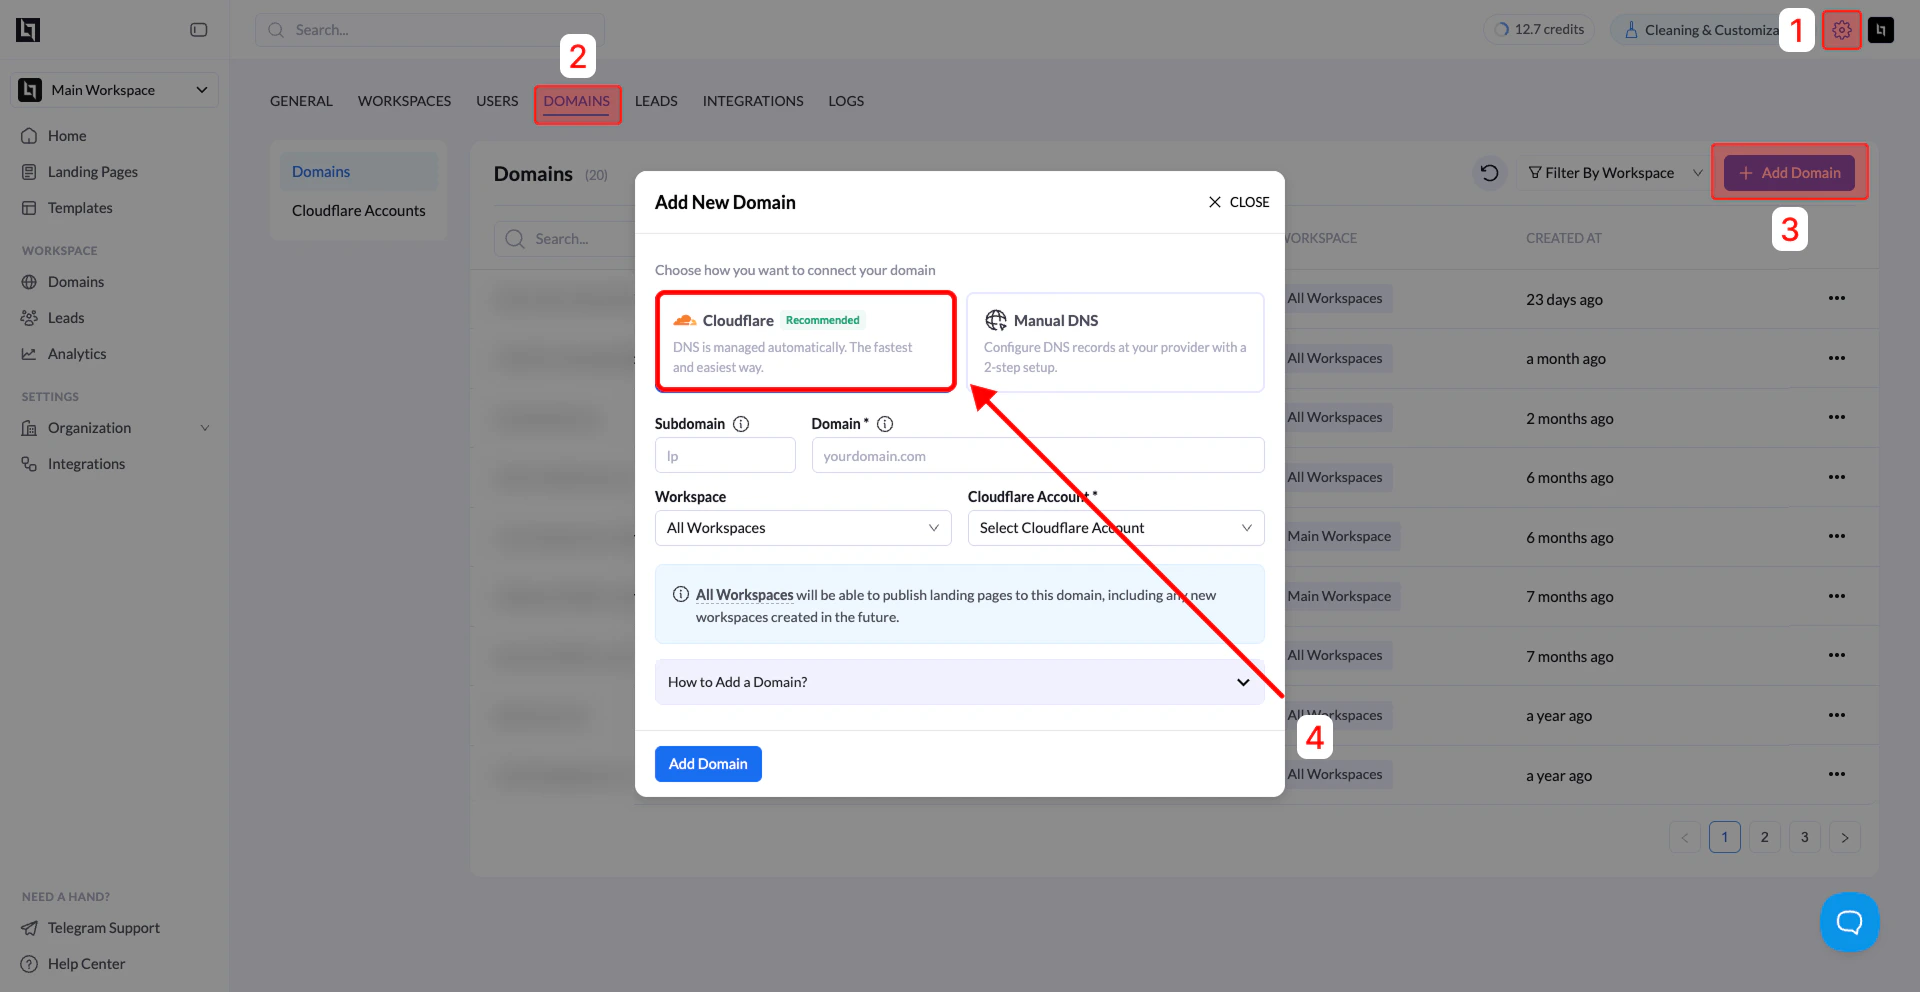
- Log in to your LanderLab dashboard.
- Go to Settings.
- Click Domains.
Step 2: Click Add Domain
- Click Add Domain in the top-right corner.
- The Add New Domain window will open.
Step 3: Enter Domain Information
Fill in the required fields:| Field | Description |
|---|---|
| Subdomain | Enter the subdomain you want to use for landing pages (example: lp). This field is optional. |
| Domain | Enter your main domain (example: yourdomain.com) |
| Workspace | Choose which workspace can publish pages to this domain |
| Cloudflare Account | Select the Cloudflare account connected to LanderLab |
Step 4: Choose Workspace Access
You can choose how the domain is used across your workspaces. Options- All Workspaces - any workspace can publish landing pages to this domain, including new workspaces created in the future
- Specific Workspace - restrict publishing to a specific workspace only
Step 5: Add the Domain
Click Add Domain. LanderLab will automatically configure the necessary DNS records through your connected Cloudflare account.Step 6: Update Your Domain Nameservers
After clicking Add Domain, LanderLab will display a Domain Nameservers window. This window shows the two Cloudflare nameservers that your domain needs to point to. You need to update your nameservers at the domain registrar where you purchased your domain (for example: Namecheap, GoDaddy, or any other registrar). To update your nameservers:- Copy the two nameservers shown in the window (use the Copy button next to each one).
- Log in to your domain registrar.
- Go to the DNS or Nameserver settings for your domain.
- Replace the existing nameservers with the two Cloudflare nameservers you copied from LanderLab.
- Save the changes.
The nameservers shown are unique to your Cloudflare account. Always use the exact values displayed in the LanderLab window rather than copying them from other sources.
Nameserver changes can take anywhere from a few minutes to 48 hours to propagate globally, depending on your registrar. Most updates complete within a few hours.
How to Find Nameservers Again
If you closed the nameserver window or need to view the nameservers later, you can retrieve them at any time:- Go to Settings then Domains in your LanderLab dashboard.
- Find the domain in your list. It will show a Pending status.
- Click on the Pending status label.
- The Domain Nameservers window will open again with the nameservers you need.
Step 7: Wait for Activation
After updating your nameservers:- The domain will appear in the Domains list with a Pending status.
- Once the nameserver changes propagate, the status will change to Active.