

What You Need
- A LanderLab account with at least one landing page.
- A ClickFlare account.
- Claude on the web or Claude Desktop.
Setup
1
Connect LanderLab to Claude
- Open Claude and go to Settings > Connectors.
- Click Browse connectors, search for
LanderLab, and select it. - Click Connect, sign in to LanderLab, and click Authorize.
- Review the tool permissions. Set the tools you use often to Always allow so Claude does not ask on every action.
LanderLab is a listed connector, so there is no URL to paste. Full walkthrough: Connect LanderLab to Claude.ai via MCP.
2
Create a ClickFlare API key
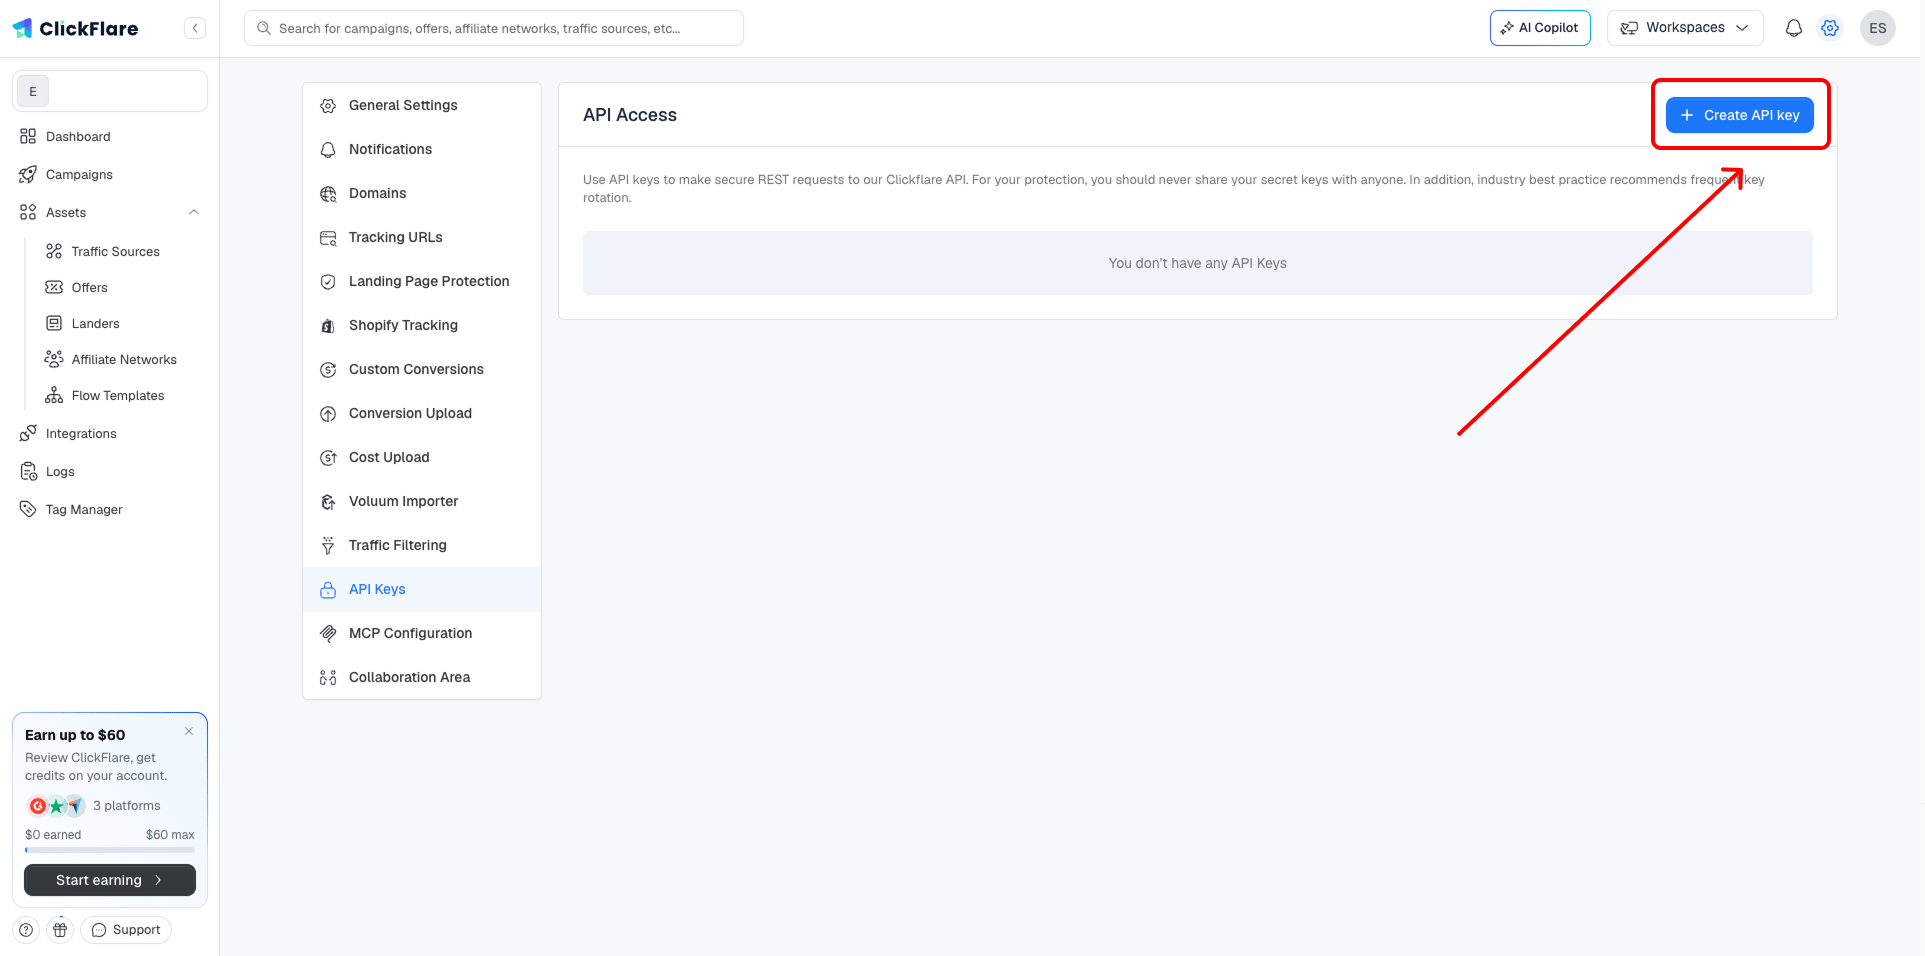
- Log in to ClickFlare and open Settings > API Keys.
- Click Create API key, give it a descriptive name, and click Generate.
- In the Your API Key window, switch from the HTTP tab to the MCP tab.
-
Copy the MCP server URL. It already contains your API key.
3
Add ClickFlare as a custom connector
ClickFlare is not in Claude’s connector directory yet, so you add it manually.
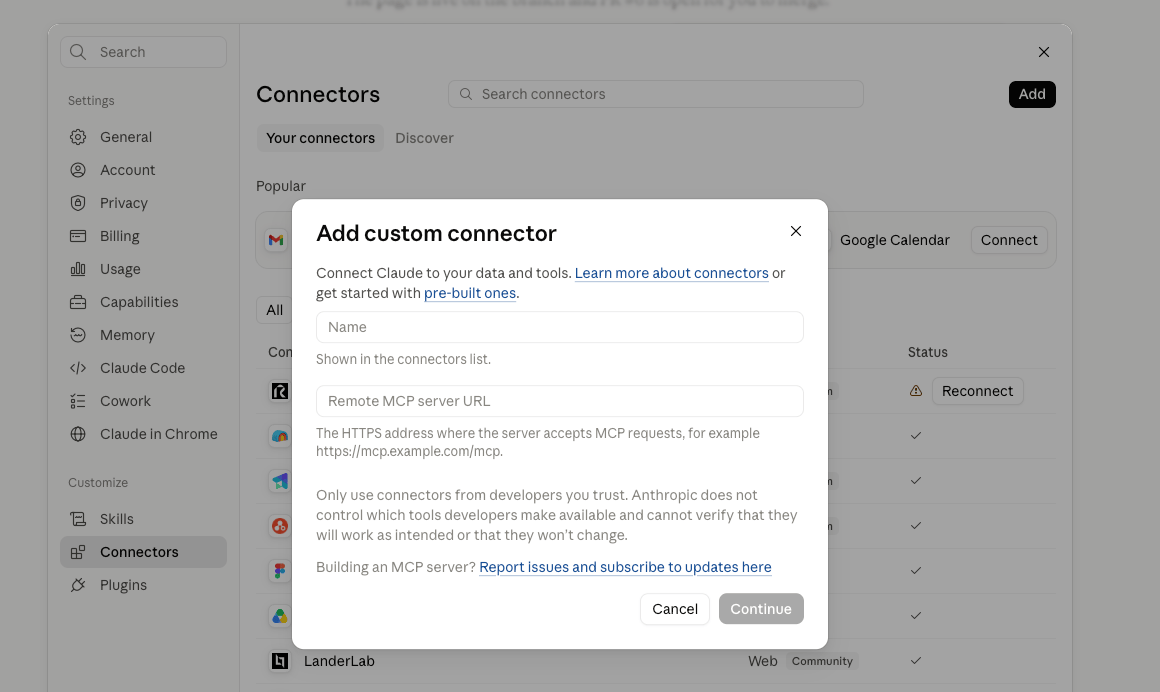
- Go back to Settings > Connectors in Claude and click Add > Add custom connector.
- Set Name to
ClickFlare. - Paste the MCP server URL from the previous step into Remote MCP server URL, then click Continue.
- Leave Authentication set to None. The API key is already inside the URL, so no OAuth sign-in and no request headers are needed.
- Click Add, then click Connect on the ClickFlare connector.
4
Send the lander to ClickFlare
Start a new chat and ask for it directly. You can point at the lander by URL or by name:Claude pulls the page URL from LanderLab, then creates the lander in ClickFlare. Approve the tool calls when prompted.
Verify It Worked
Open ClickFlare and go to Assets > Landers. The new lander appears in the list with the name and URL you gave it, ready to drop into a campaign or flow.Example Prompts
- “List my LanderLab landers and tell me which ones are not in ClickFlare yet”
- “Add my three published landers to ClickFlare with the same names”
- “Create a ClickFlare lander from the Summer Offer preview URL, 2 CTAs”
- “Rename the Summer Offer lander in ClickFlare to Summer Offer V2”