

How It Works
If a user becomes inactive for a defined period of time, the system will:- Capture data from the current step
- Include data from previous steps
- Send it to your configured integration (CRM, webhook, etc.)
How to Enable Inactivity Auto-Submit
1. Open Your Form
- Go to your landing page
- Open the form or quiz you want to configure
2. Access Settings
- Go to the Settings tab inside the builder
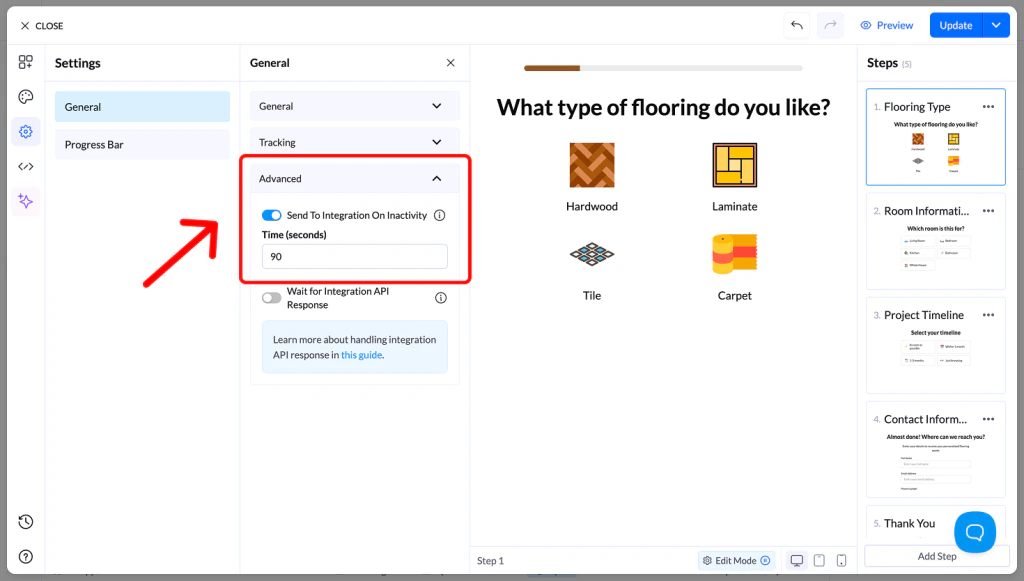
- Locate the Advanced section
3. Enable the Feature
- Find Inactivity Submission
- Toggle it ON
4. Set the Timer
- Enter the inactivity time (in seconds)
- This defines how long the system waits before submitting data
5. Save Changes
- Click Save
- Publish or Republish your page
Why Use Inactivity Auto-Submit
- Capture leads that don’t finish the flow
- Improve visibility into drop-off points
- Ensure data is still sent to your CRM