Use Manual DNS if your domain is managed outside Cloudflare or if you prefer to configure DNS records yourself.
This method connects your domain by adding DNS records in your domain provider, then verifying them inside LanderLab.
Before You Start
Make sure the following requirements are met:
- You have access to your domain DNS settings (GoDaddy, Namecheap, etc.)
- Only admins can add domains in LanderLab
- Manual DNS usually requires a subdomain (example:
lp.yourdomain.com), not the root domain (yourdomain.com)
Step 1: Open Domains in Settings
- In your LanderLab dashboard, go to Settings.
- Click the Domains tab.
- You will see the Domains list and the option to add a new domain.
Step 2: Click Add Domain
Click Add Domain in the top-right corner.
If you do not see this button, you likely do not have admin permissions.
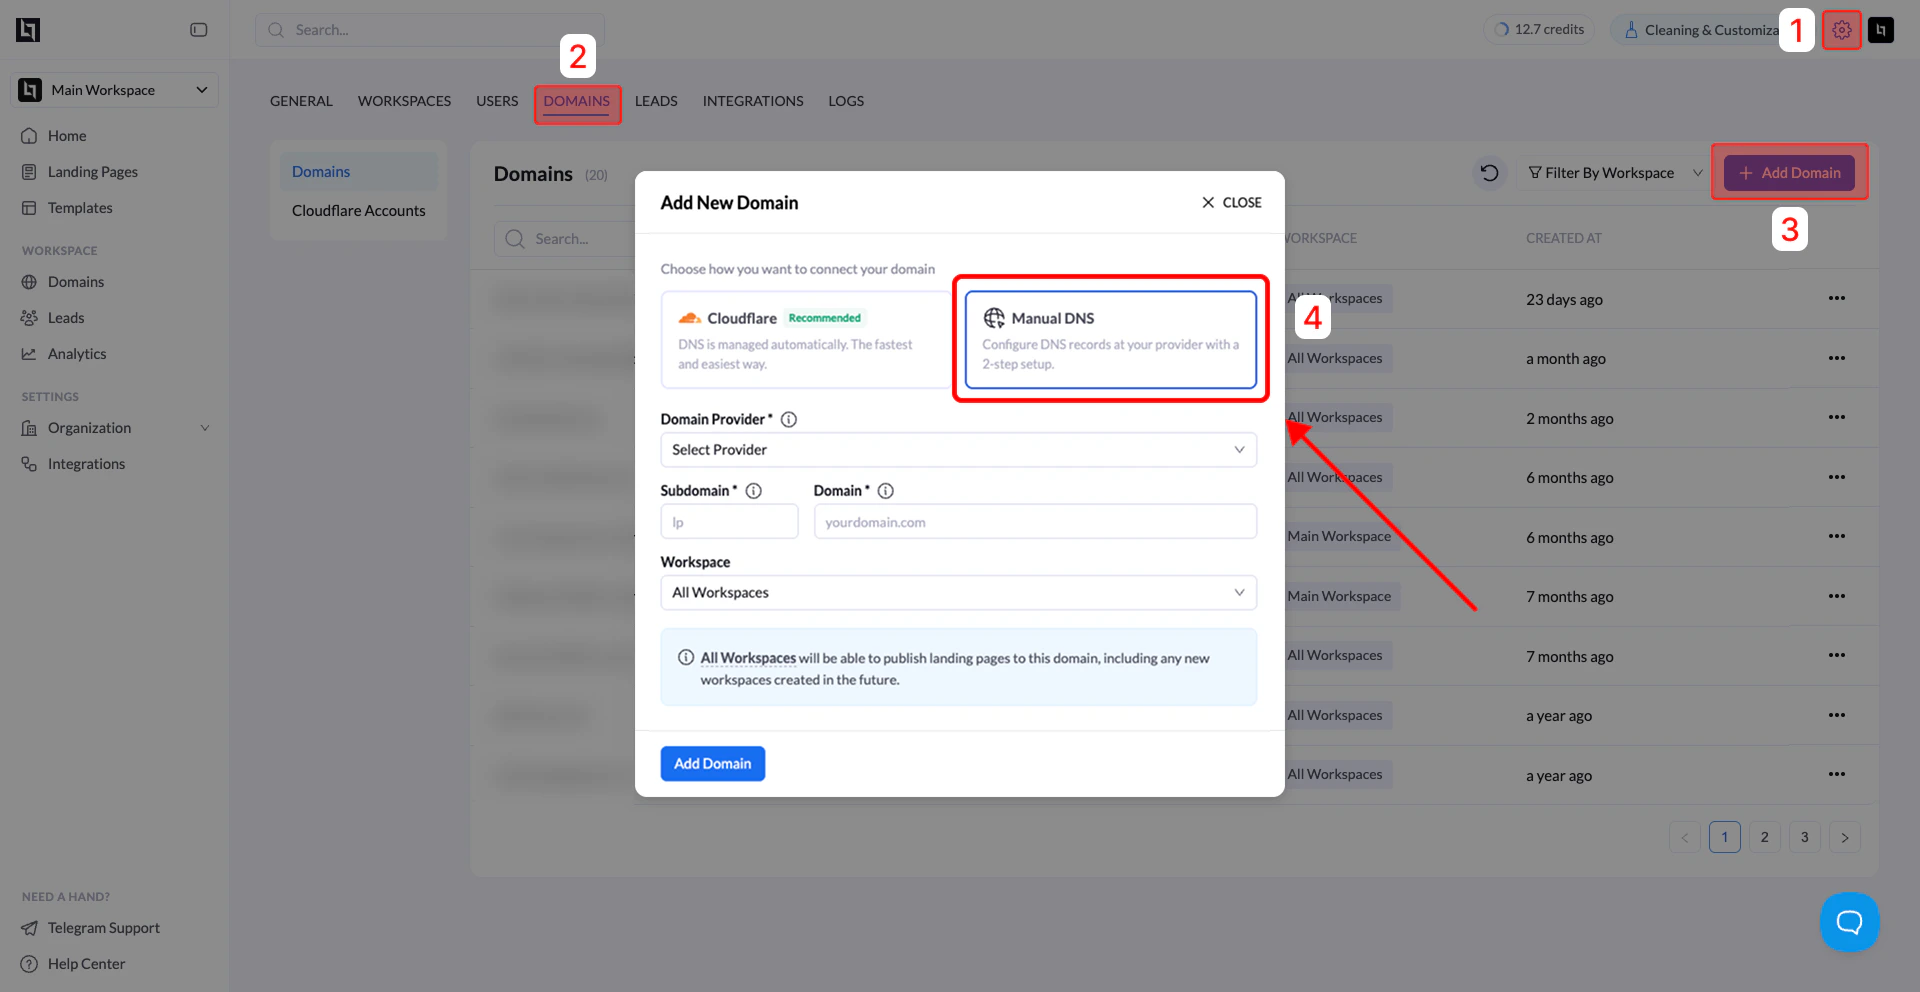
Step 3: Choose Manual DNS
In the Add New Domain window, you will see two connection options:
- Cloudflare (Recommended) – automatic DNS configuration
- Manual DNS – configure DNS records manually
Select Manual DNS.
Step 4: Enter Domain Details
Fill in the required fields:
| Field | Description |
|---|
| Domain Provider | Select your provider (GoDaddy, Namecheap, etc.) |
| Subdomain | The subdomain you want to use (example: lp) |
| Domain | Your main domain (example: yourdomain.com) |
| Workspace | Choose where the domain will be available |
- All Workspaces – any workspace can publish to this domain
- Specific Workspace – only selected workspace can use it
Click Add Domain.
Root Domain Notes
Some domain providers do not allow CNAME records on root domains.
Because of this, Manual DNS usually requires a subdomain such as:
lp.yourdomain.com
www.yourdomain.com
yourdomain.com), you can:
- Connect the domain using Cloudflare (recommended), or
- Use a subdomain like www and redirect the root domain to it.
Step 5: Add the DNS Records
After clicking Add Domain, LanderLab will open the Domain Verification window.
You will be asked to add DNS records.
Typically you will see two records:
| Record Type | Purpose |
|---|
| CNAME | Routes the subdomain to LanderLab |
| TXT | Verifies ownership of the domain |
Add the records in your domain provider
- Log in to your domain provider dashboard
- Open DNS Management or Zone Editor
- Create the records exactly as shown in LanderLab:
- Match the Type (CNAME / TXT)
- Match the Host / Name
- Match the Value / Target
Tips:
- Do not include
https://
- If a record already exists with the same host, edit or remove it to avoid conflicts
Step 6: Verify the Records
- Return to the Domain Verification window in LanderLab
- Click Refresh
If the records are correct and DNS propagation has started, the verification step will continue.
Step 7: Add the SSL Record (HTTPS)
After the first records are verified, LanderLab will prompt the next step:
A final SSL DNS record will appear.
What to do
- Wait a few minutes
- Click Refresh
- Copy the SSL record shown
- Add it to your DNS provider (same process as before)
- Return to LanderLab
- Click Refresh
Once verified, HTTPS will be enabled for your domain.
Step 8: Confirm the Domain is Active
After all records are added:
- Go to Settings → Domains
- Click the Refresh icon
- Locate your domain in the list
- Confirm the Status shows “Active”
Your domain is now ready to be used for publishing landing pages.
Common Issues
Domain still shows Pending
DNS propagation may take a few minutes up to 24–48 hours depending on the provider.
Some DNS providers expect:
Others expect:
Follow your provider’s interface format, but ensure the intent matches the instructions.
CNAME Not Allowed on Root DomainIf your provider does not allow CNAME records on root domains:
- Use a subdomain (recommended)
- Or connect your domain using Cloudflare