

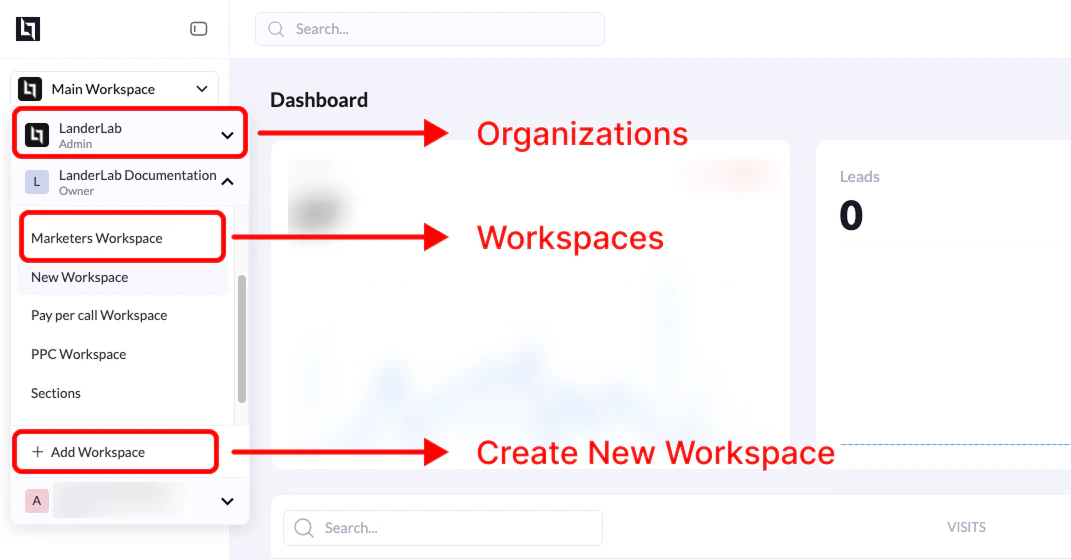
Create a Workspace from the Sidebar
Steps
- From your LanderLab dashboard, locate the workspace selector in the top-left sidebar.
- Click the workspace dropdown to open the list of available workspaces.
- Scroll to the bottom of the list.
- Click + Add Workspace.
- Enter a name for the new workspace.
- Confirm the creation.
Create a Workspace from Settings
Steps
- Go to Settings.
- Click the Workspaces tab.
- You will see a table listing your existing workspaces.
- Click Add Workspace.
- Enter a name for the new workspace.
- Confirm the creation.
What Happens After Creating a Workspace
Once the workspace is created:- It becomes available in the workspace selector in the sidebar
- You can create landing pages, domains, and campaigns inside that workspace
- Users can be assigned specific roles and permissions per workspace
Permissions
Only Organization Admins can create new workspaces.
- Workers
- Viewers