The Custom Code section allows you to add custom JavaScript to your landing page. This is useful when integrating external tools such as tracking scripts, analytics platforms, or third-party widgets.
You can add scripts that run either in the page header or before the closing body tag, depending on how the script needs to load.
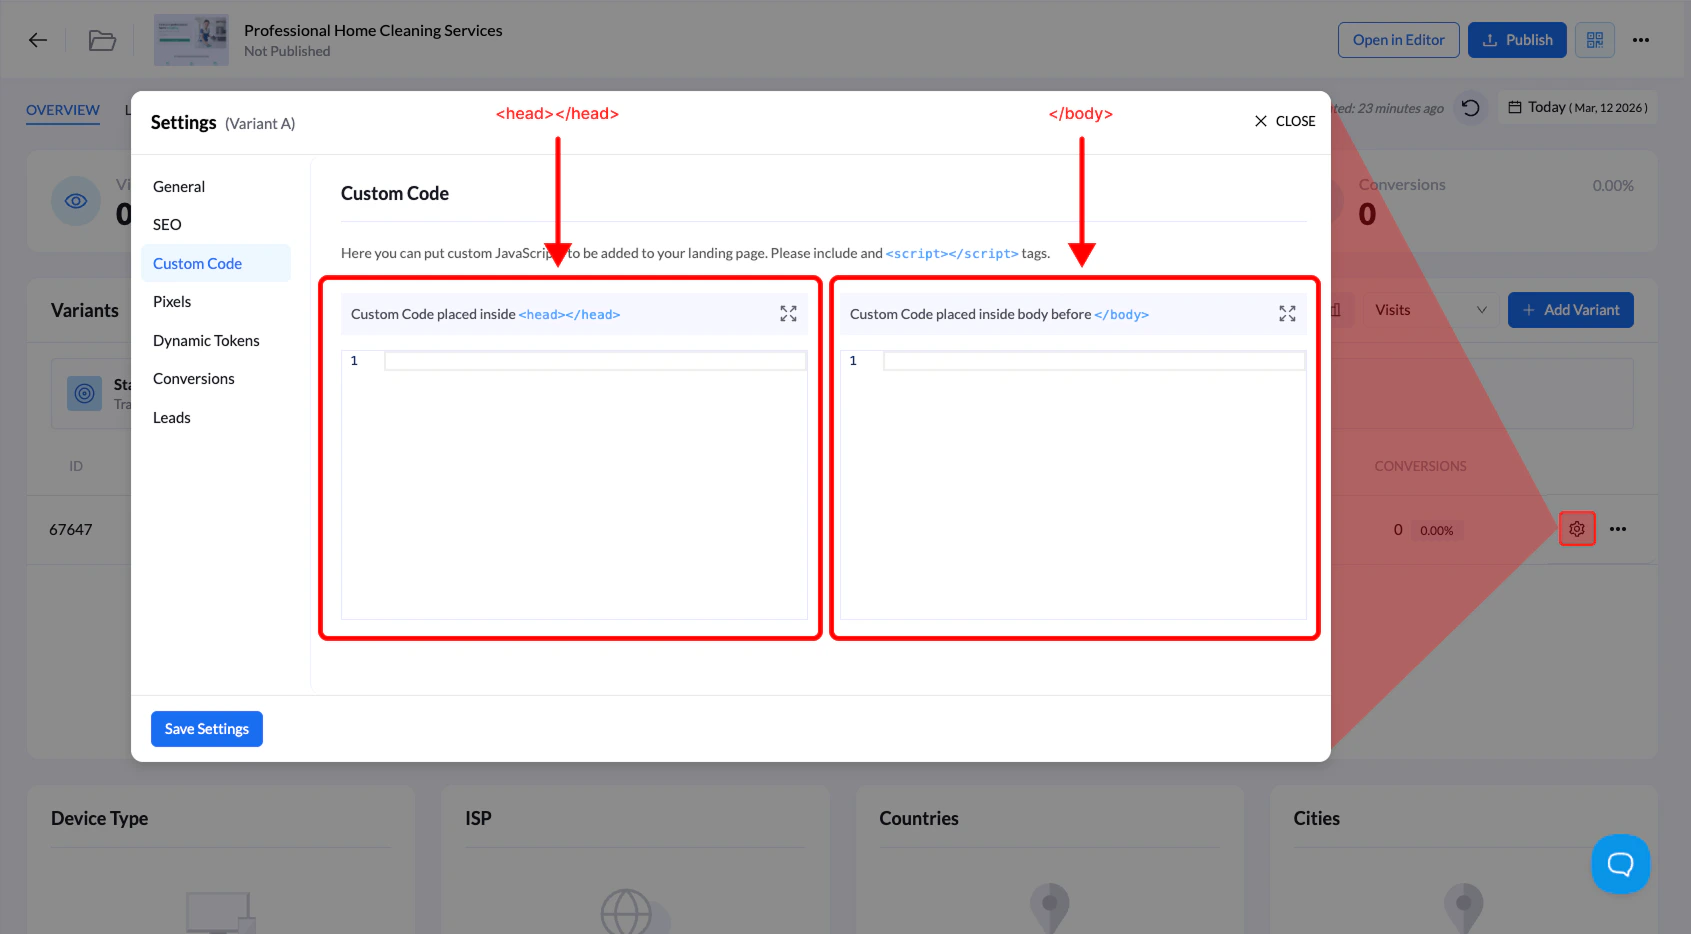
Where Custom Code Can Be Added
Inside the Custom Code settings you will find two script placement areas:
| Location | Description |
|---|
Inside<head> | Scripts placed here load early when the page loads. This is commonly used for analytics tools, tracking pixels, or scripts that must initialize before the page renders. |
Before</body> | Scripts placed here load after the page content. This is ideal for trackers, widgets, and scripts that should run after the page has finished loading. |
How to Add Custom Code
Follow the steps below to add custom JavaScript to your landing page.
1. Open your landing page
Go to Landing Pages and click the name of the landing page you want to edit.
2. Open the Settings panel
Click the Settings tab on the landing page overview screen.
3. Go to Custom Code
From the settings menu on the left side, select Custom Code.
4. Add your script
Paste your JavaScript code into one of the available fields:
- Custom Code inside
<head>
- Custom Code before
</body>
Make sure your code includes the proper <script></script> tags.
5. Save your changes
Click Save Settings to apply the custom code.
When to Use Custom Code
Custom code is commonly used for:
- Click tracking scripts
- Analytics tools (Google Analytics, etc.)
- Third-party widgets
- Conversion tracking scripts
- Custom JavaScript functionality
Tip: If you’re adding tracker scripts (like ClickFlare or Voluum), they are usually placed before the closing </body> tag, so they load after the page content.