Connecting your Cloudflare account to LanderLab allows you to automatically manage DNS records and connect domains faster. Once connected, LanderLab can configure DNS settings for your domains directly through Cloudflare.
Step-by-Step Guide
1. Open Domain Settings
- From your LanderLab dashboard, go to Settings.
- Click Domains.
- Click Manage Domains in the top-right corner.
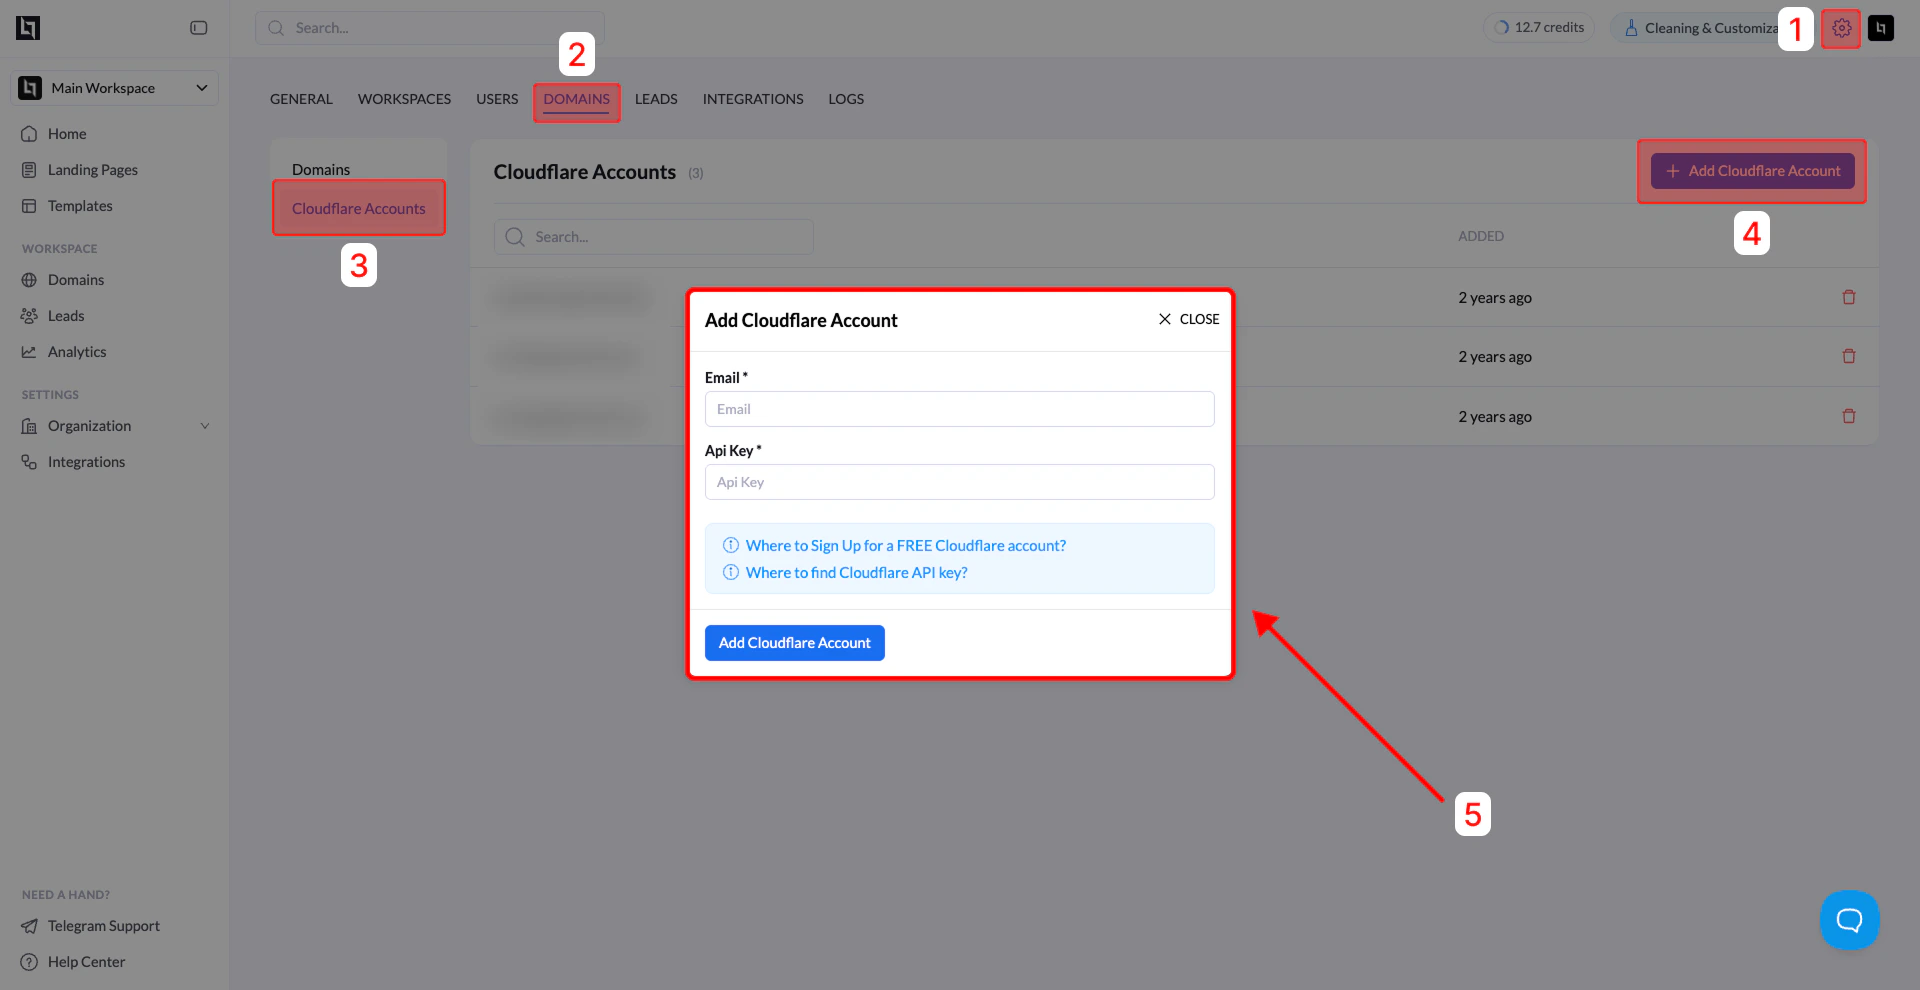
2. Navigate to Cloudflare Accounts
Inside the Domains section:
- Click Cloudflare Accounts in the left sidebar.
3. Add a Cloudflare Account
- Click + Add Cloudflare Account.
- A modal window titled Add Cloudflare Account will appear.
4: Get Your Cloudflare API Key
You will need two pieces of information from your Cloudflare account:
- Your Cloudflare account email
- Your Global API Key
How to find the Global API Key
- Log in to your Cloudflare dashboard.
- Click your profile icon in the top-right corner.
- Select My Profile or Settings.
- Navigate to the API Tokens / API Keys section.
- Locate Global API Key.
- Click View to reveal the key.
- You may need to enter your password or verification code.
Copy the Global API Key.
5: Enter Your Credentials in LanderLab
Return to the Add Cloudflare Account modal in LanderLab.
Enter:
| Field | Description |
|---|
| Email | The email associated with your Cloudflare account |
| API Key | Your Cloudflare Global API Key |
6: Complete the Connection
Click Add Cloudflare Account.
If the credentials are correct, you will see a success message, and your Cloudflare account will appear in the list of connected accounts.
Why Connect Cloudflare?
Connecting Cloudflare allows LanderLab to:
- Automatically configure DNS records
- Simplify domain connection
- Enable faster domain verification
- Support root domain connections
Tip: Using Cloudflare integration is the recommended method for connecting domains, as it removes the need to manually configure DNS records.