> ## Documentation Index
> Fetch the complete documentation index at: https://docs.landerlab.io/llms.txt
> Use this file to discover all available pages before exploring further.
# Set Up Outbrain Pixel Integration
> Learn how to add the Outbrain Pixel to your landing pages in LanderLab to track conversions, measure ad performance, and optimize your Outbrain Amplify campaigns.
 Add the Outbrain Pixel to your landing pages in LanderLab to track visitor actions, measure conversions, and send event data back to Outbrain so your campaigns can optimize on real results.
## What is the Outbrain Pixel?
The Outbrain Pixel is a small piece of JavaScript that runs in the visitor's browser. When someone lands on your page after clicking an Outbrain ad, the pixel fires and reports that visit and any conversion back to Outbrain Amplify.
That data is what lets Outbrain attribute conversions to the right campaign, build retargeting audiences, and optimize delivery toward the publishers and placements that actually perform.
LanderLab handles the pixel installation for you. Instead of pasting the tracking code into your page, you enter your Marketer ID and LanderLab adds the script on publish.
Once you add an Outbrain Pixel integration, it is saved **globally** in your account. You can connect the same pixel to as many landing pages as you want without entering the details again.
## How to Add the Outbrain Pixel
Go to **Landing Pages** and click the **name of the landing page** where you want to add the pixel.
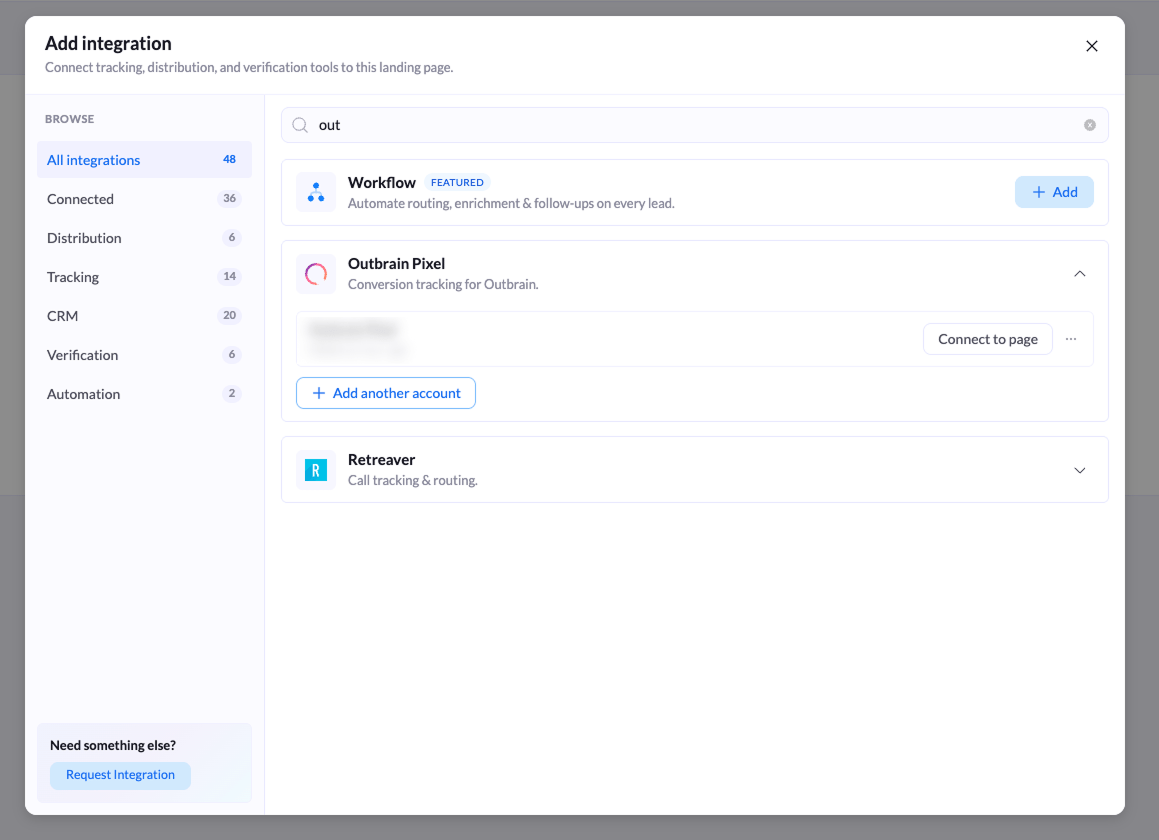
Click **Add Integration**, then search for **Outbrain** in the search bar or open the **Tracking** category on the left.
Click **Outbrain Pixel**, then click **Add another account** if you already have one saved. A short configuration form appears.
Add the Outbrain Pixel to your landing pages in LanderLab to track visitor actions, measure conversions, and send event data back to Outbrain so your campaigns can optimize on real results.
## What is the Outbrain Pixel?
The Outbrain Pixel is a small piece of JavaScript that runs in the visitor's browser. When someone lands on your page after clicking an Outbrain ad, the pixel fires and reports that visit and any conversion back to Outbrain Amplify.
That data is what lets Outbrain attribute conversions to the right campaign, build retargeting audiences, and optimize delivery toward the publishers and placements that actually perform.
LanderLab handles the pixel installation for you. Instead of pasting the tracking code into your page, you enter your Marketer ID and LanderLab adds the script on publish.
Once you add an Outbrain Pixel integration, it is saved **globally** in your account. You can connect the same pixel to as many landing pages as you want without entering the details again.
## How to Add the Outbrain Pixel
Go to **Landing Pages** and click the **name of the landing page** where you want to add the pixel.
Click **Add Integration**, then search for **Outbrain** in the search bar or open the **Tracking** category on the left.
Click **Outbrain Pixel**, then click **Add another account** if you already have one saved. A short configuration form appears.
 | Field | Description |
| :-------------- | :--------------------------------------------------------------------------------------------------------------------------------- |
| **Name** | A label to identify this pixel (e.g. "Outbrain Pixel" or "Outbrain - Insurance"). Useful when you save more than one account. |
| **Marketer ID** | Your Outbrain Marketer ID, a long alphanumeric string such as `00f4e3f55f8511e0a1e0a1b2c3d4e5f6a7`. Found in your Amplify account. |
Click **Add Outbrain Pixel** to save the account. It is stored globally, so it will be ready to use on any other landing page.
Click **Connect to page**, choose which variants should run the pixel under **Apply to variants**, then confirm with **Connect to page**.
| Field | Description |
| :-------------- | :--------------------------------------------------------------------------------------------------------------------------------- |
| **Name** | A label to identify this pixel (e.g. "Outbrain Pixel" or "Outbrain - Insurance"). Useful when you save more than one account. |
| **Marketer ID** | Your Outbrain Marketer ID, a long alphanumeric string such as `00f4e3f55f8511e0a1e0a1b2c3d4e5f6a7`. Found in your Amplify account. |
Click **Add Outbrain Pixel** to save the account. It is stored globally, so it will be ready to use on any other landing page.
Click **Connect to page**, choose which variants should run the pixel under **Apply to variants**, then confirm with **Connect to page**.
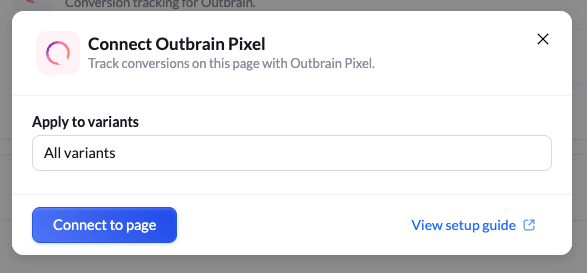 **All variants** is selected by default. Keep it so every version of your A/B test reports back to Outbrain, or pick a single variant to isolate one design.
Click **Publish** or **Republish**. The pixel only runs on the live page, so tracking starts after publishing.
## Connect the Outbrain Pixel to Another Landing Page
Because Outbrain accounts are saved globally, you never need to enter the Marketer ID twice.
Go to **Landing Pages** and open the page you want to track.
Click **Add Integration**, search for **Outbrain**, and you will see your saved account listed. Click **Connect to page** next to it.
Select the variants under **Apply to variants**, confirm, then **Publish** or **Republish** the page.
## Where to Find Your Outbrain Marketer ID
1. Log in to [Outbrain Amplify](https://my.outbrain.com).
2. Open the **Conversions** section from the top navigation.
3. Click **Install Outbrain Pixel** to view your pixel code.
4. Copy the long alphanumeric value shown as your **Marketer ID**. In the pixel code it appears next to `OB_ADV_ID`.
You do not need the rest of the pixel code. LanderLab injects the script automatically, so the Marketer ID is the only value you have to copy.
## How to Confirm the Pixel Is Working
Open the live URL of your landing page in a normal browser tab.
Go back to Amplify and open **Conversions**. Your pixel status should switch to active once the first events come in, usually within a few minutes.
If the pixel stays inactive, republish the landing page and make sure the correct variant was selected under **Apply to variants**. Ad blockers can also stop the pixel from firing, so test in a clean browser window.
## Why Use the Outbrain Pixel
* **Track conversions** - Measure sign-ups, form submissions, purchases, and other actions that happen after someone clicks your Outbrain ad.
* **Optimize campaign delivery** - Give Outbrain conversion data so it can shift budget toward the publishers and placements that convert.
* **Build retargeting audiences** - Reach visitors who landed on your page but did not convert, using audiences built from pixel data.
* **Measure real ROI** - Connect your Outbrain spend directly to landing page results instead of relying on clicks alone.
* **Works with A/B tests** - Apply the pixel to every variant and compare Outbrain conversion data next to LanderLab's built-in reporting.
**All variants** is selected by default. Keep it so every version of your A/B test reports back to Outbrain, or pick a single variant to isolate one design.
Click **Publish** or **Republish**. The pixel only runs on the live page, so tracking starts after publishing.
## Connect the Outbrain Pixel to Another Landing Page
Because Outbrain accounts are saved globally, you never need to enter the Marketer ID twice.
Go to **Landing Pages** and open the page you want to track.
Click **Add Integration**, search for **Outbrain**, and you will see your saved account listed. Click **Connect to page** next to it.
Select the variants under **Apply to variants**, confirm, then **Publish** or **Republish** the page.
## Where to Find Your Outbrain Marketer ID
1. Log in to [Outbrain Amplify](https://my.outbrain.com).
2. Open the **Conversions** section from the top navigation.
3. Click **Install Outbrain Pixel** to view your pixel code.
4. Copy the long alphanumeric value shown as your **Marketer ID**. In the pixel code it appears next to `OB_ADV_ID`.
You do not need the rest of the pixel code. LanderLab injects the script automatically, so the Marketer ID is the only value you have to copy.
## How to Confirm the Pixel Is Working
Open the live URL of your landing page in a normal browser tab.
Go back to Amplify and open **Conversions**. Your pixel status should switch to active once the first events come in, usually within a few minutes.
If the pixel stays inactive, republish the landing page and make sure the correct variant was selected under **Apply to variants**. Ad blockers can also stop the pixel from firing, so test in a clean browser window.
## Why Use the Outbrain Pixel
* **Track conversions** - Measure sign-ups, form submissions, purchases, and other actions that happen after someone clicks your Outbrain ad.
* **Optimize campaign delivery** - Give Outbrain conversion data so it can shift budget toward the publishers and placements that convert.
* **Build retargeting audiences** - Reach visitors who landed on your page but did not convert, using audiences built from pixel data.
* **Measure real ROI** - Connect your Outbrain spend directly to landing page results instead of relying on clicks alone.
* **Works with A/B tests** - Apply the pixel to every variant and compare Outbrain conversion data next to LanderLab's built-in reporting.