> ## Documentation Index
> Fetch the complete documentation index at: https://docs.landerlab.io/llms.txt
> Use this file to discover all available pages before exploring further.
# Trigger Node (Lead) Setup Guide
> Learn how to add the Lead trigger to a LanderLab workflow, connect one or more landing pages, and configure it to fire on every new lead captured.
Every workflow starts with a trigger. The trigger is the first node on the canvas, and it decides *when* the workflow runs. Until you add one, the rest of the workflow has nothing to react to.
LanderLab currently offers one trigger: **Lead**. It fires whenever a new lead is captured on a landing page you connect to it. Once the trigger is in place, you add nodes after it to filter, branch, modify, and send that lead wherever you need it.
A workflow can have only one trigger, and it must be the first node. You build everything else on top of it.
## Add the Lead trigger
A new workflow opens with an empty canvas and a single **+** button in the center.
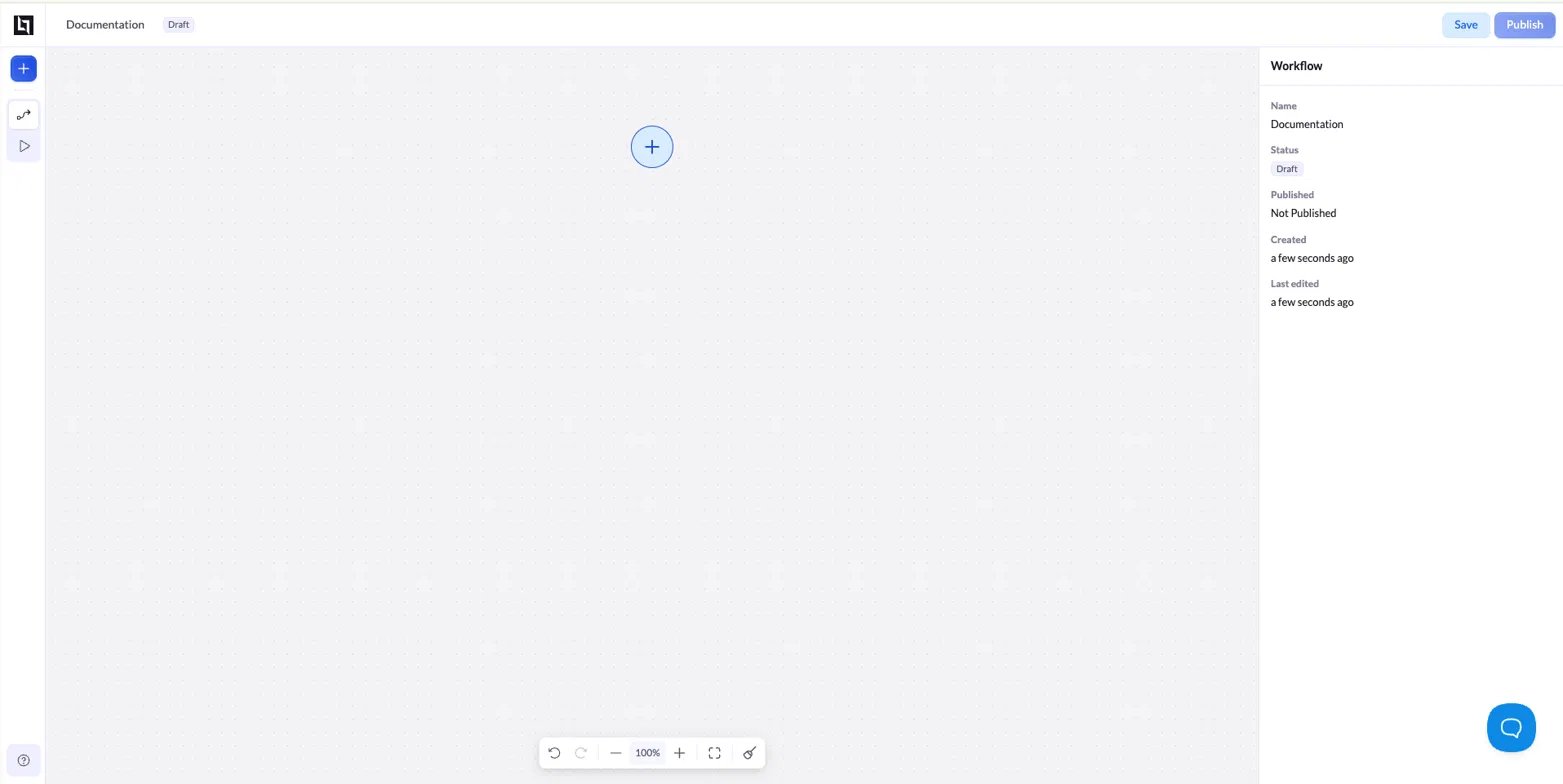 Click the **+** button in the center of the canvas. The **Search Nodes** menu opens.
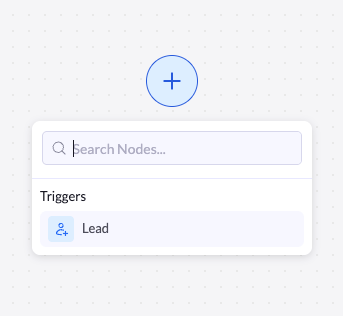
Under **Triggers**, click **Lead**. You can also start typing in the search box to filter the list.
Click the **+** button in the center of the canvas. The **Search Nodes** menu opens.
Under **Triggers**, click **Lead**. You can also start typing in the search box to filter the list.
 The **Connect a Landing Page** dialog opens. Select the page that should fire the workflow, then click **Apply**. See [Connect a landing page](#connect-a-landing-page) below for details.
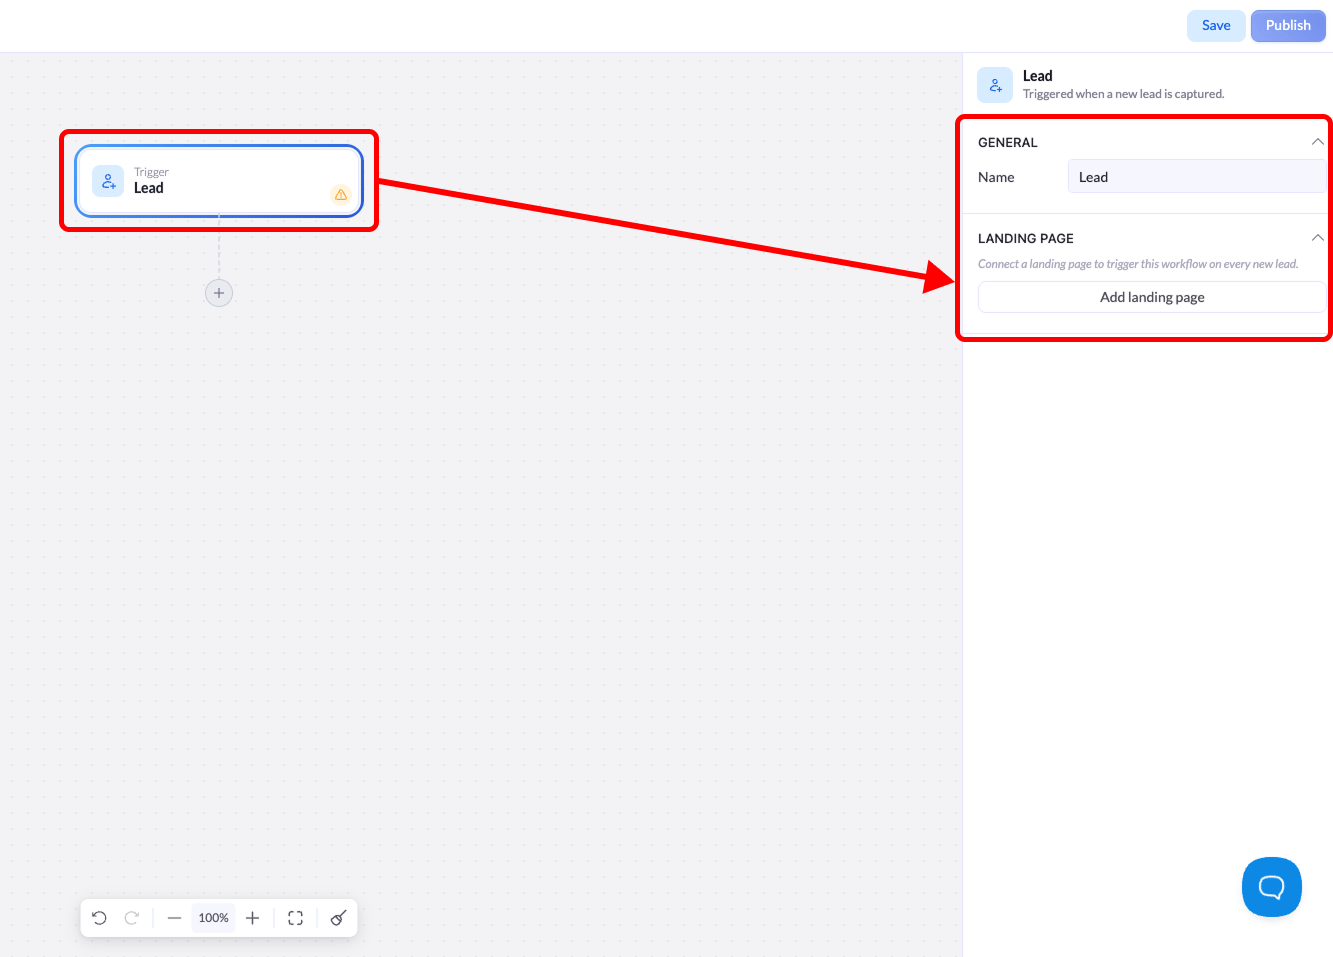
The Lead trigger now appears on the canvas as the first node, and its settings open in the panel on the right.
## Connect a landing page
The **Connect a Landing Page** dialog is where you choose which page triggers the workflow on every new lead.
The **Connect a Landing Page** dialog opens. Select the page that should fire the workflow, then click **Apply**. See [Connect a landing page](#connect-a-landing-page) below for details.
The Lead trigger now appears on the canvas as the first node, and its settings open in the panel on the right.
## Connect a landing page
The **Connect a Landing Page** dialog is where you choose which page triggers the workflow on every new lead.
 The dialog includes:
* **Search landing pages** - Filter the list by page name.
* **All / Published / Not Published** - Switch tabs to narrow the list by publish status.
* **Page list** - Each row shows the page thumbnail, its name, and its current status. Select a page with its radio button.
* **Apply** - Confirm your selection and connect the page to the trigger.
You can connect a page that isn't published yet so the workflow is ready to go the moment the page goes live. Just remember the trigger only fires once the page is published and capturing leads.
## Configure the trigger
Selecting the trigger node opens its settings in the right panel. The header confirms what the node does: *Triggered when a new lead is captured.*
### General
| Setting | Description |
| -------- | ------------------------------------------------------------------------------------------------------------------------------------------------------ |
| **Name** | The label for this node on the canvas. Rename it to something descriptive (for example, `Newsletter lead`) so the workflow stays readable as it grows. |
### Landing page
This section lists every landing page connected to the trigger.
* **Toggle** - Turn a connected page on or off without removing it. When the toggle is on, new leads from that page fire the workflow.
* **More menu (**`···`**)** - Manage the connected page, including removing it from the trigger.
* **Add landing page** - Connect another page to the same trigger. One workflow can listen to several pages at once, so leads from any of them run through the same automation.
Connect multiple landing pages to a single trigger when they should follow the same follow-up logic. Use separate workflows when each page needs to behave differently.
## Add the next node
A trigger on its own only captures the lead. To do something with it, add nodes after the trigger.
Click the **+** below the trigger node to open the node menu. After a trigger, the menu shows two groups:
Shape and control the flow:
* **Filter** - Stop the workflow unless the lead meets a condition.
* **If** - Branch into two paths based on a condition.
* **Switch** - Branch into multiple paths.
* **Delay** - Wait for a set time before continuing.
Do something with the lead:
* **HTTP Request** - Send the lead data to an external service.
* **Google Sheets** - Add the lead to a spreadsheet.
A typical workflow follows the trigger with a filter or condition to qualify the lead, then an action to route it where it needs to go.
The dialog includes:
* **Search landing pages** - Filter the list by page name.
* **All / Published / Not Published** - Switch tabs to narrow the list by publish status.
* **Page list** - Each row shows the page thumbnail, its name, and its current status. Select a page with its radio button.
* **Apply** - Confirm your selection and connect the page to the trigger.
You can connect a page that isn't published yet so the workflow is ready to go the moment the page goes live. Just remember the trigger only fires once the page is published and capturing leads.
## Configure the trigger
Selecting the trigger node opens its settings in the right panel. The header confirms what the node does: *Triggered when a new lead is captured.*
### General
| Setting | Description |
| -------- | ------------------------------------------------------------------------------------------------------------------------------------------------------ |
| **Name** | The label for this node on the canvas. Rename it to something descriptive (for example, `Newsletter lead`) so the workflow stays readable as it grows. |
### Landing page
This section lists every landing page connected to the trigger.
* **Toggle** - Turn a connected page on or off without removing it. When the toggle is on, new leads from that page fire the workflow.
* **More menu (**`···`**)** - Manage the connected page, including removing it from the trigger.
* **Add landing page** - Connect another page to the same trigger. One workflow can listen to several pages at once, so leads from any of them run through the same automation.
Connect multiple landing pages to a single trigger when they should follow the same follow-up logic. Use separate workflows when each page needs to behave differently.
## Add the next node
A trigger on its own only captures the lead. To do something with it, add nodes after the trigger.
Click the **+** below the trigger node to open the node menu. After a trigger, the menu shows two groups:
Shape and control the flow:
* **Filter** - Stop the workflow unless the lead meets a condition.
* **If** - Branch into two paths based on a condition.
* **Switch** - Branch into multiple paths.
* **Delay** - Wait for a set time before continuing.
Do something with the lead:
* **HTTP Request** - Send the lead data to an external service.
* **Google Sheets** - Add the lead to a spreadsheet.
A typical workflow follows the trigger with a filter or condition to qualify the lead, then an action to route it where it needs to go.