> ## Documentation Index
> Fetch the complete documentation index at: https://docs.landerlab.io/llms.txt
> Use this file to discover all available pages before exploring further.
# Add Landing Pages to Tracker
> Add landing pages to trackers like Voluum or ClickFlare to track performance, manage campaigns, and streamline your workflow.
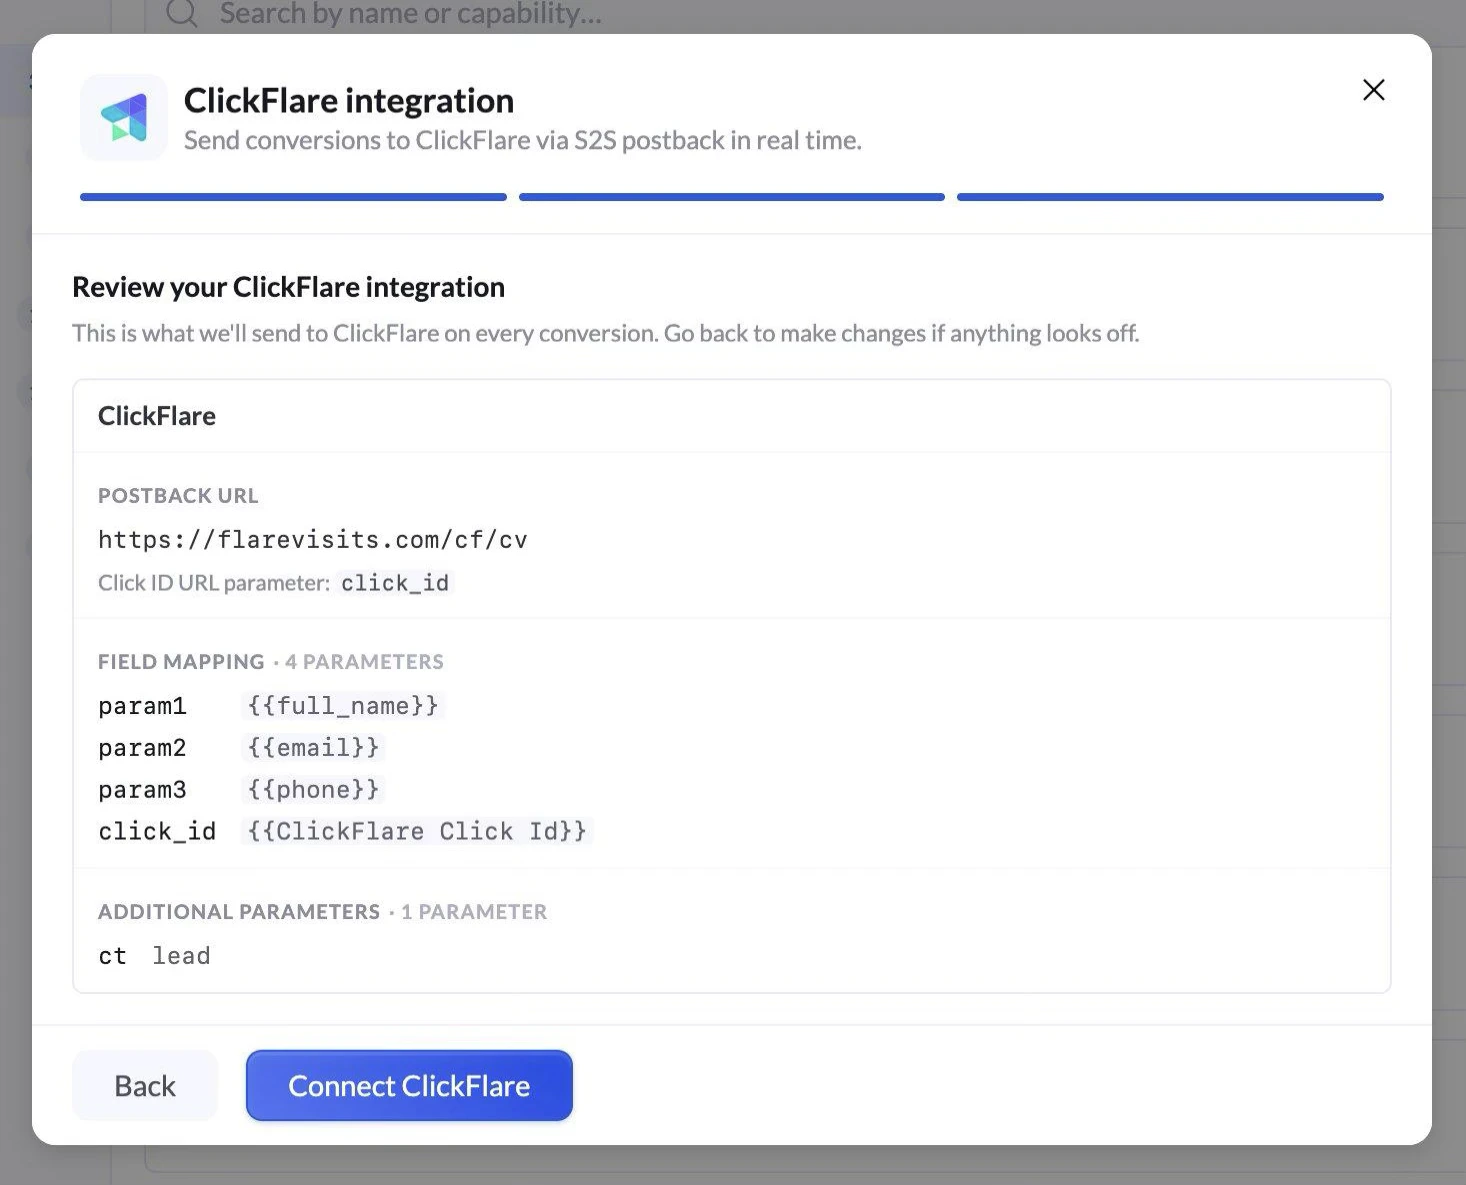
LanderLab integrates directly with popular **click tracking platforms** such as **ClickFlare** and **Voluum**. This allows you to quickly add your landing pages to your tracker and start using them in your campaigns.
## Requirements
Before you begin, make sure you have the following:
* An **active LanderLab account**
* An **active Voluum or ClickFlare account**
* A configured **ClickFlare or Voluum integration** in LanderLab
* A **published landing page**
## Step-by-Step Guide
Follow the steps below to add a landing page to your tracker.
### 1. Log in to LanderLab
Sign in to your **LanderLab account**.
### 2. Locate the landing page
Find the **published landing page** you want to add to your tracker.
### 3. Open the page menu
Click the **three-dot menu (•••)** on the right side of the landing page name.
### 4. Select “Add to Tracker”
From the dropdown options, click **Add to Tracker**.
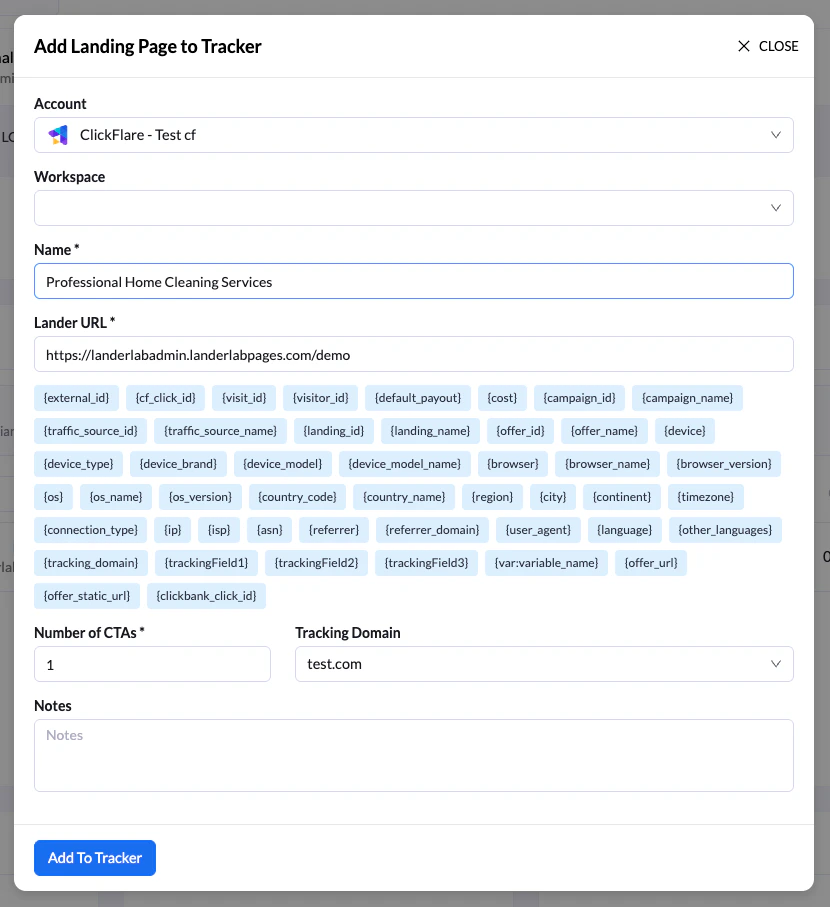
### 5. Configure the tracker settings
In the **Add Landing Page to Tracker** screen:
* Select the **tracker account** where the landing page will be added
* Enter a **name for the landing page** so you can easily identify it in your tracking platform
* *(Optional)* Add **tracking tokens/macros** to the landing page URL parameters
* Specify the **number of CTAs (Call-to-Actions)**, also known as the number of offers for the landing page
* *(Optional)* Add any **notes** for reference
 ### 6. Add the landing page to the tracker
Click **Add to Tracker** to complete the process.
### 7. Choose whether to add the tracking script
After adding the landing page, a prompt will appear asking if you want to **include your tracker’s tracking script** in the landing page.
You have two options:
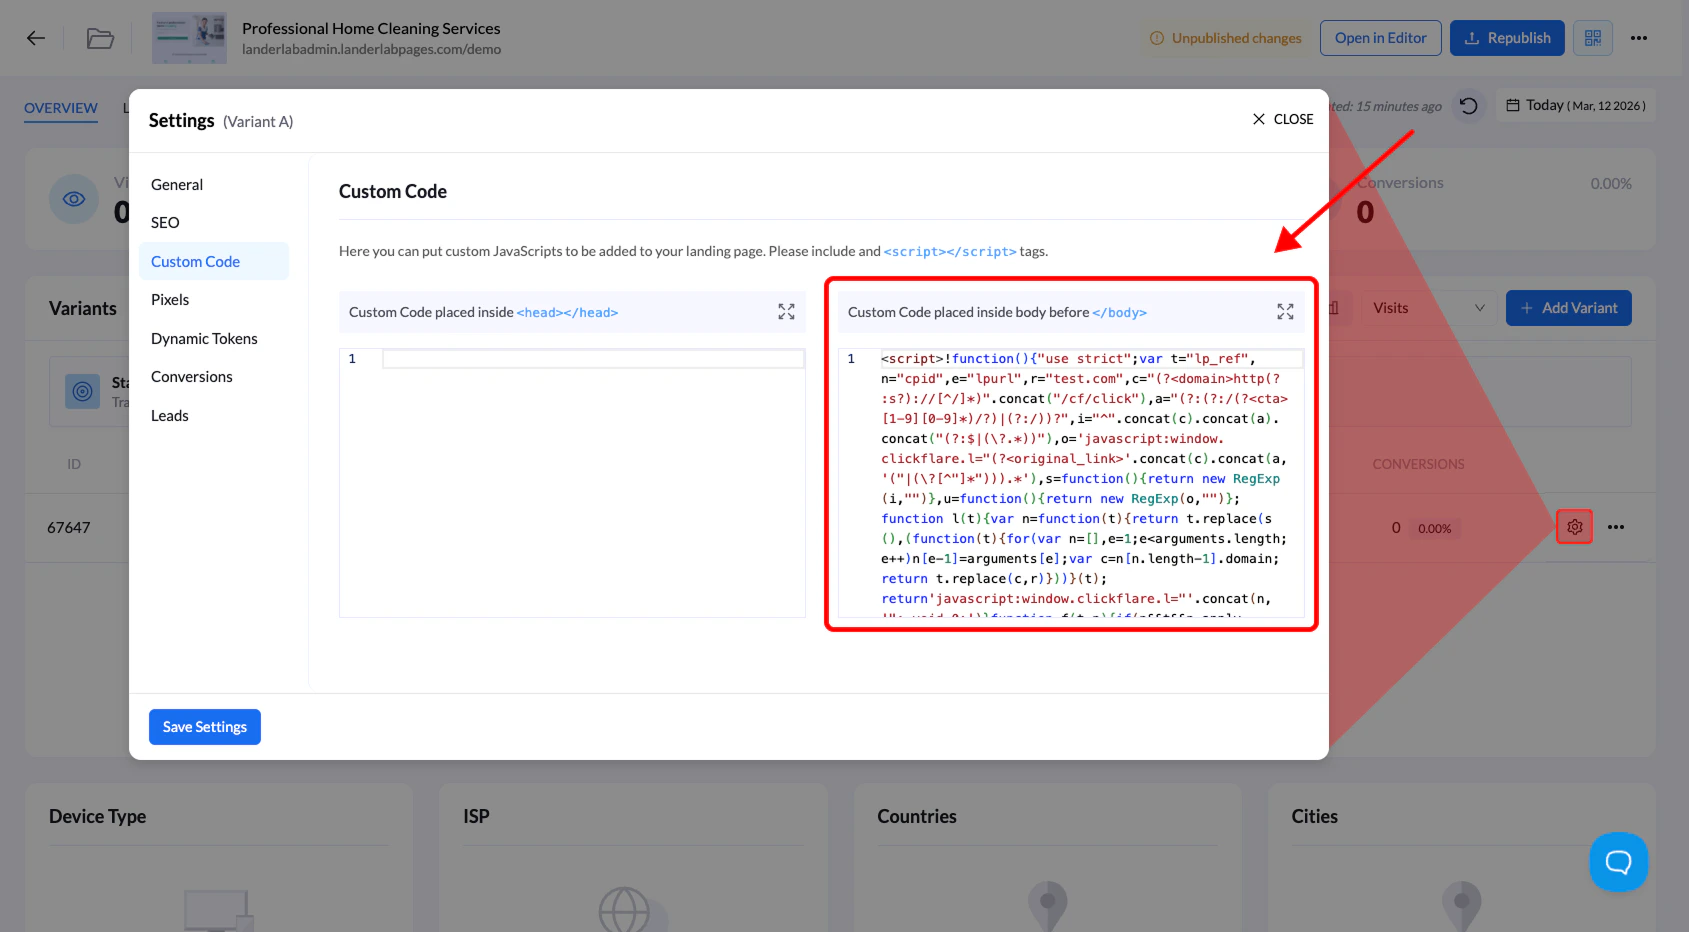
* **Cancel** – Finalizes the process without adding the tracking script.
* **Continue** – Automatically adds the tracker’s **tracking script** to the **Custom Code section** of your landing page.
### 6. Add the landing page to the tracker
Click **Add to Tracker** to complete the process.
### 7. Choose whether to add the tracking script
After adding the landing page, a prompt will appear asking if you want to **include your tracker’s tracking script** in the landing page.
You have two options:
* **Cancel** – Finalizes the process without adding the tracking script.
* **Continue** – Automatically adds the tracker’s **tracking script** to the **Custom Code section** of your landing page.
 ## When Should You Add the Tracking Script?
Adding the tracking script is **not always required**.
We recommend adding it when the landing page is used in campaigns **without redirects**, so the tracker can properly record visits and events.
**Tip:** Using the tracker integration helps you **quickly deploy landing pages into campaigns without manually copying URLs or configuring tracking parameters.**
## When Should You Add the Tracking Script?
Adding the tracking script is **not always required**.
We recommend adding it when the landing page is used in campaigns **without redirects**, so the tracker can properly record visits and events.
**Tip:** Using the tracker integration helps you **quickly deploy landing pages into campaigns without manually copying URLs or configuring tracking parameters.**