> ## Documentation Index
> Fetch the complete documentation index at: https://docs.landerlab.io/llms.txt
> Use this file to discover all available pages before exploring further.
# Control Visibility and Responsiveness
> Control element visibility across devices and adjust opacity to create responsive and adaptable landing page designs.
The Visibility settings control **where your element appears** and **how visible it is**. This helps you adapt your design for different devices and control how elements are shown.
## Where to Find It
1. Select any element
2. Go to the **right panel**
3. Open the **Visibility** section (usually at the bottom)
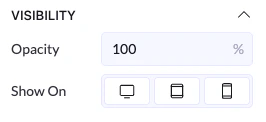 ***
## Visibility Options
### Show On (Devices)
You can choose where the element is displayed:
* **Desktop** → shows on larger screens
* **Tablet** → shows on tablet devices
* **Mobile** → shows on phones
👉 You can enable or disable any of these depending on your needs
***
### How It Works
* If a device is **enabled** → the element is visible there
* If a device is **disabled** → the element is hidden on that device
👉 This is useful for responsive design
### Example
* Show on Desktop: ON
* Show on Tablet: OFF
* Show on Mobile: OFF
👉 Result: element only appears on desktop
***
## Opacity
Opacity controls how transparent an element is.
* **100%** → fully visible
* **0%** → completely invisible
* **50%** → semi-transparent
### How to Use It
* Lower opacity to create softer elements
* Use it for overlays or subtle effects
***
## Visibility Options
### Show On (Devices)
You can choose where the element is displayed:
* **Desktop** → shows on larger screens
* **Tablet** → shows on tablet devices
* **Mobile** → shows on phones
👉 You can enable or disable any of these depending on your needs
***
### How It Works
* If a device is **enabled** → the element is visible there
* If a device is **disabled** → the element is hidden on that device
👉 This is useful for responsive design
### Example
* Show on Desktop: ON
* Show on Tablet: OFF
* Show on Mobile: OFF
👉 Result: element only appears on desktop
***
## Opacity
Opacity controls how transparent an element is.
* **100%** → fully visible
* **0%** → completely invisible
* **50%** → semi-transparent
### How to Use It
* Lower opacity to create softer elements
* Use it for overlays or subtle effects